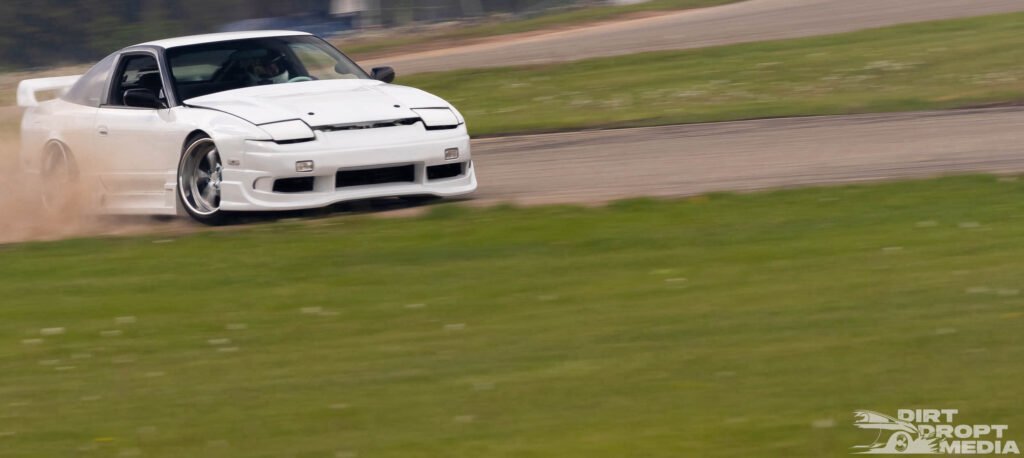
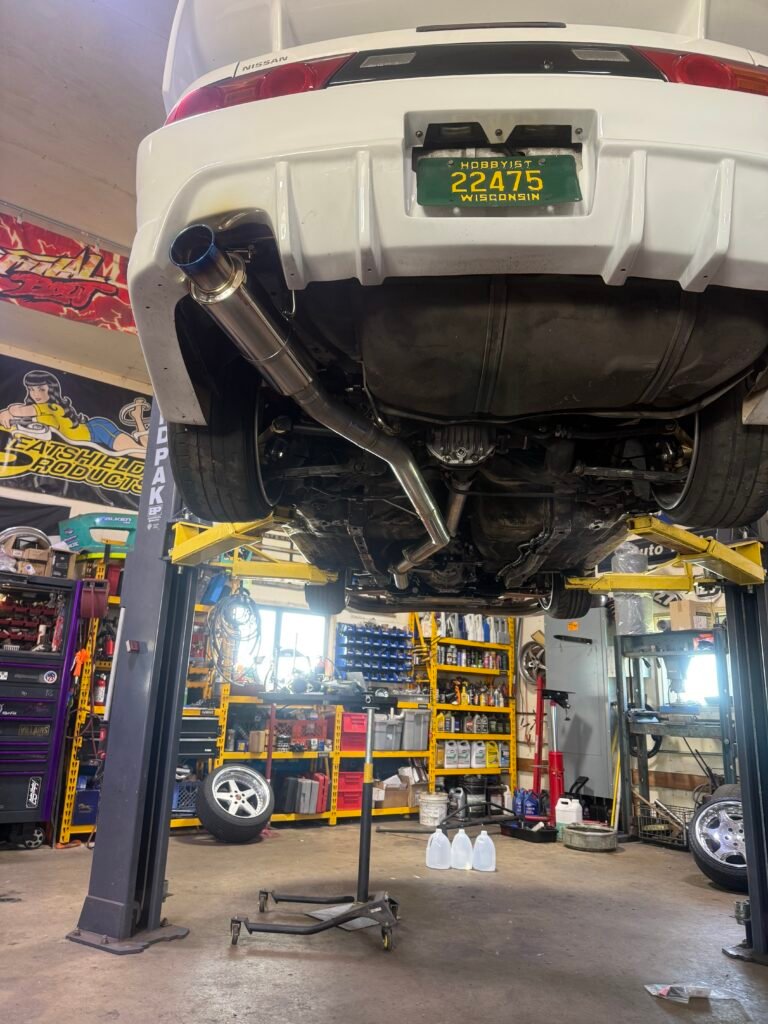
At the end of the the 2024 season, I decided it was time to part ways with the VH45. It was a great platform, but do to parts availability problems it wasn’t practical anymore.
I spent some time to think about a different route to go with, It was between an 1JZ and an SR. I love the 1JZ platform, it sounds good, it’s reliable, but it would need a bunch of customization (similar to my Vh45) that I just want in the position to do. So with all that being said, It made it really simply for me to decided on the cars original plan that I made in 2008. Get an SR20.
It’s going to be a little more involved than I expect due to having a VH swap prior. A lot (meaning all) of the parts from my KA that would swap over to an SR are long gone so I’m going to have to track some used parts down or buy new.
I’ll continue to update my parts list as I get more parts
A little history
Since I bought the car in 2008 I was dead set on getting an SR. I remember obsessively scanning JDM importer pages looking for a perfect redtop SR. At the time they were like $1,500. Which for my broke ass it was still a lot of money (I was 19 at that time working part time as a server at Applebees along with a couple other odd end jobs). So being that I couldn't afford something, my adolescent brain decides on the next logical thing. "Let's start buying parts for it, then I'll have to save up and get it" (Makes total sense right.....). I proceeded to start buying parts but didn't really get that far. I bought a Greddy FMIC kit, HKS BOV w/ hotpipe, Cosworth Headgasket, and ARP Studs.
My SR dreams fell short. I can't remember if I changed my mind or I needed money, but either way I ended up selling everything.
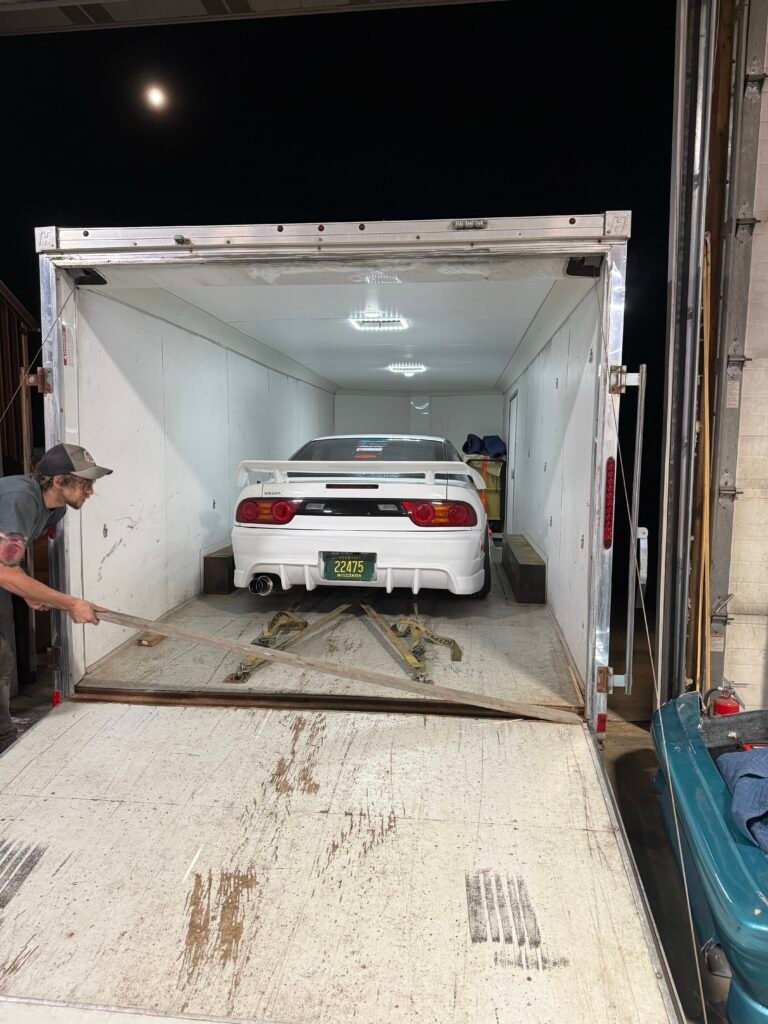
May 25th 2025
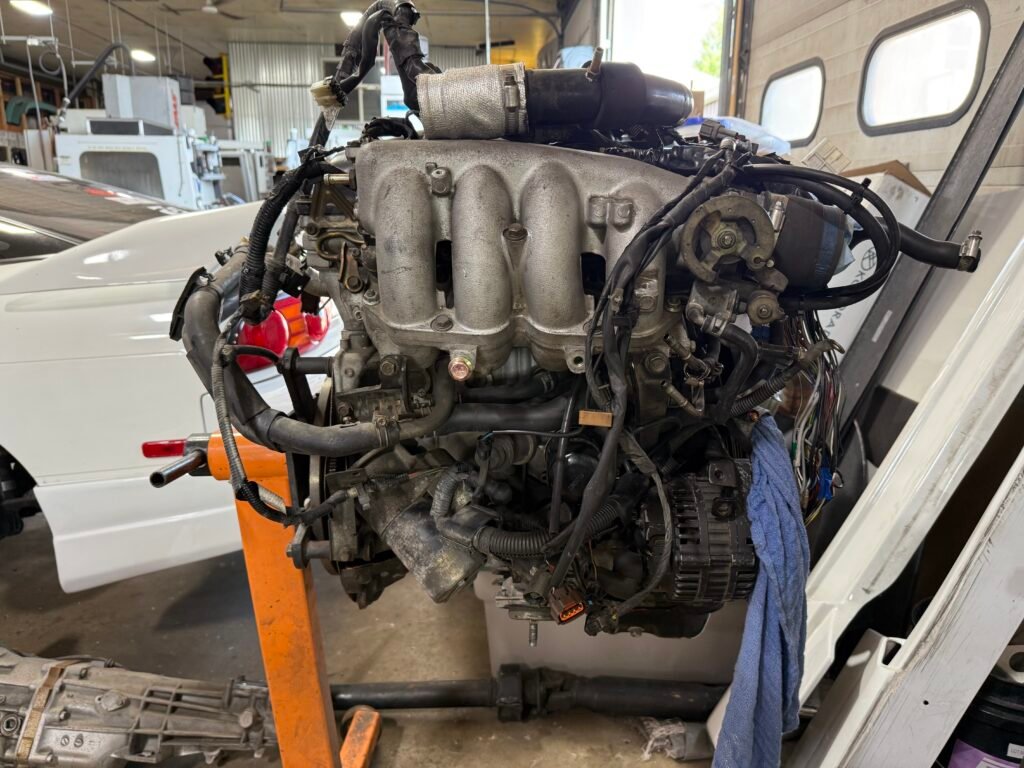
SR20 Pickup
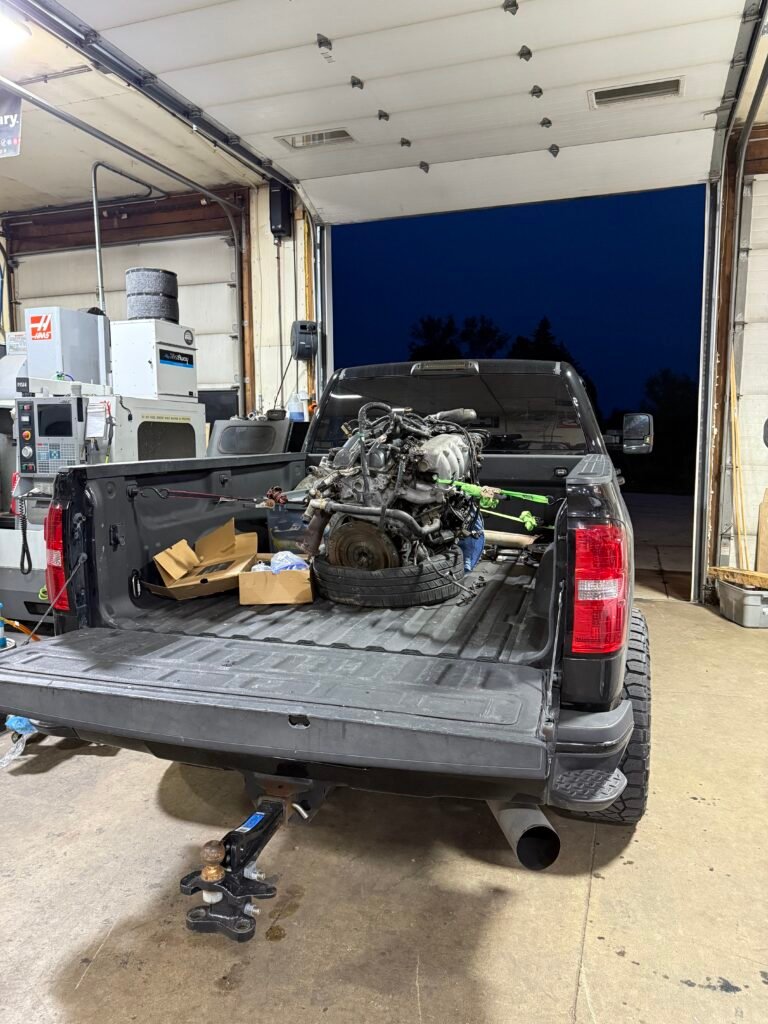
I was going back in forth with a dude in Michigan a week or so before Memorial day (2025) before pulling the trigger on it. I was actually driving an all weekend event (DD102) at USAIR in Shawano, WI when I finalized the plan. Saturday after driving I hit Kyle (same name) up to send a deposit. After the deposit went though the race was on to find someone to come with me and getting a truck to get the motor. Luckily my Dad was available Monday (Memorial day) to come with and my homie Brendan let me borrow his Duramax. So as long as I can make it home from the track (I street drive my car) I’ll be picking up a motor the next day. Luckily nothing major broke to leave me stranded at the track (While driving home my wife calls me to tell me none of my lights are working. It was a little sketchy driving home 2 hours not having brake lights, but we made it work).
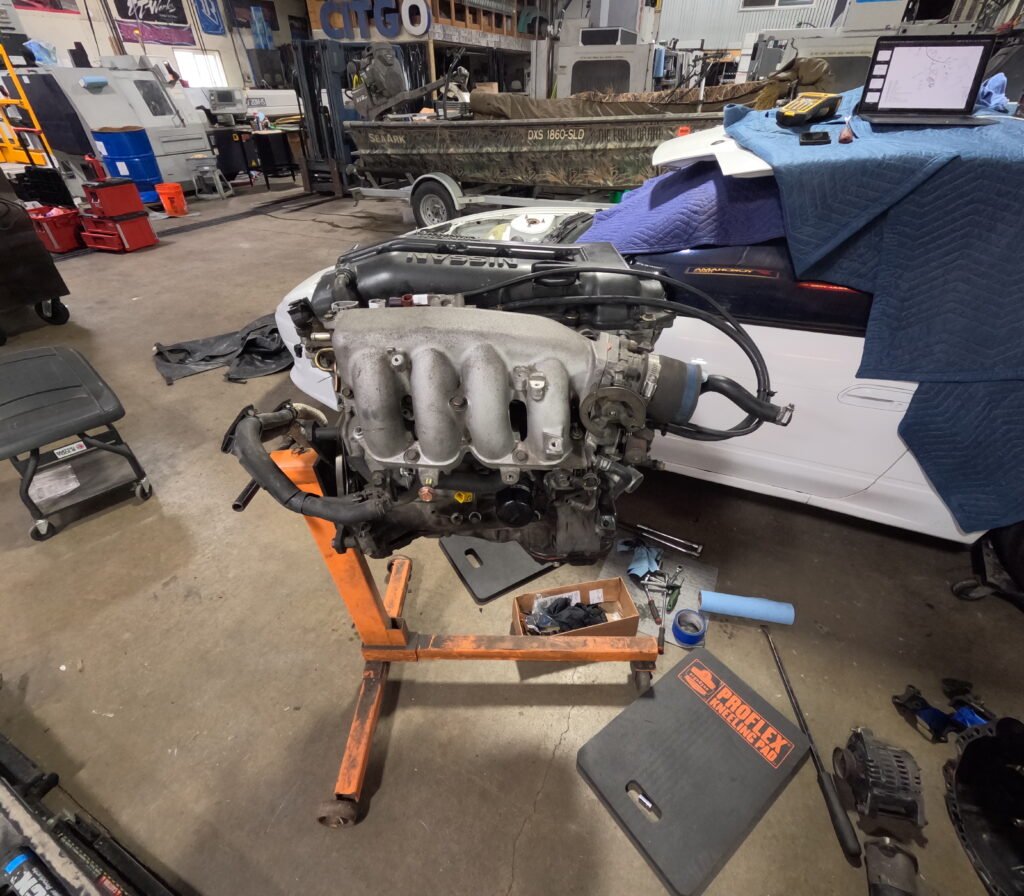
After dropping the car at the shop, grabbing the truck, and driving home it was about 8:30pm. Relaxed a bit and prepped to leave at 6am to go to Michigan to pick up the engine.
6am came quick and we’re off. 6 hours go by and we show up to Kyle’s house. Kyle and his pops greet us, super cool dudes, after checking out the engine we start loading it up in the truck. As i’m loading parts into the truck I couldn’t help but chuckle as I look up and see my dad having a beer and chopping it up with Kyle’s dad. My dad has always been the nicest dude you could ever meet and it still always amazes me to see how he can get along with anyone
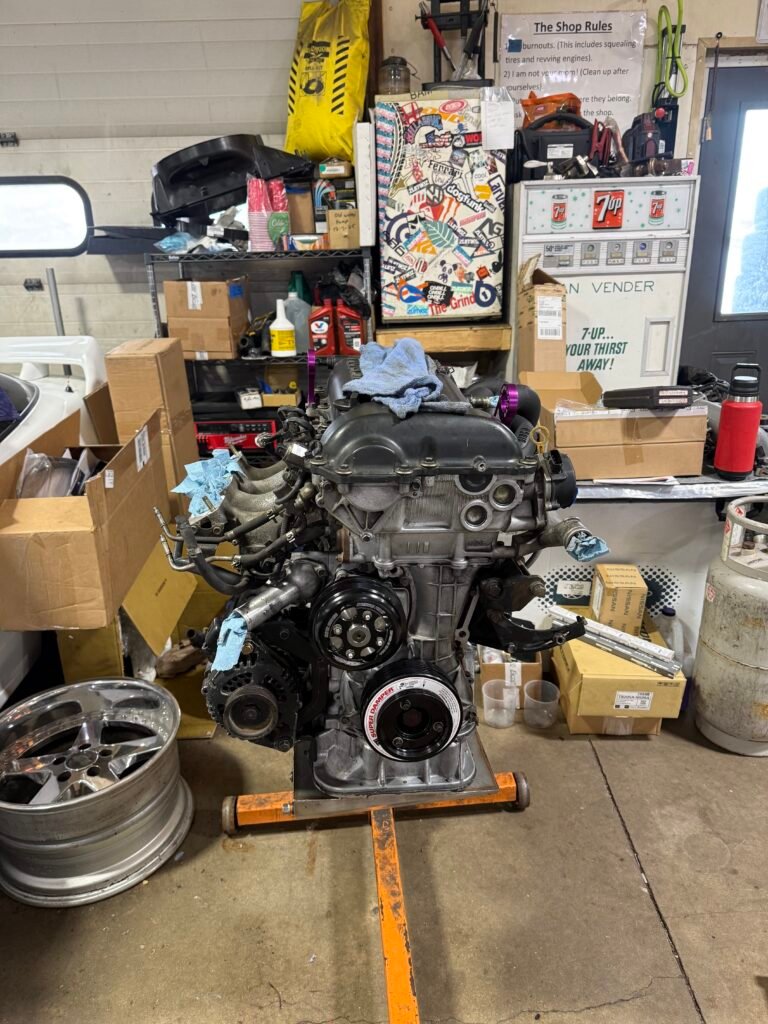
Back on the road We get back to the shop around 9pm and unload the truck, get the engine on a stand and clean up. It was a long day. Left the shop to drive home at about 11pm.
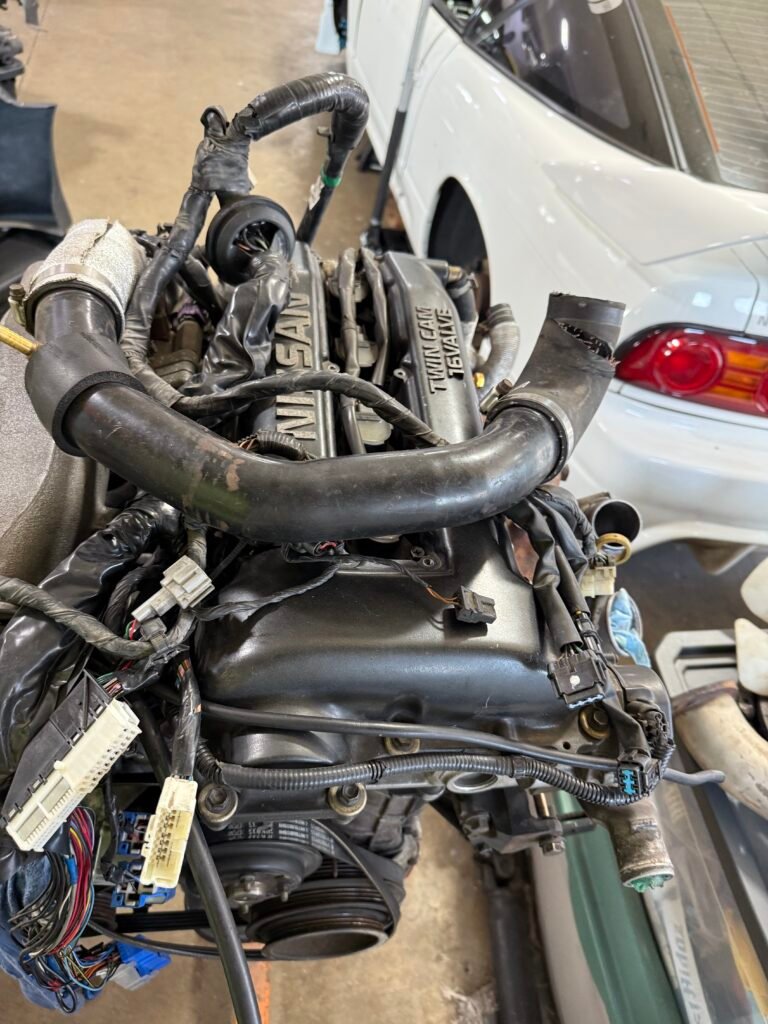
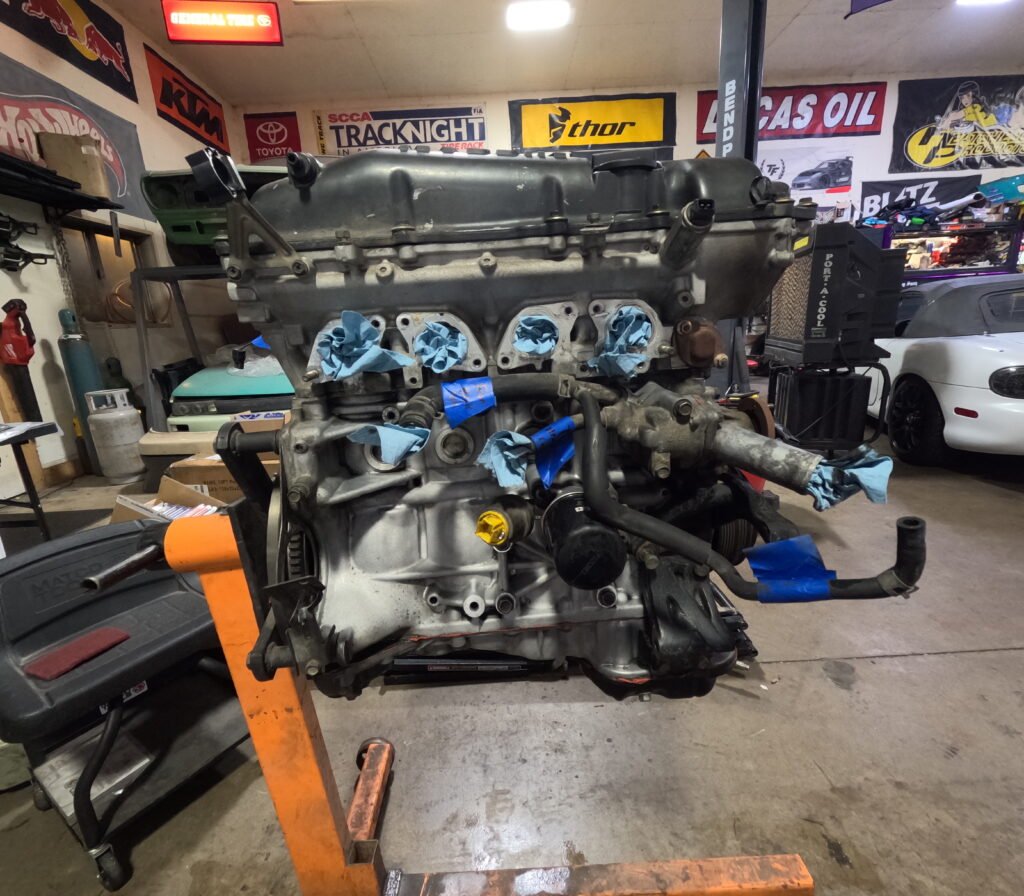
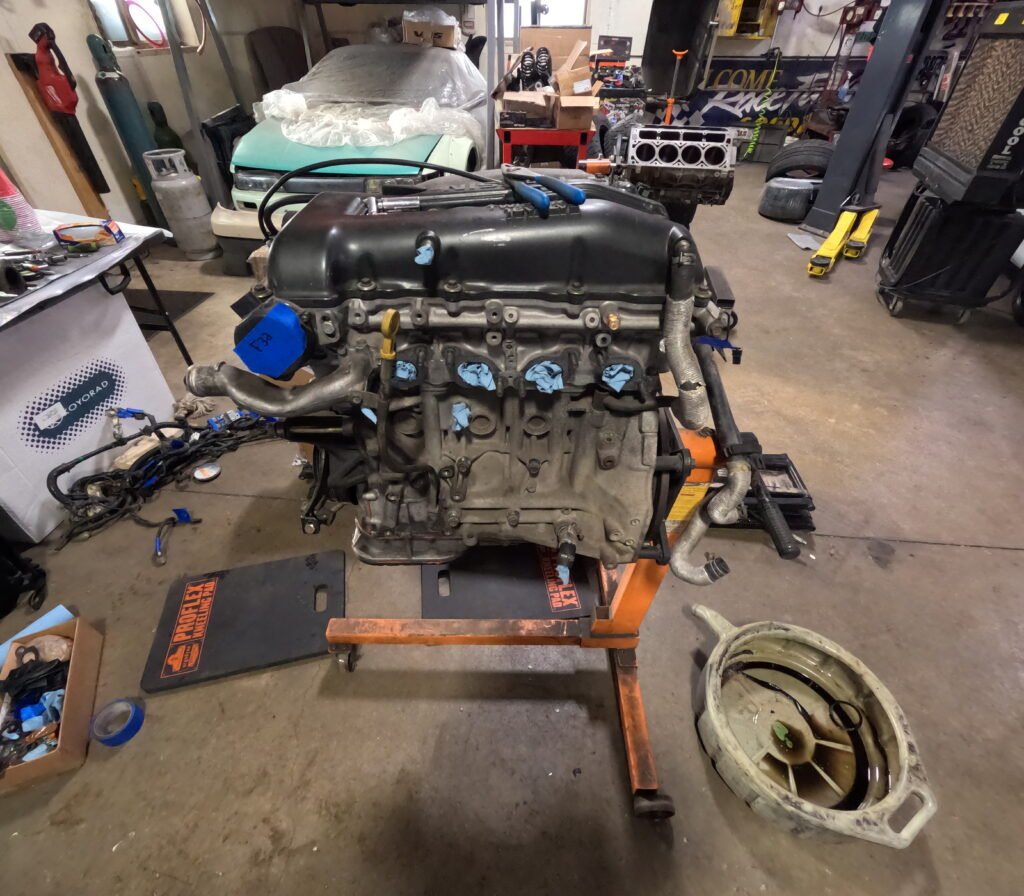
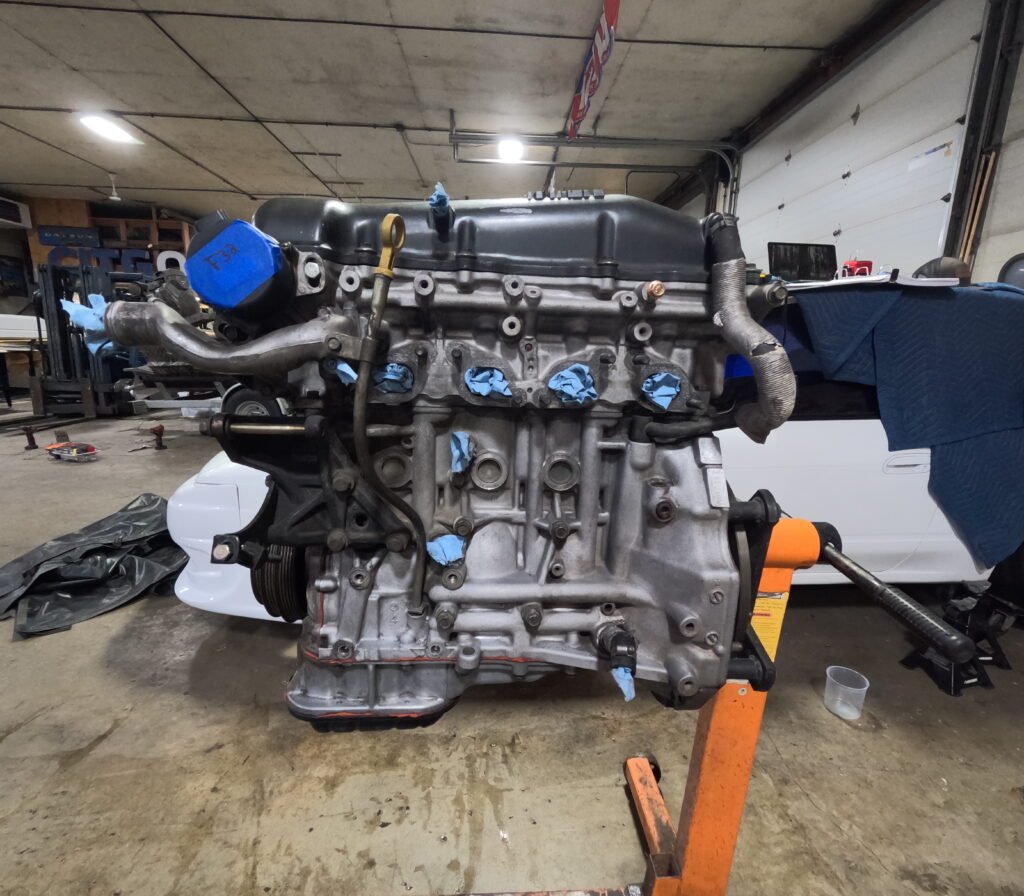
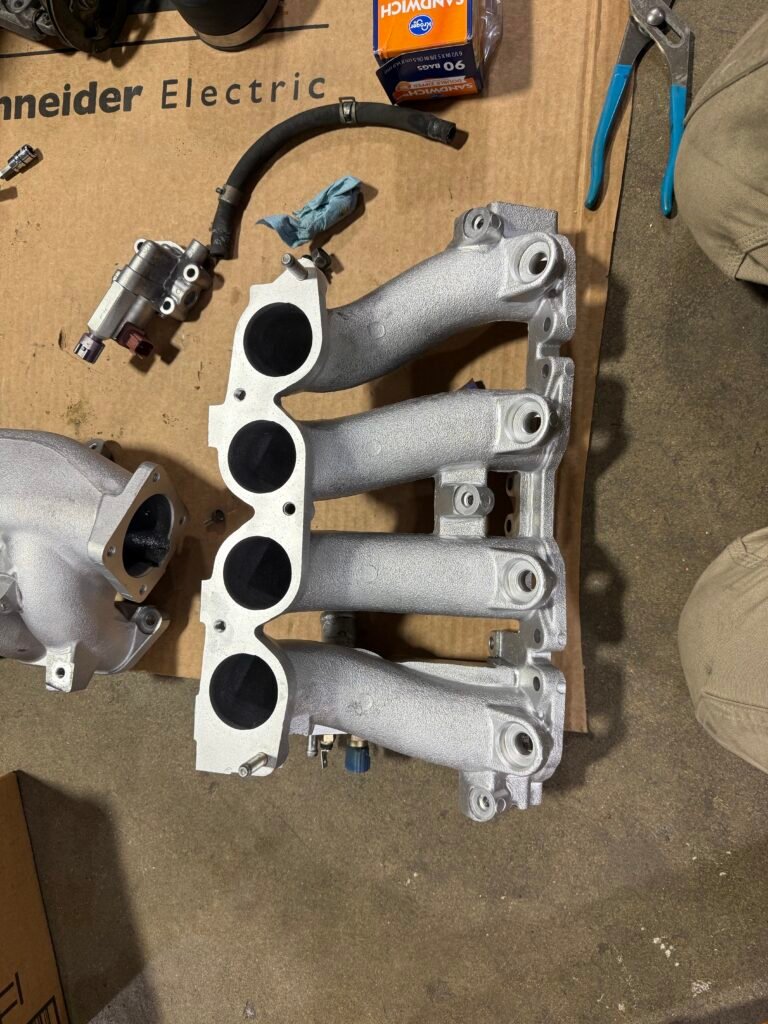
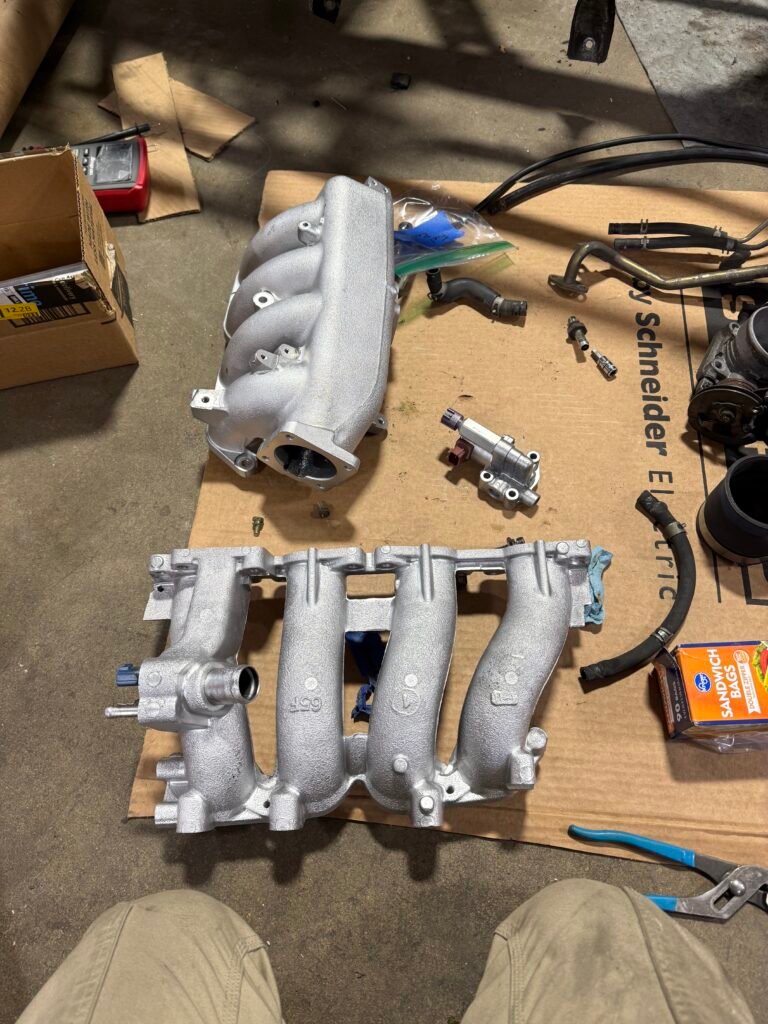
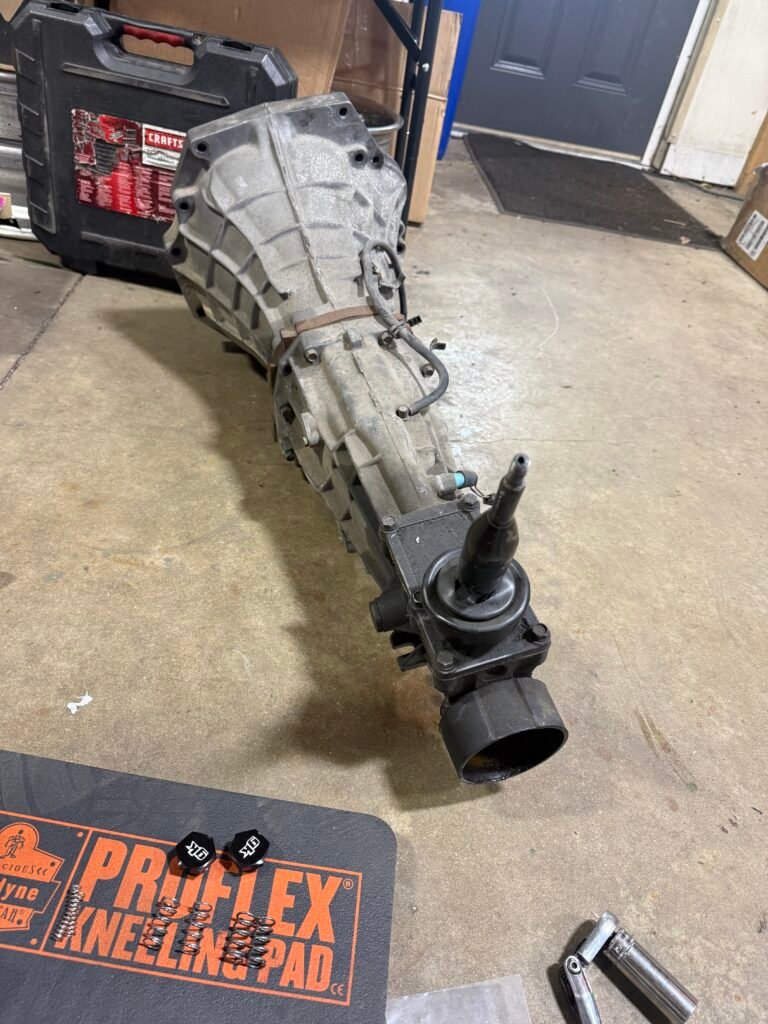
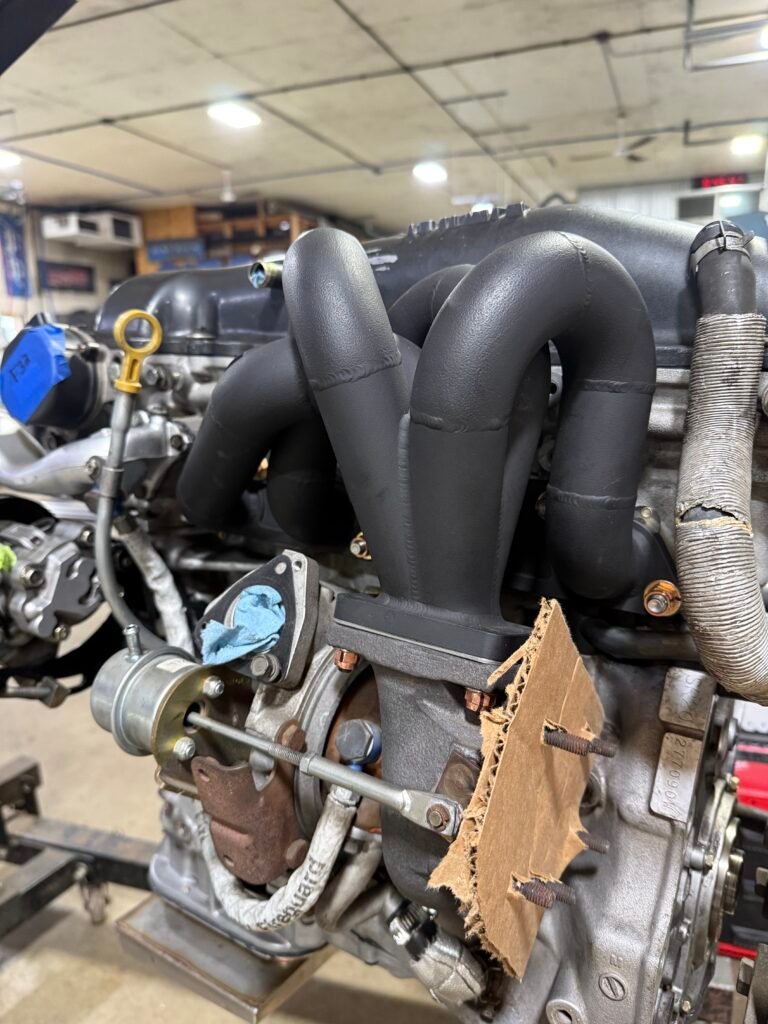
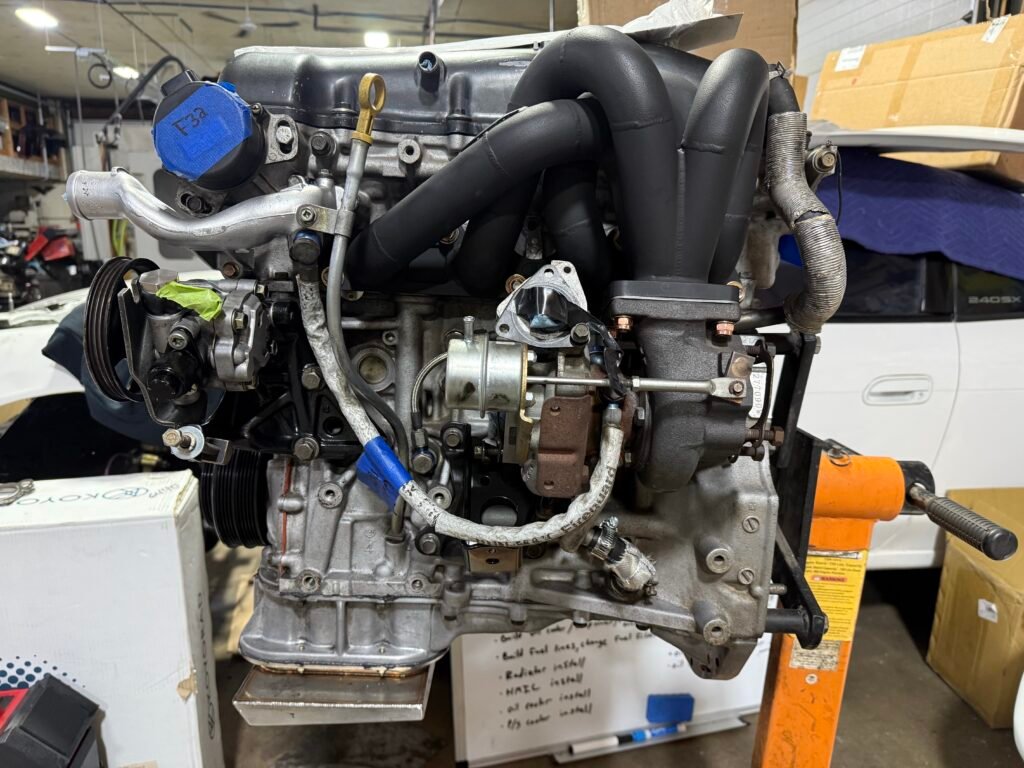
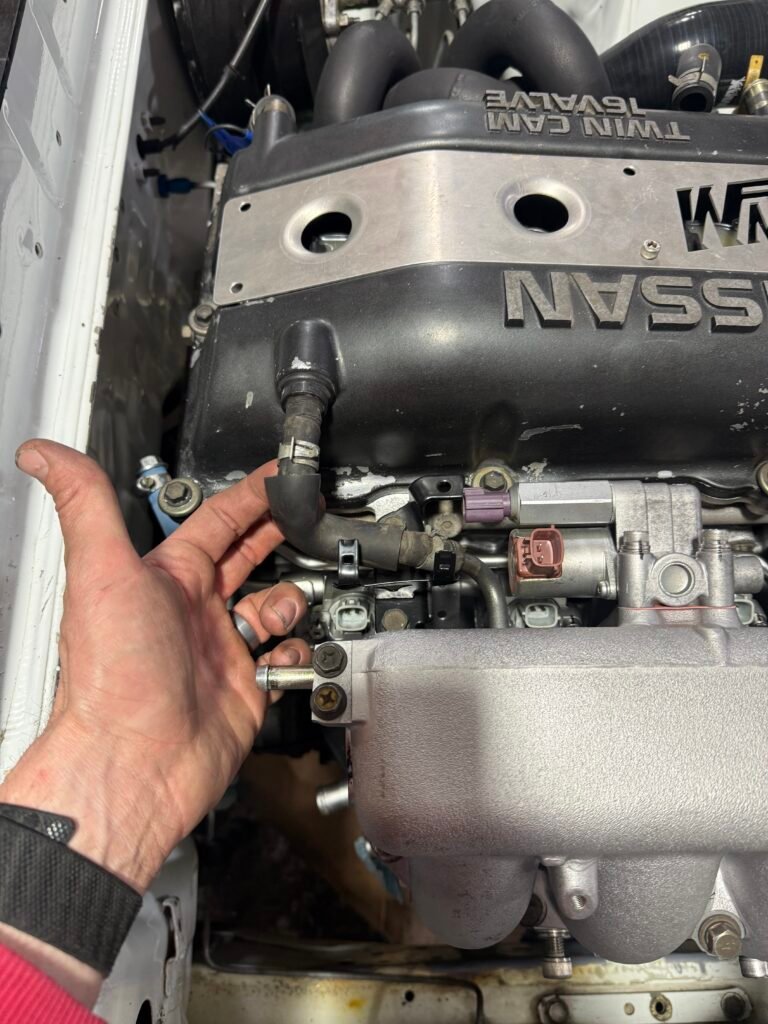
S14 Notchtop (97-98') Approx mileage: 100,000k
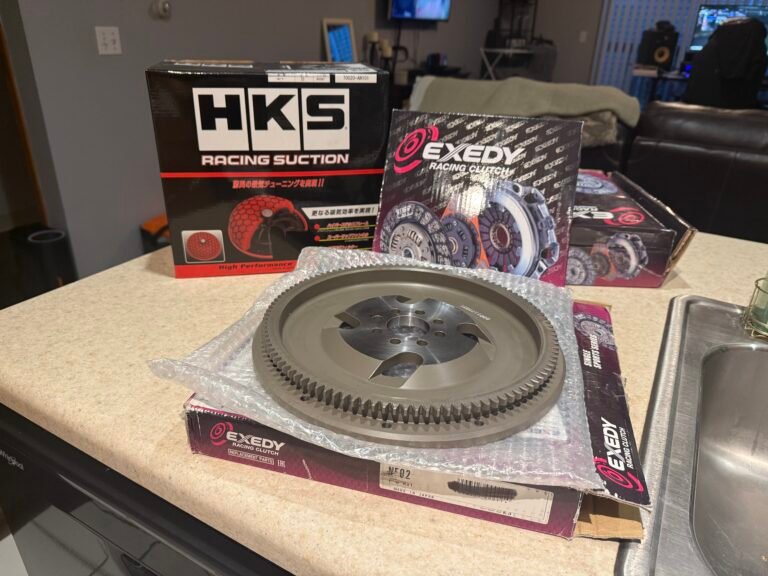
Included Parts with the engine
Exedy Stage 2 Clutch + Exedy Lightweight Flywheel
HKS Intake Kit
Koyo RadiatorFor an S14, ran into fitment issues (sits 1/2" taller) with my S13 — selling
My plan is to take my time to research the common fail points, address those, make this SR as reliable as possible while utilizing stock internals. I’m also working on “future” proofing the engine so when I’m ready to add more power I’ll have the infrastructure ready to go so I don’t need to do things twice.
I’m just going to have fun doing research on each item to make sure it will benefit the engine and do my best to avoid the “trust me bro” playbook. Shit, I still may be wrong with my decisions. Time will tell how everything holds up, but at least I’ll have my baseline reasoning of why I did it. That way I can bring my thought process to smarter people than me to get there take on it when I run into issues.
I’m not trying to come off as pretentious. Put simply, the older I get, the more I try to understand the “why” of things. Too much of my life I’ve fallen into the trap of just doing something because other people did it that way and not knowing why, then just going with it. It’s fine if you think like that, many people do, and they do just fine. The caveat is that it’s very superficial knowledge and you don’t really understand what is going on. Which can lead to frustration when things go wrong, you may not know what to do to fix the problem or why it’s happening. I remember seeing this in the 2009-2015 era with SR’s where people did zero maintenance, added no additional engine cooling, upped the boost to arbitrary numbers, then the engine blows up. All of a sudden “SR’s are garbage”. There not, it just needed supporting upgrades and an understanding of how said upgrades work with each other. That was a different time though, where SR’s were basically disposable and we were a bunch of teenagers trying to figure it out lol. So I guess it’s just the nature of progress.
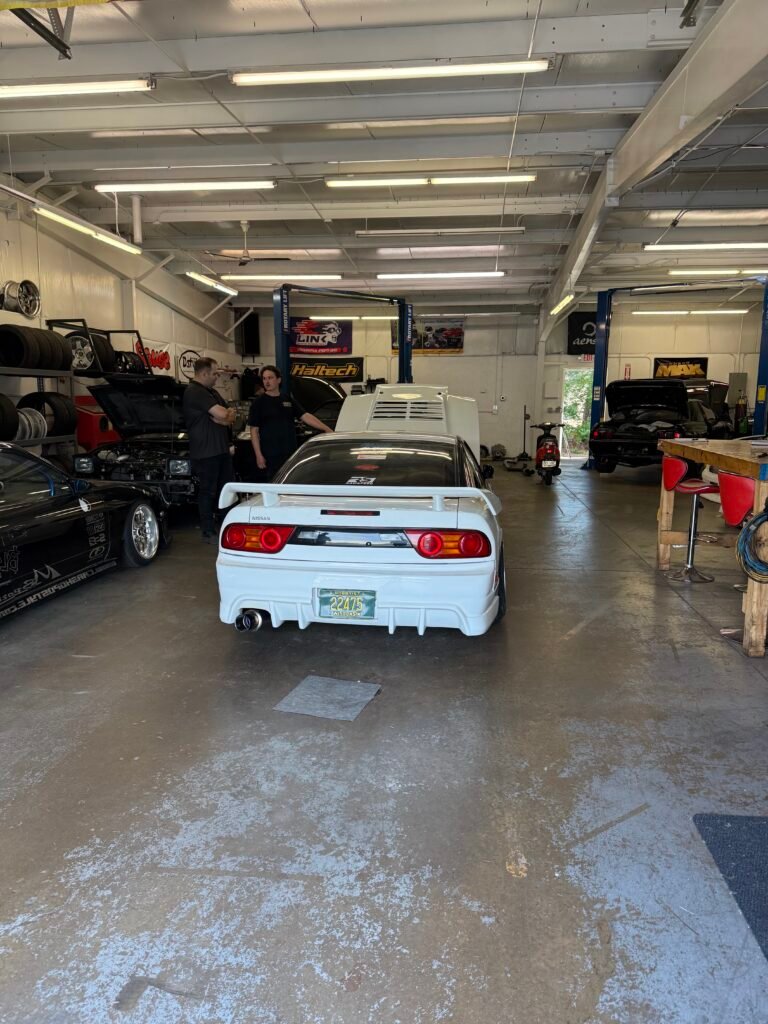
August 20th 2025
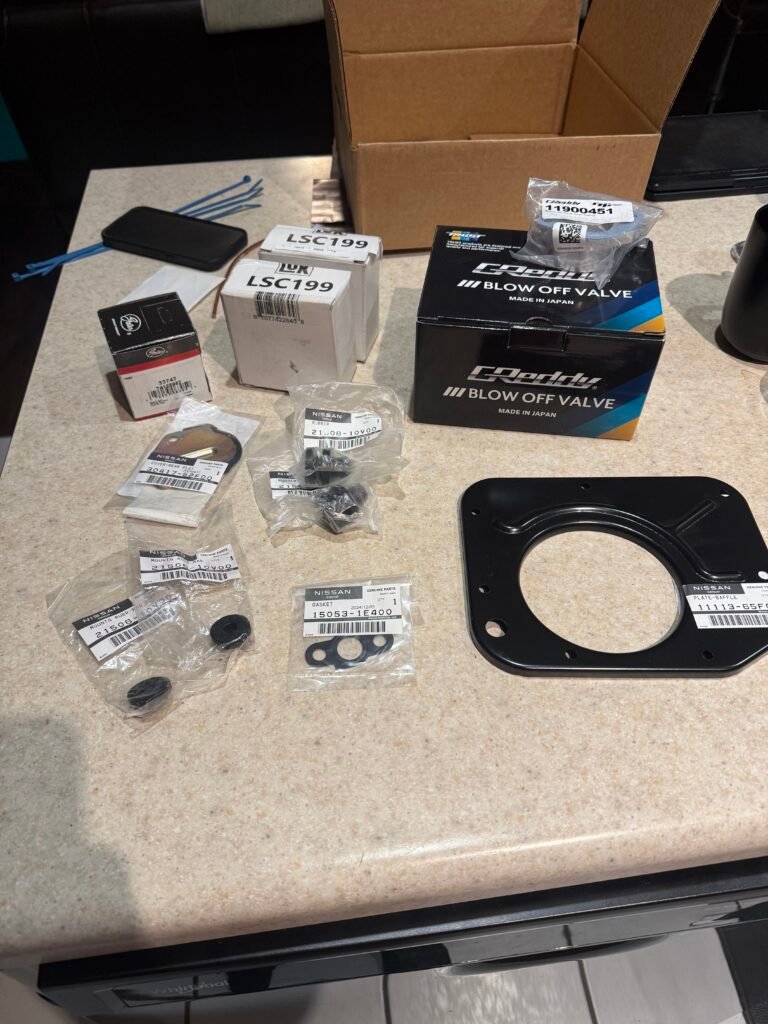
Parts collection continues
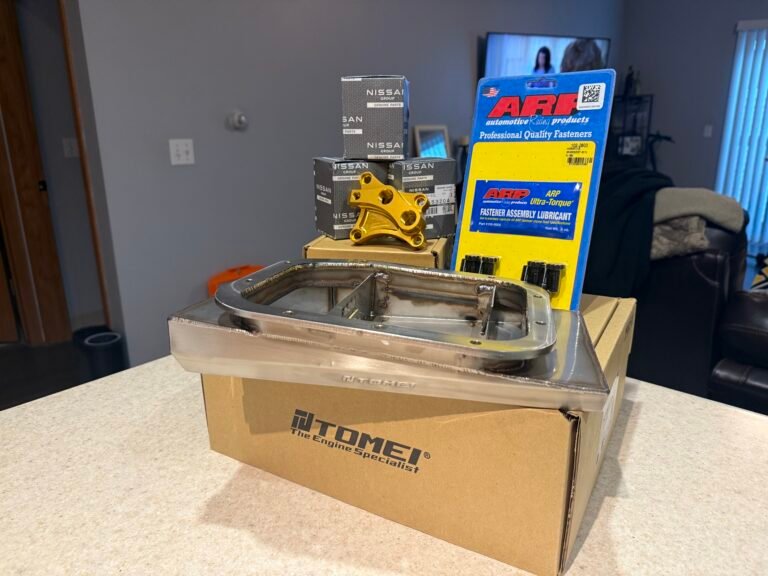
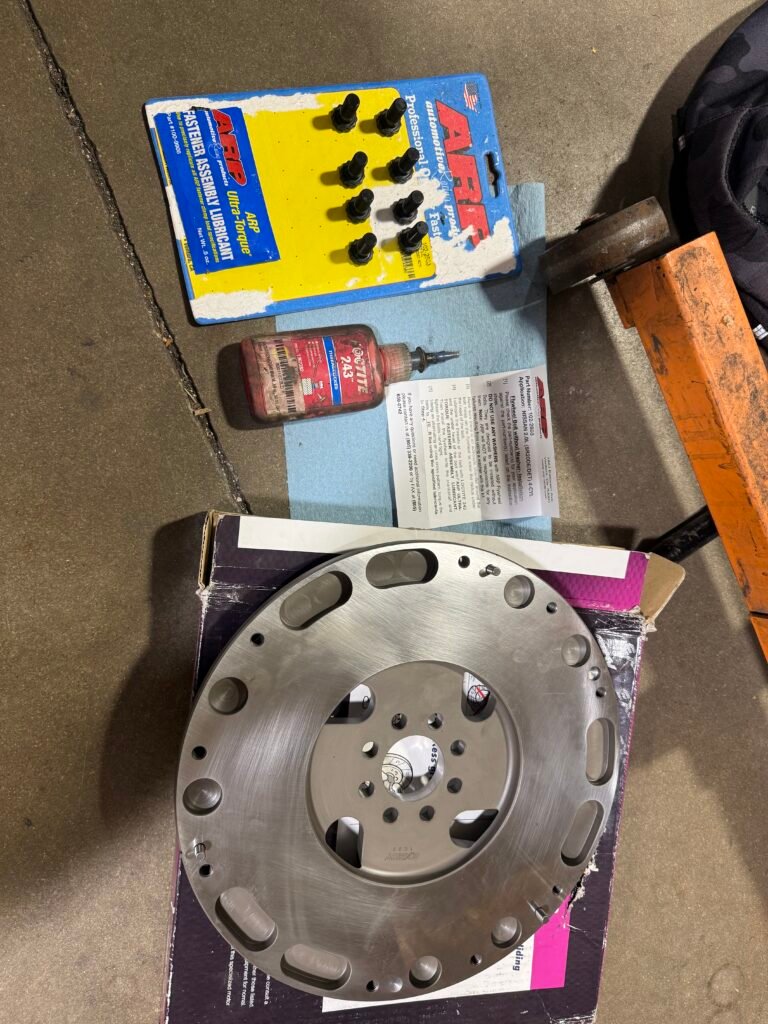
Tomei high capacity oil pan, oil block adapter, ARP fLywheel bolts, and some OEM filters
I chose the Tomei Oil pan for it’s capacity upgrade (.63 qts more), steel contruction, and the trap doors to prevent oil starvation from slosh during drifting. I was back and forth with this one or the Greddy pan, but the steel construction sold me to protect it better from any impacts as I still street the car.
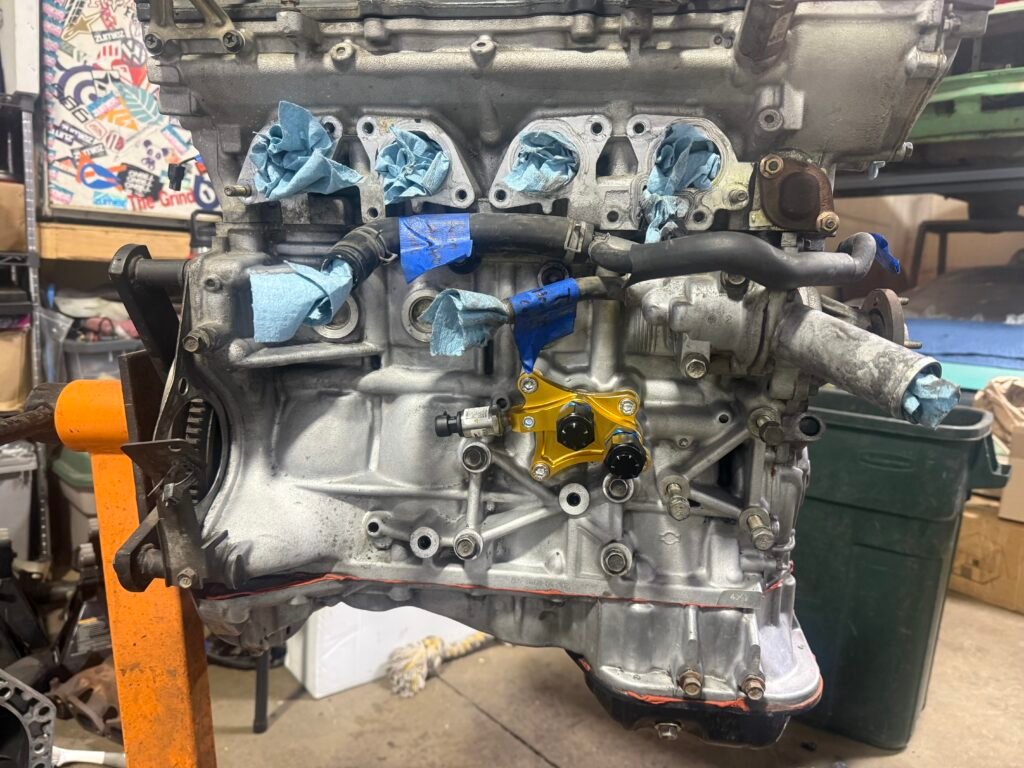
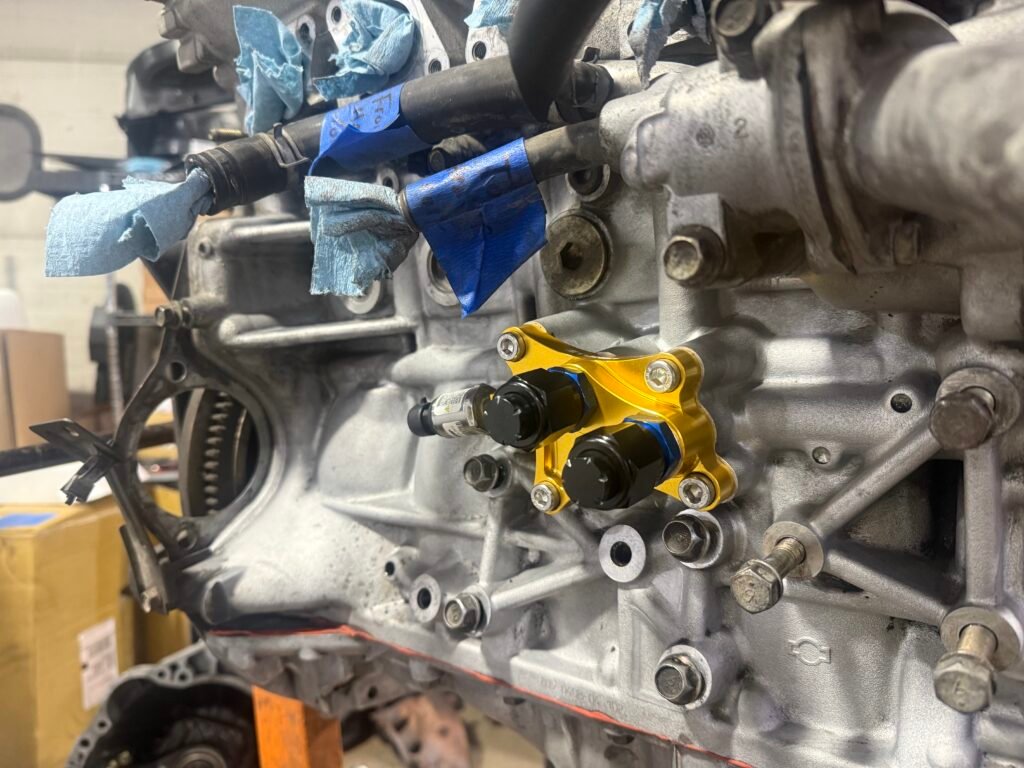
Oil Block-off plate is for my remote filter setup and an oil pressure sensor.
September 8th 2025
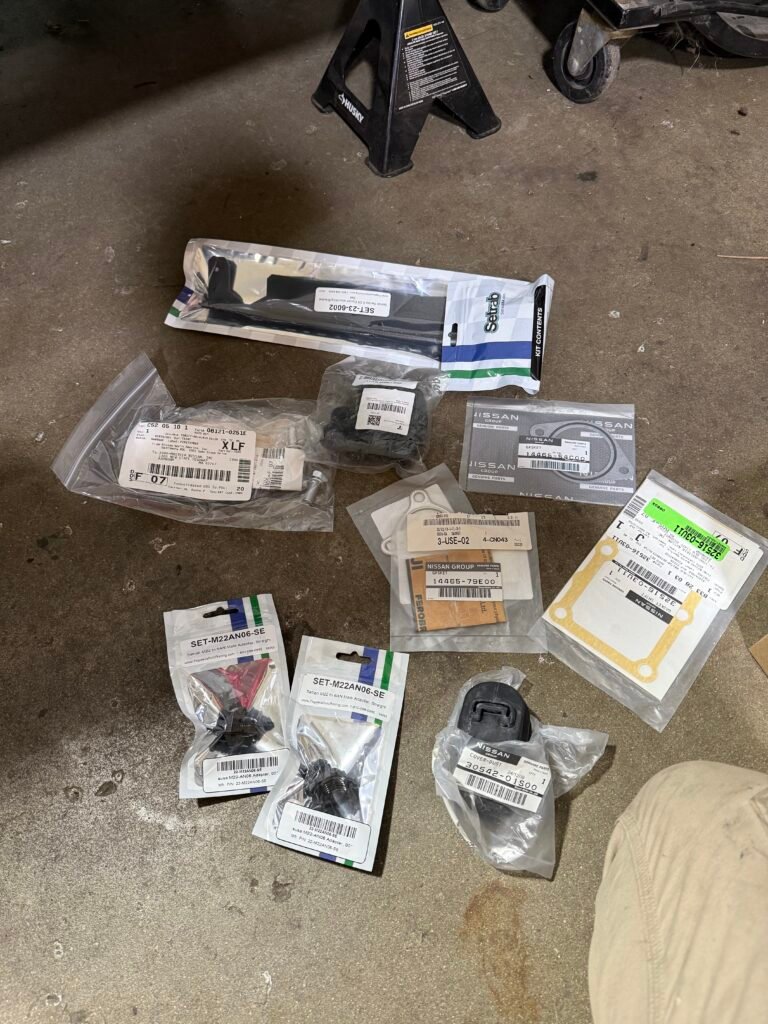
Parts collection continues
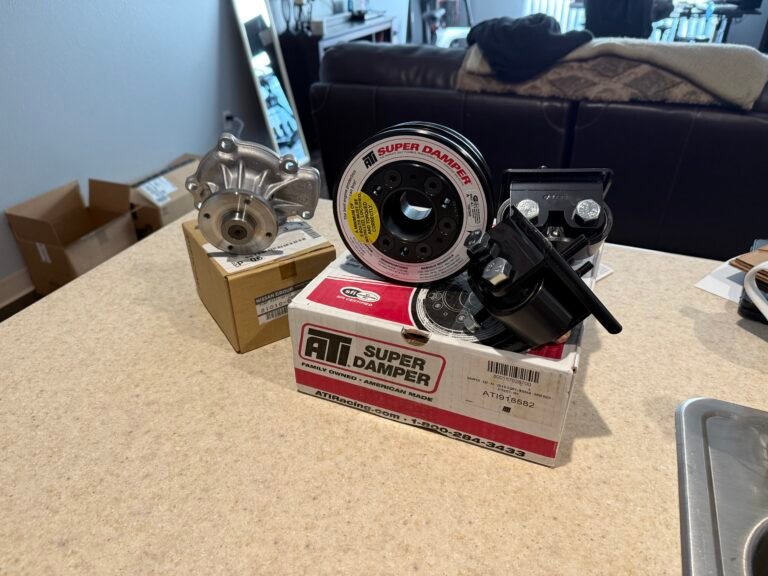
OEM water pump, ATI Super Damper, Cusco solid motor mounts
I didn’t need to replace the water pump but its a good measure to start fresh while everything is out. Used one will be a backup.
Moving onto the ATI Damper. Not gonna Lie, Factions review video on the Super Damper one sold me on it. Pairing this with solid motor mounts seemed like a smart play as i’m going to be introducing more vibrations to the engine.
I used to run Cusco mounts on my KA24DE, had zero issues with them so I stuck with what worked.
I’ll include the video review from Faction below.
November 3rd 2025
Parts collection continues
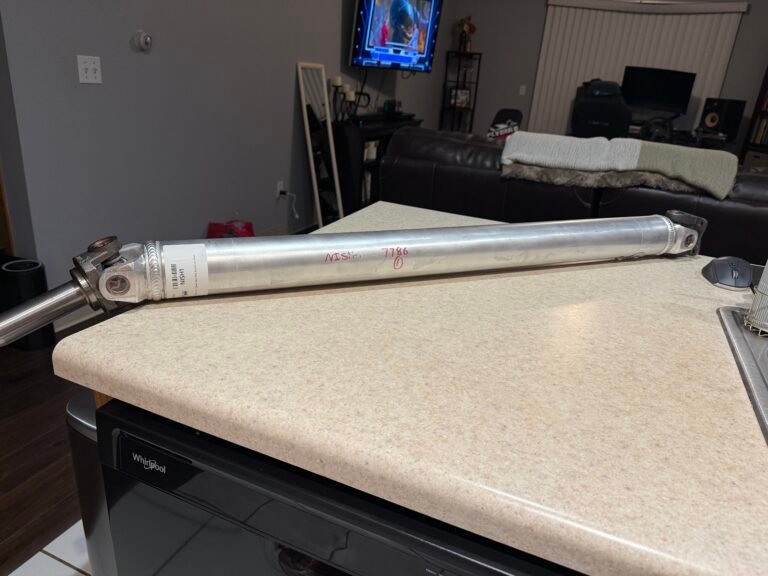
Drivshaft Shop aluminum driveshaft
Ditching the two piece and freeing up some driveline weight
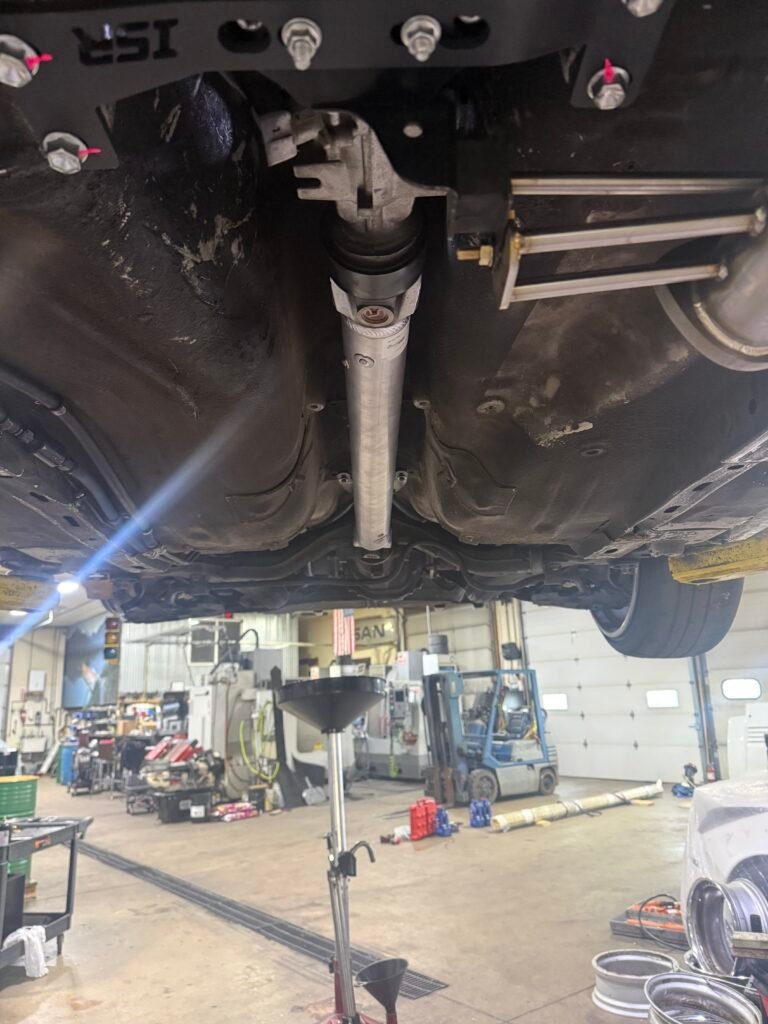
ISR Transmission crossmember and Stance oversized water pump pulley
I decided on an ISR trans Xmember because it was inexpensive, its just a mount, I didn’t need anything special or to try and track down an OEM one. The Stance oversized pulley felt like a must to get. Anything I can do to keep the SR cool is the goal. This component will help eliminate any cavitation issues from the water pump at high RPM during drifting.
November 9th 2025
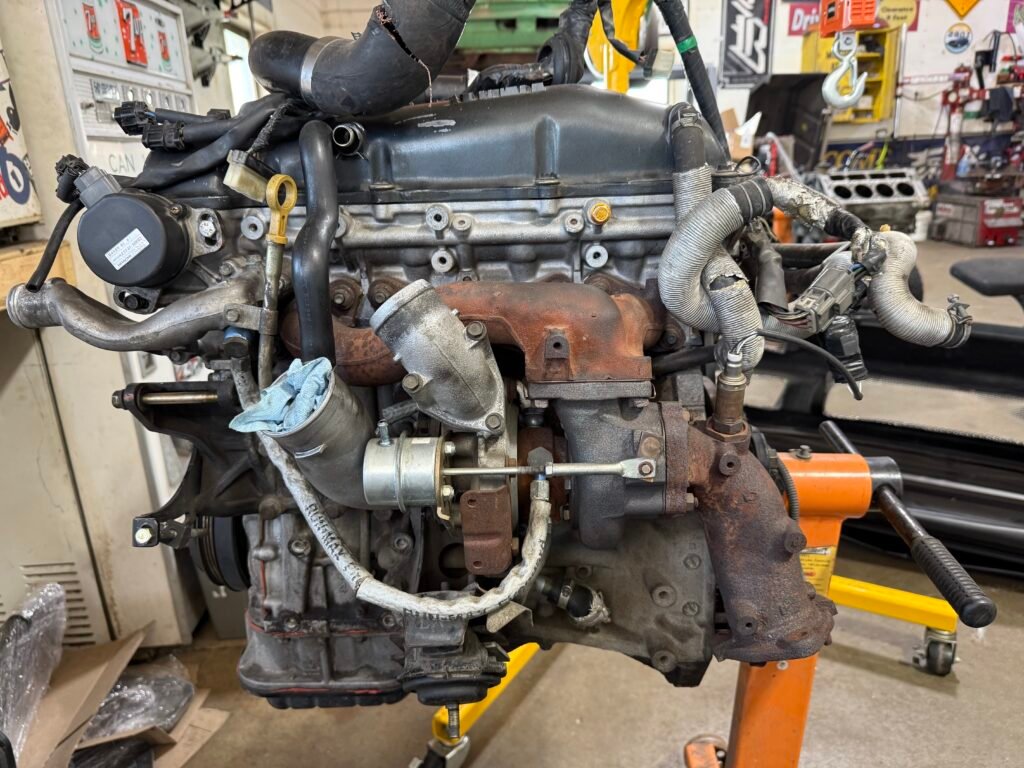
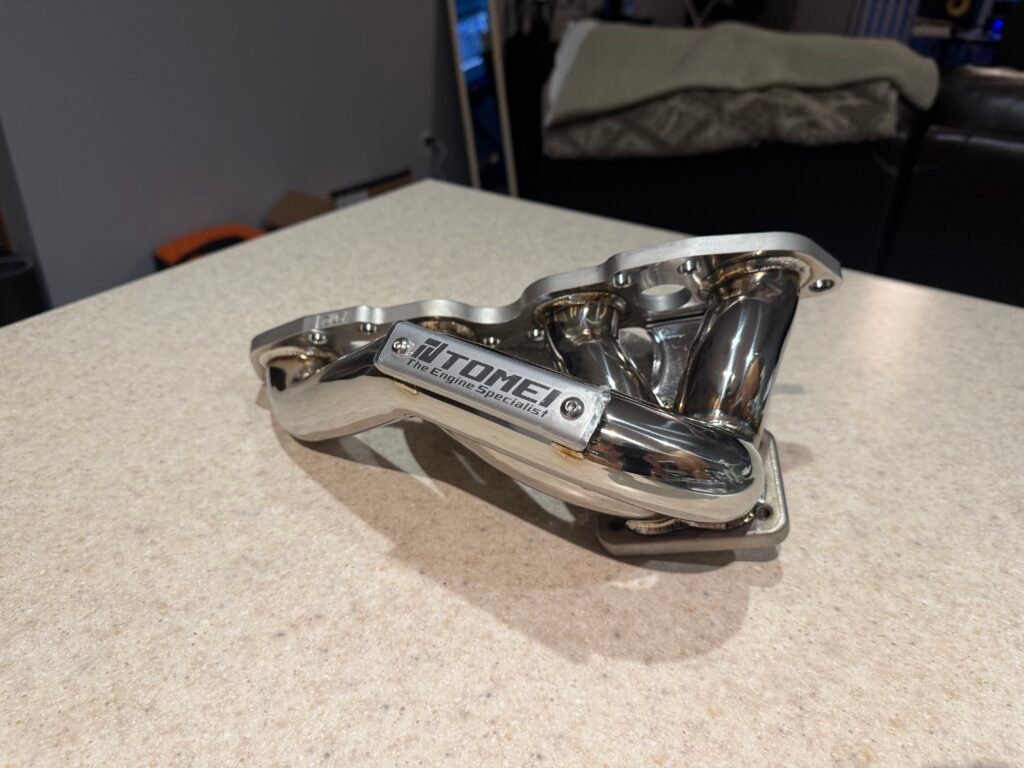
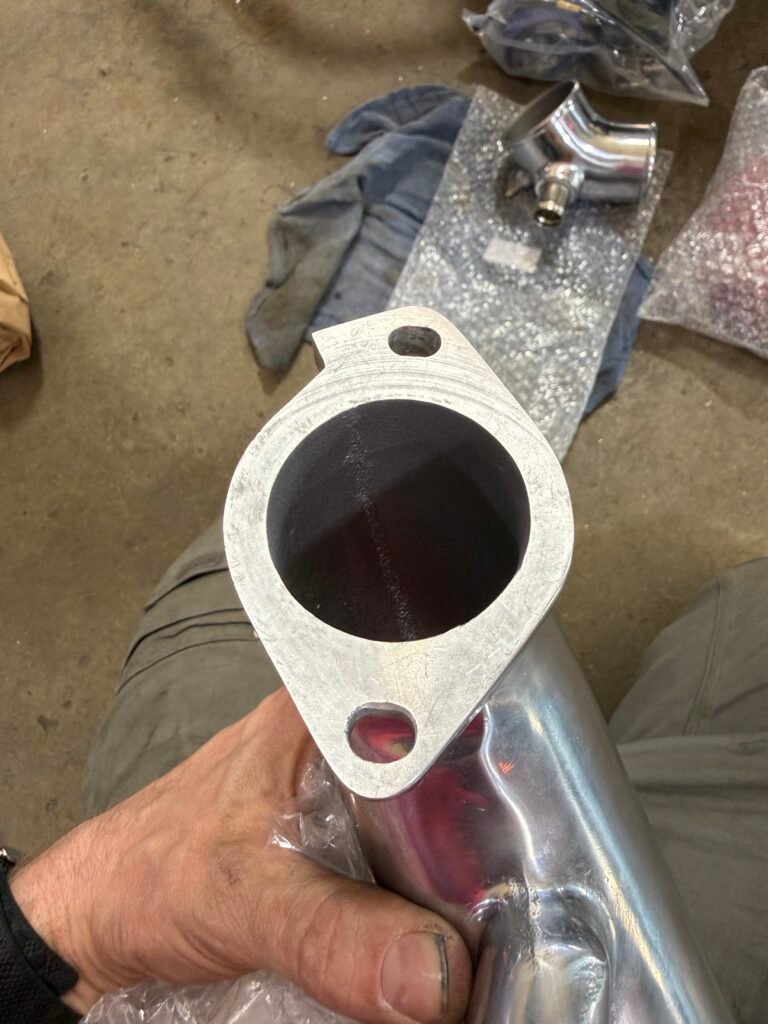
Turbo Manifold Update - Decided to go another route and sell the Tomei manifold
November 11th 2025
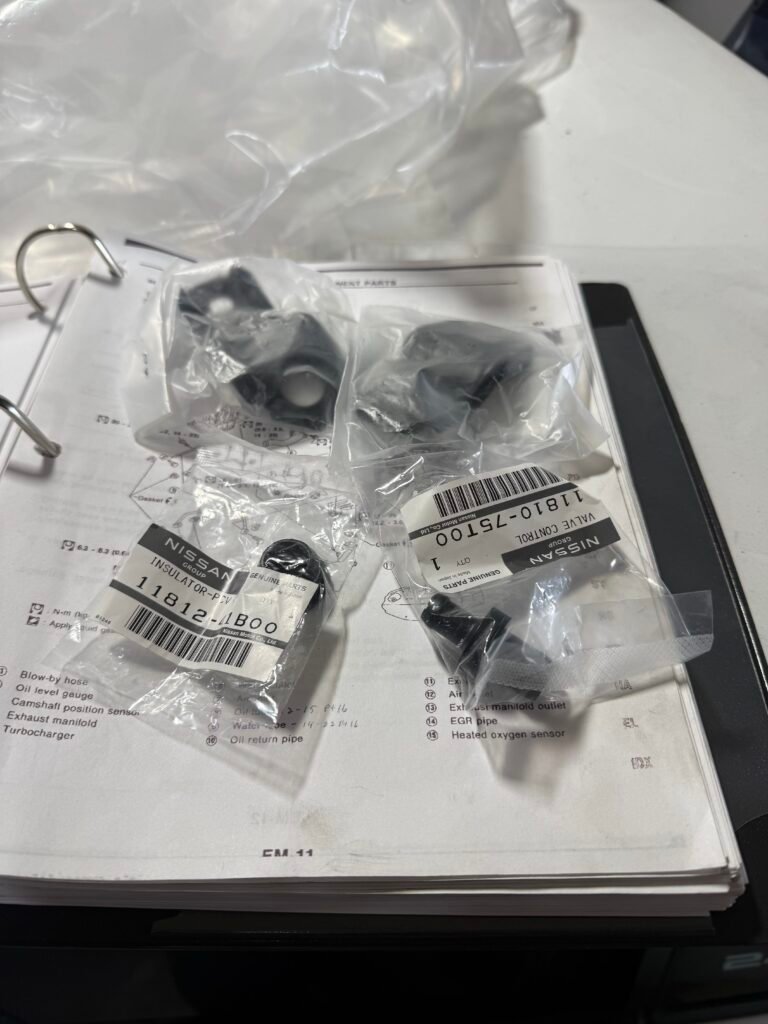
Parts collection continues
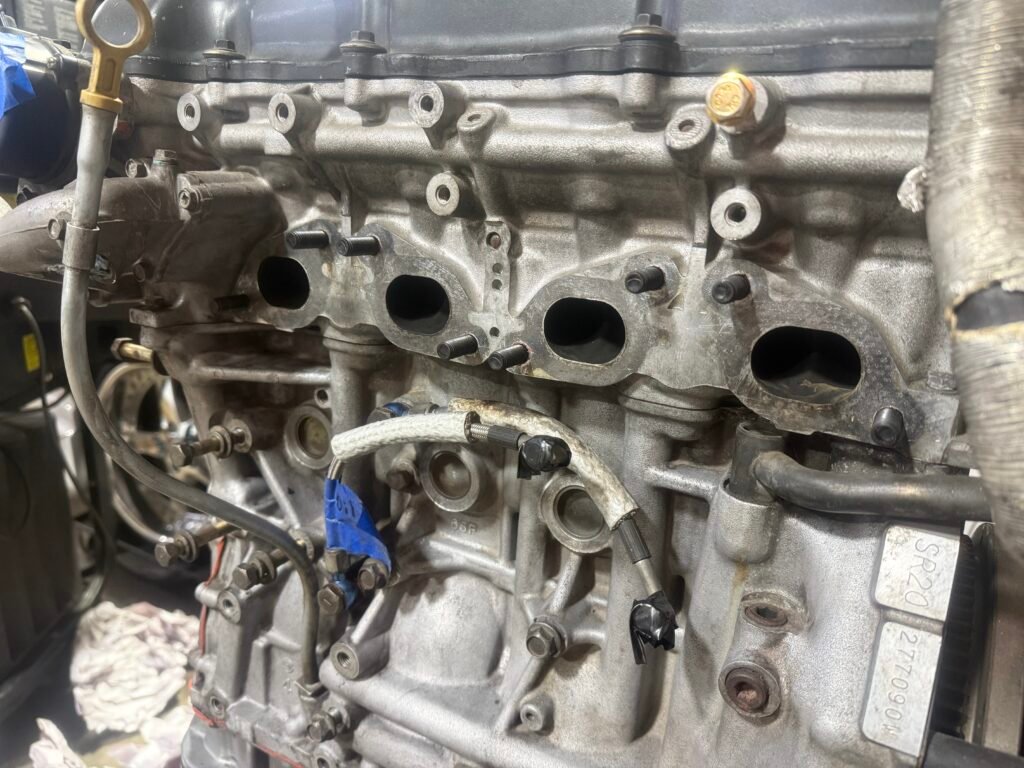
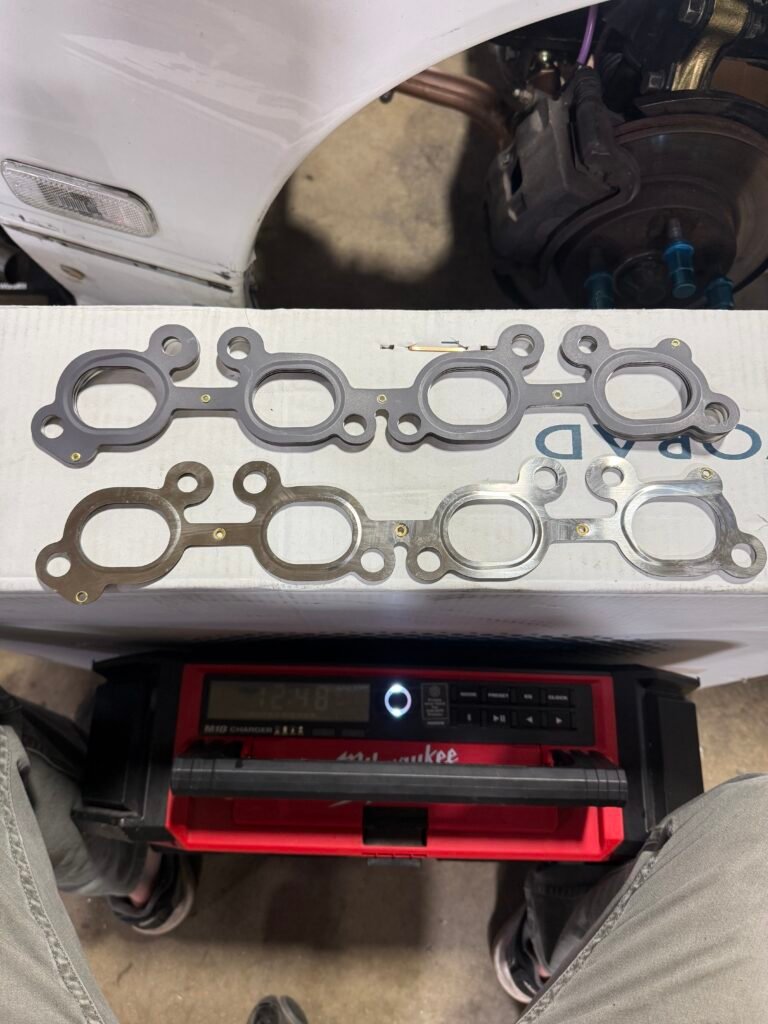
OEM Front Main Seal, Rear Main Seal, Injector O-rings (upper, lower, and insulating bushings), Intake Gaskets (Collector and Manifold), Exhaust and Intake Cam Oil Squirters)
More maintenance items I picked up to replace while the engine is out.
I don’t think it’s necessary to replace the oil squirter assemblies but after hearing they can clog up and prevent lubrication, I decided to start new instead of rolling the dice.
November 13th 2025
Parts collection continued
OEM Fan Shroud, Lower Shroud, Belts (Power steering, alternator, and AC), Valve Cover Gasket and Spark Plug Gasket
I’m keeping tit simple utilizing the stock shroud after it’s been proven to help provide adequate cooling.
November 25th 2025
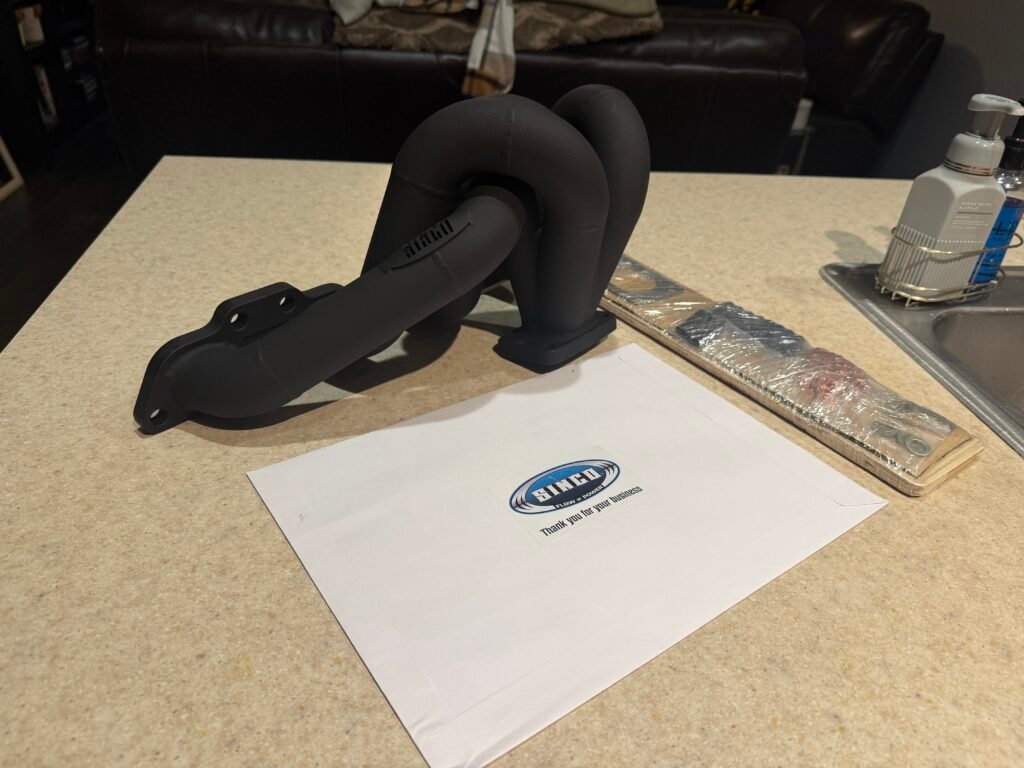
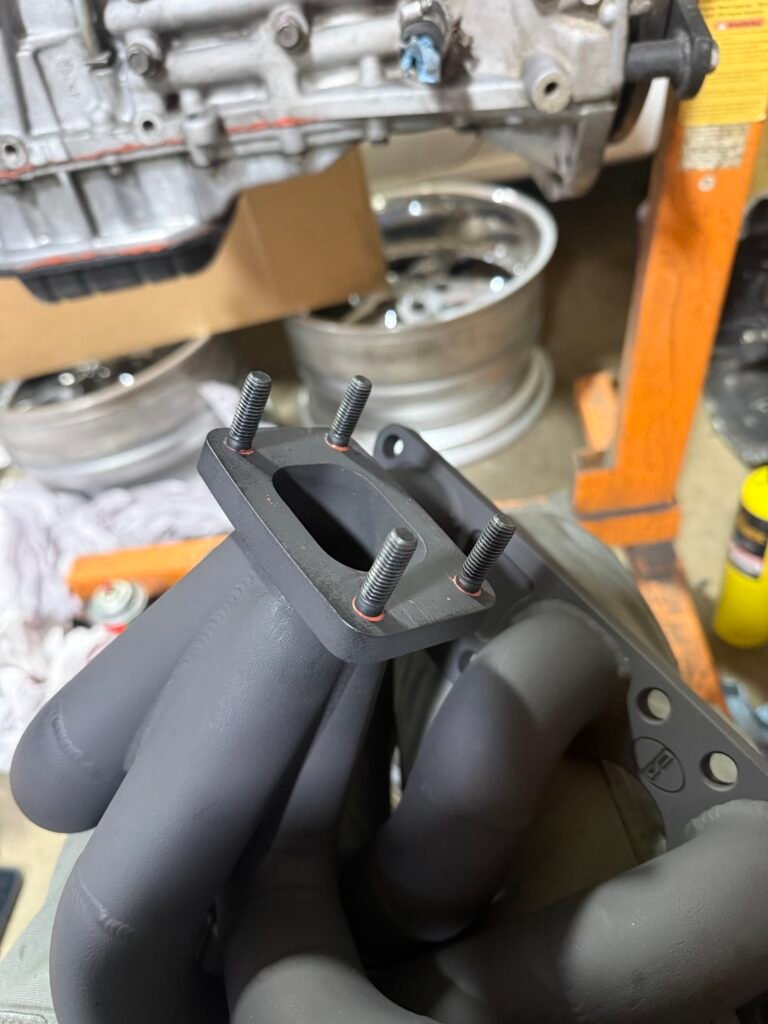
New manifold arrives
A friend told me about this manifold and after watching watching videos hearing how it sounds I had to get it. Shoutout to Sinco for having great customer service. Highly recommend them.
November 28th 2025
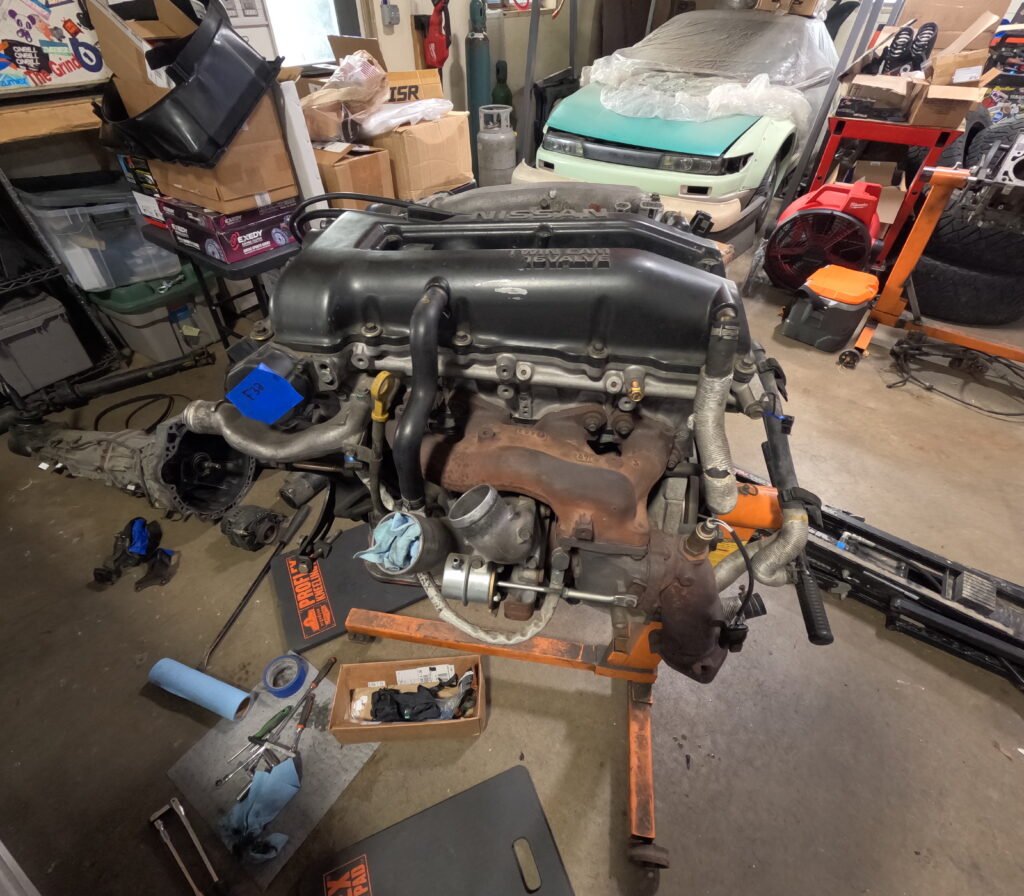
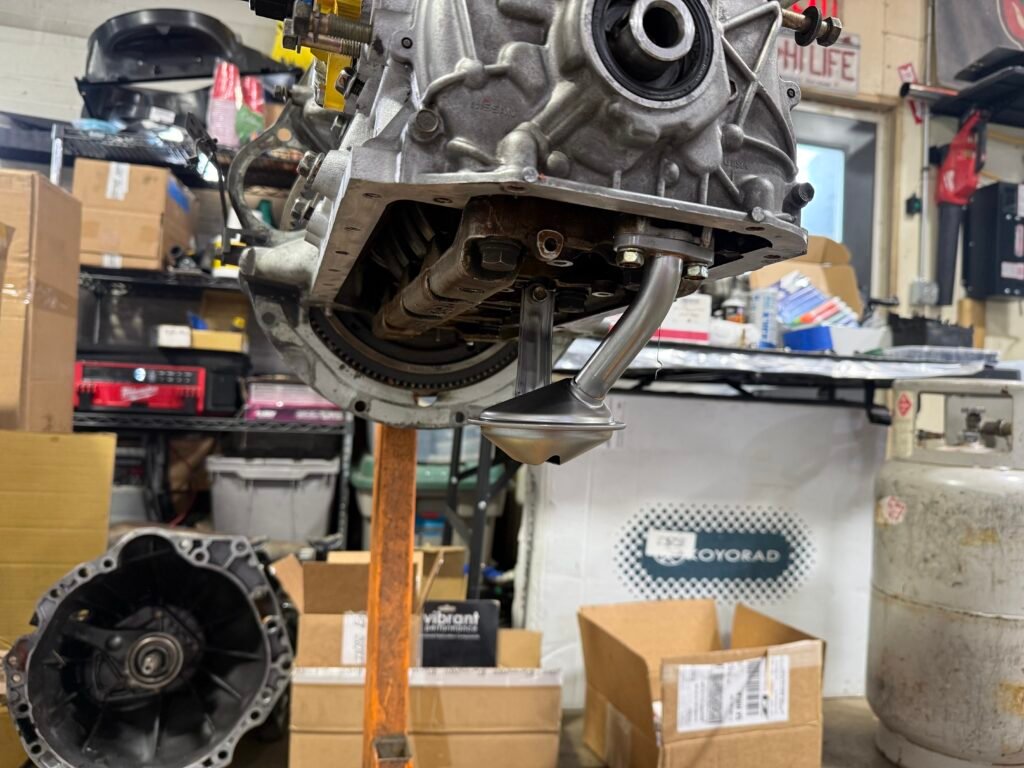
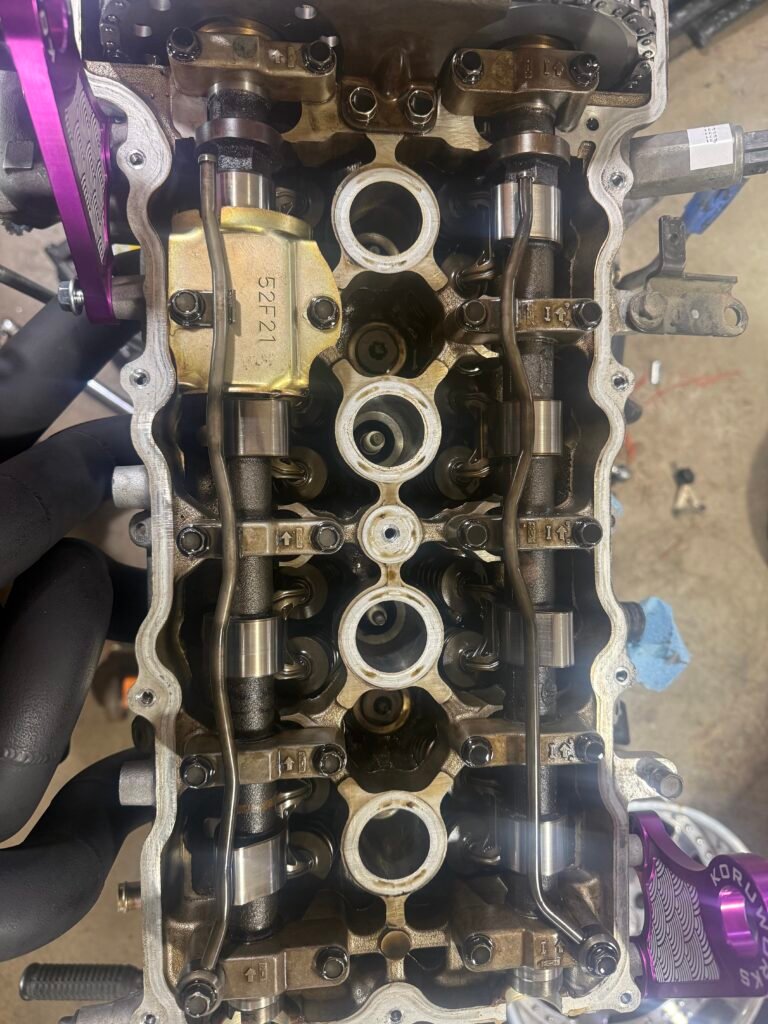
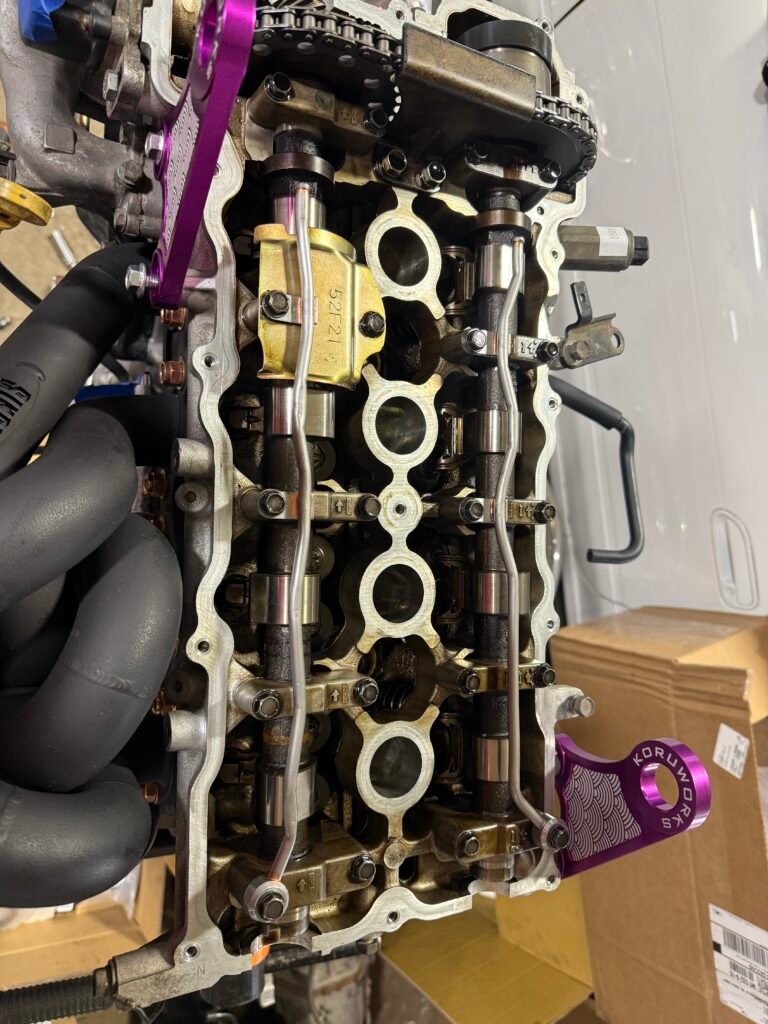
Teardown and cleaning
Before and After Simple Green HD cleaner
Before and After Simple Green HD cleaner
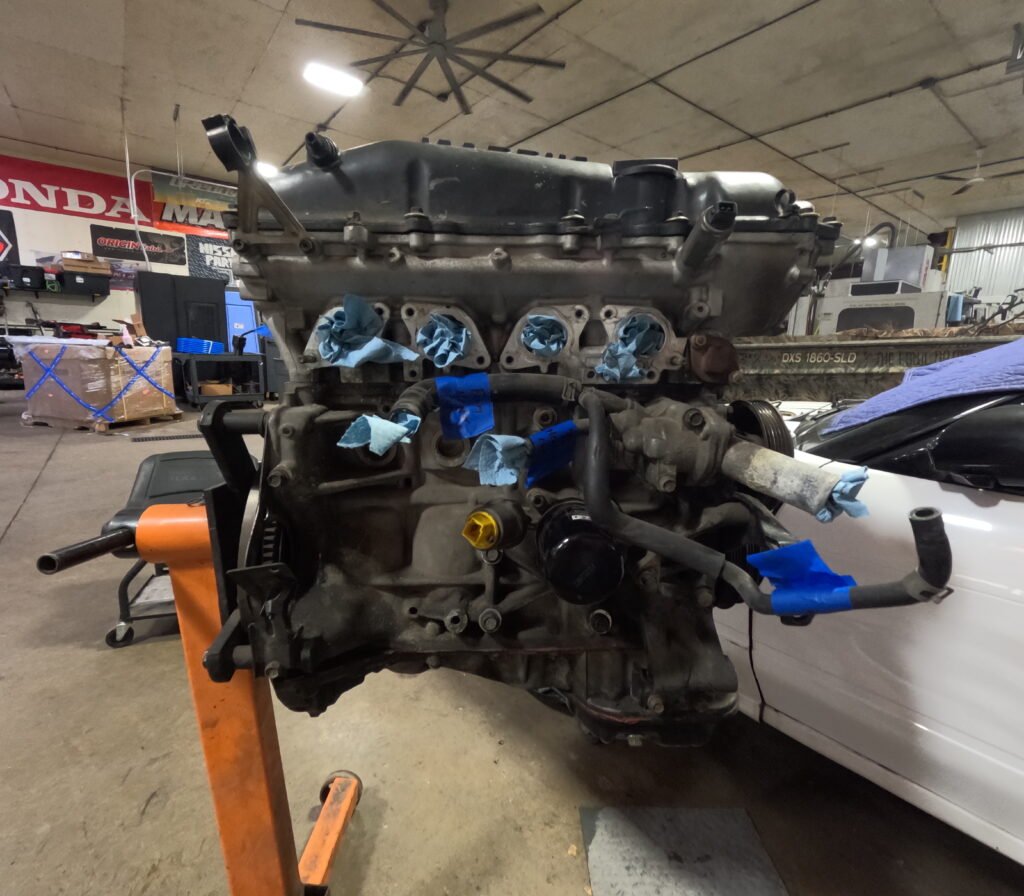
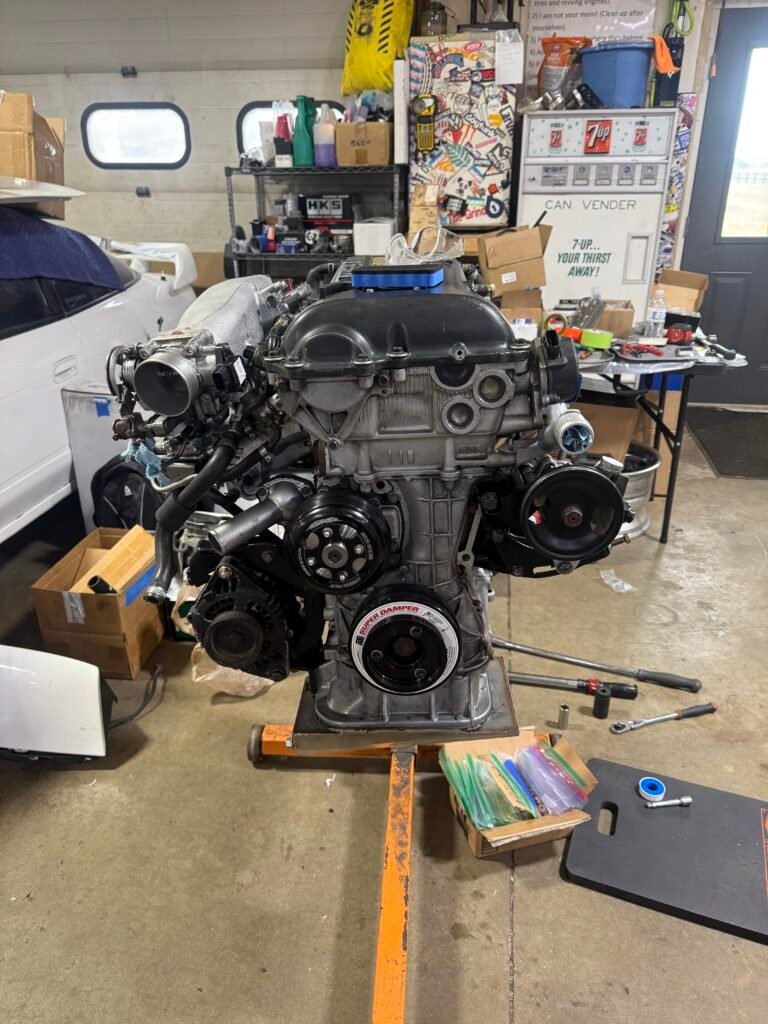
Started disassembly to clean up the engine and begin installing parts. As for degreaser, I used Simple Green Pro HD cleaner, it’s safe on aluminum and worked pretty well to clean it up. While the engine is out, I’m going to replace as many gaskets, hoses, and seals for more preventative maintenance.
December 3rd 2025
Cleaning and starting assembly
More cleanup
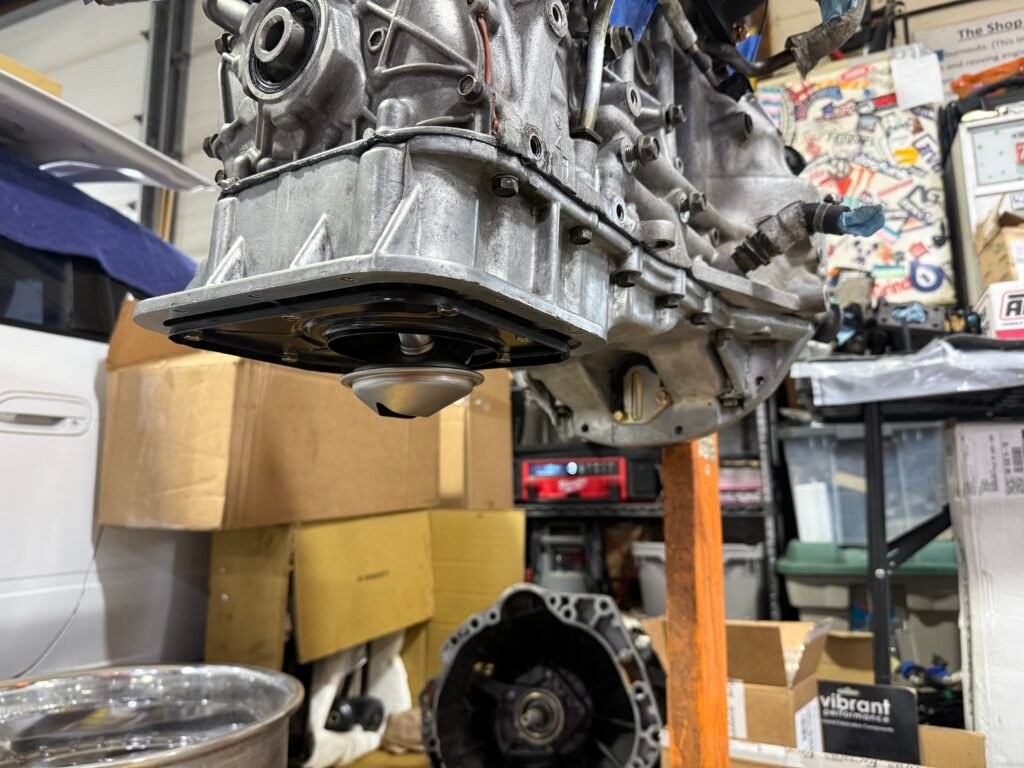
Tomei oil block adapter installed
Got the rest of the engine cleaned up. pulled the crank pulley, installed the new water pump, and oil block adapter. I’m still undecided how/ which remote oil filter setup I want to run. I’ll have to test fit the engine to really get an idea of the layout I want because it needs to be clean and accessible.
December 10th 2025
Parts collection continues
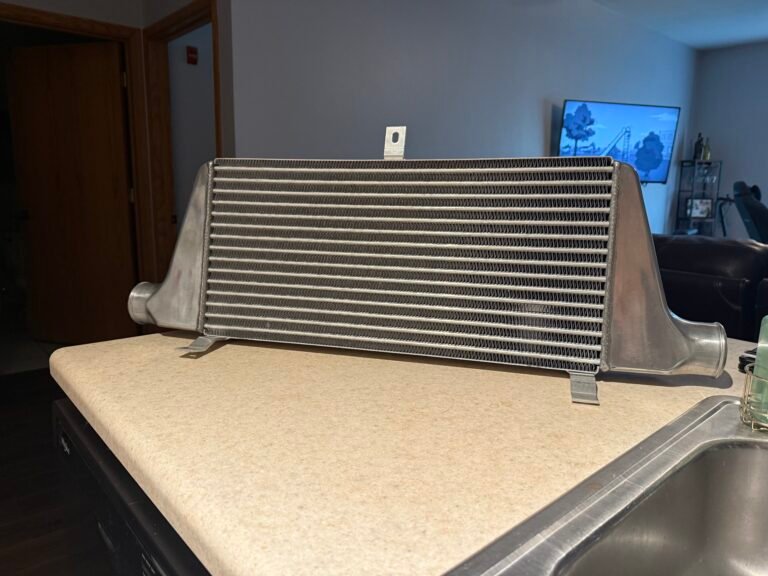
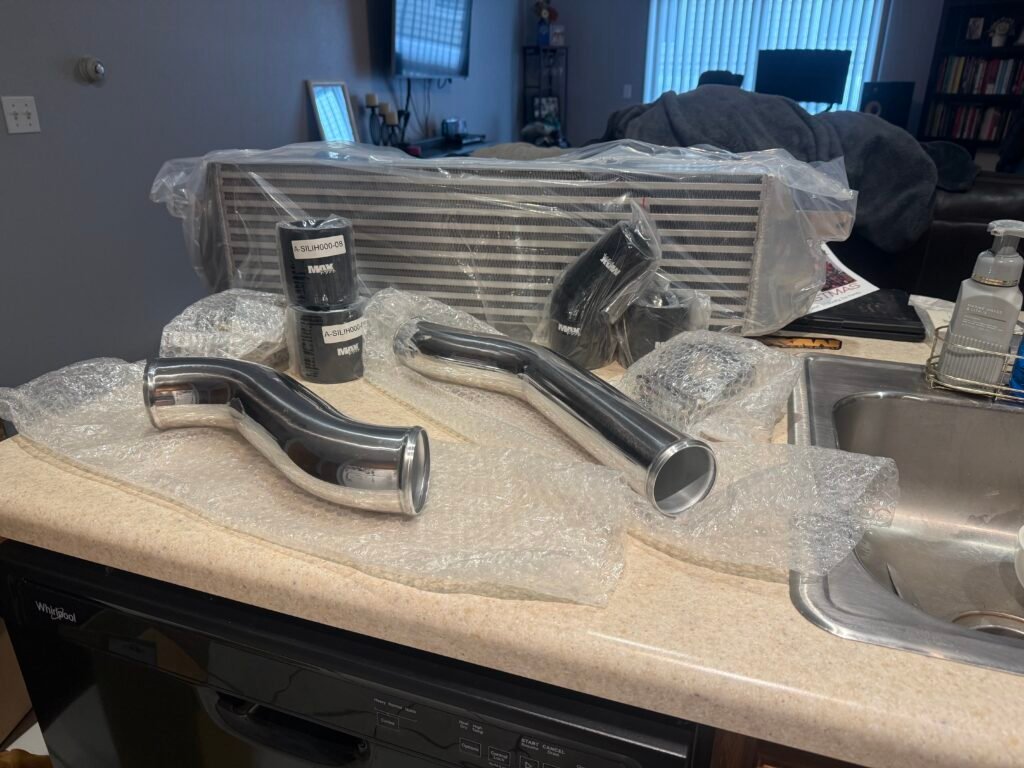
Powered by Max HMIC w/ Cold and Hot Side pipes
Early Christmas gift from my wife showed up. I’m going with this over the Greddy kit I have. The PBM HMIC offers faster turbo spool, less couplings for boost leak points, and space saving for oil and power steering coolers. The only caveat for running this intercooler is that my car is a hatch, so i’ll have to relocate the headlight motors. Luckily Englishtune makes a set. It’s a little added expense I didn’t want to have to do, but i’d be naive to think this is the only one that’s going to happen. As for the Greddy kit, i’m going to hold onto it for now.
December 17th 2025
Assembly continues
Exhaust manifold studs installed
Exhaust manifold studs installed in the head
I’m a little skeptical about this install. I don’t care for the fact that the shank portion of the stud went so far into the head after torquing them.
Exhaust manifold studs installed
Turbo manifold studs installed. These turned out how I thought the studs into the head would look with the middle collar sticking out a bit.
Exhaust manifold installed
I don’t care that the stud doesn’t protrude past the nut.
As I went to install the new oil pan I found that the pickup tube is slightly bent. Kind of a bummer, but once again not a bad item to replace as these have been prone to crack. Z1 had them in stock so I was able to get one in a couple days. At some point this oil pan must’ve been replaced because the pan wasn’t dented.
Bent oil pickup tube
January 3rd 2026
Parts collection and Assembly continued
Slave cylinder (and a spare), thermostat, radiator bushings (upper and lower), oil pan windage tray, transmission cover plate, and Greddy BOV w/ weld on flange
More parts showed up. Picked up a spare slave cylinder after Rockauto had a closeout, and am going to replace the windage tray because that was bent too.
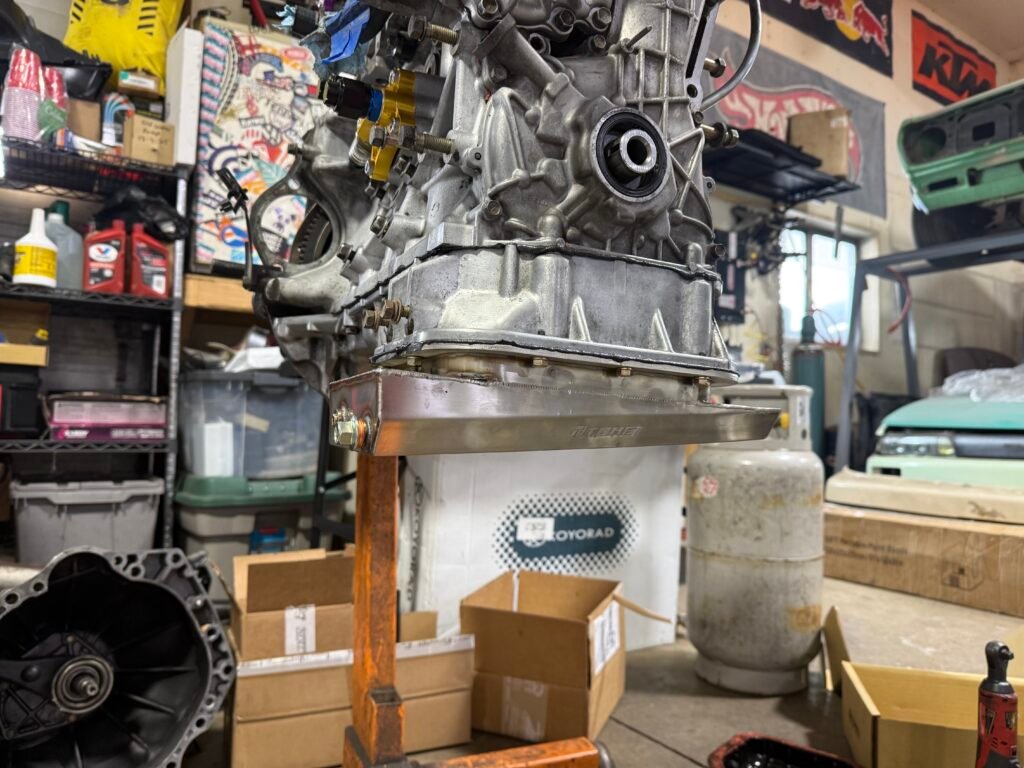
Pickup tube and oil pan installed
Pickup tube, upper oil sump, and windage tray installed
Oil pan installed
The Tomei oil pan is a very snug fit. If anything is out of line, it will hit it. Even after i installed the new pickup and windage tray It needed a little love tap to seat it fully.
Oil squirters installed
Before and after installing cam oil squirters
This is me being overly protective. I like the piece of mind knowing that I will not have any oiling issues on the cams as these can have the tendency to clog on higher mileage SR’s.
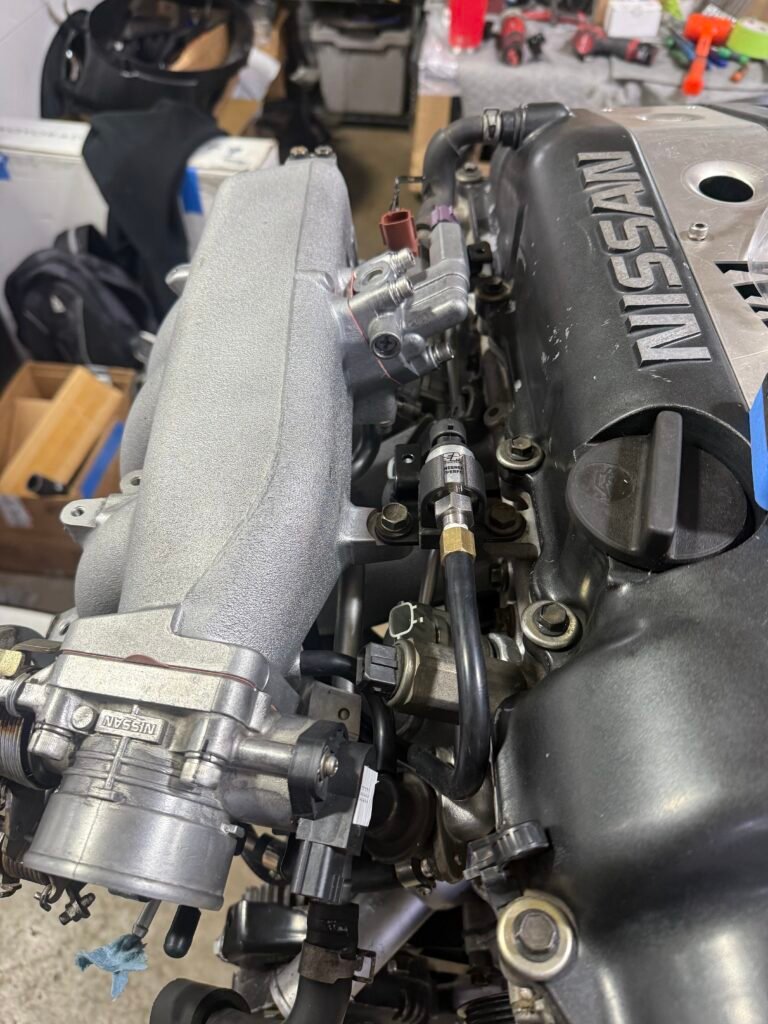
Front main seal, ATI Damper, thermostat, oversized waterpump pulley, intake manifold, acessory brackets, and alternator installed.
January 10th 2026
Assembly continued
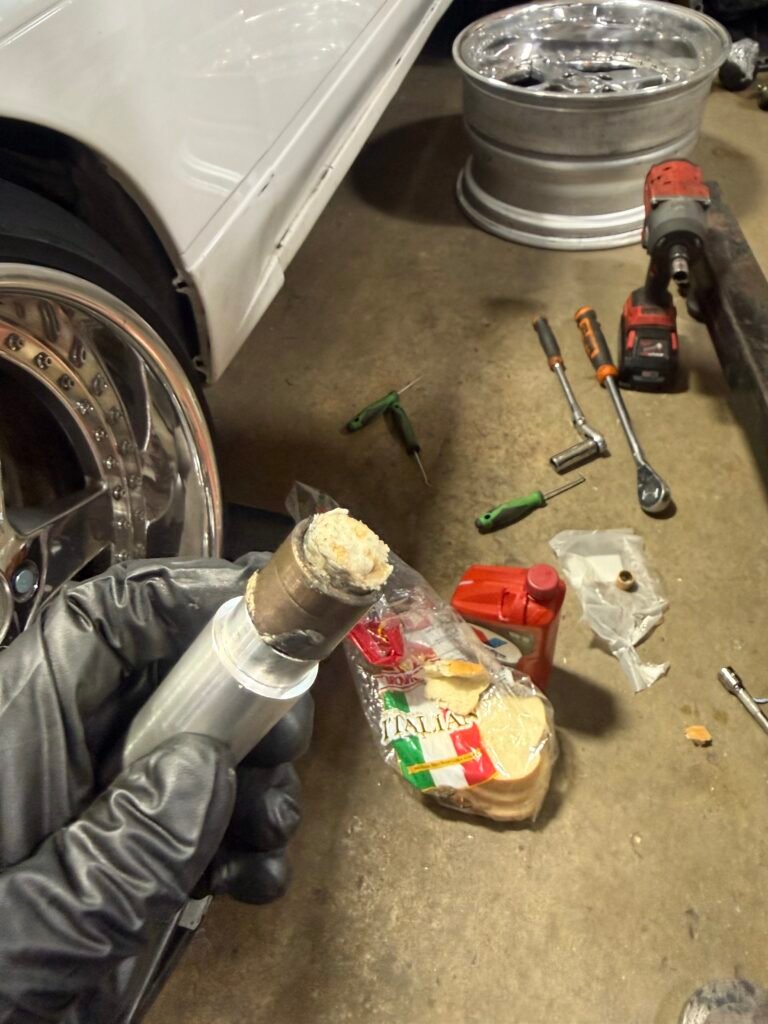
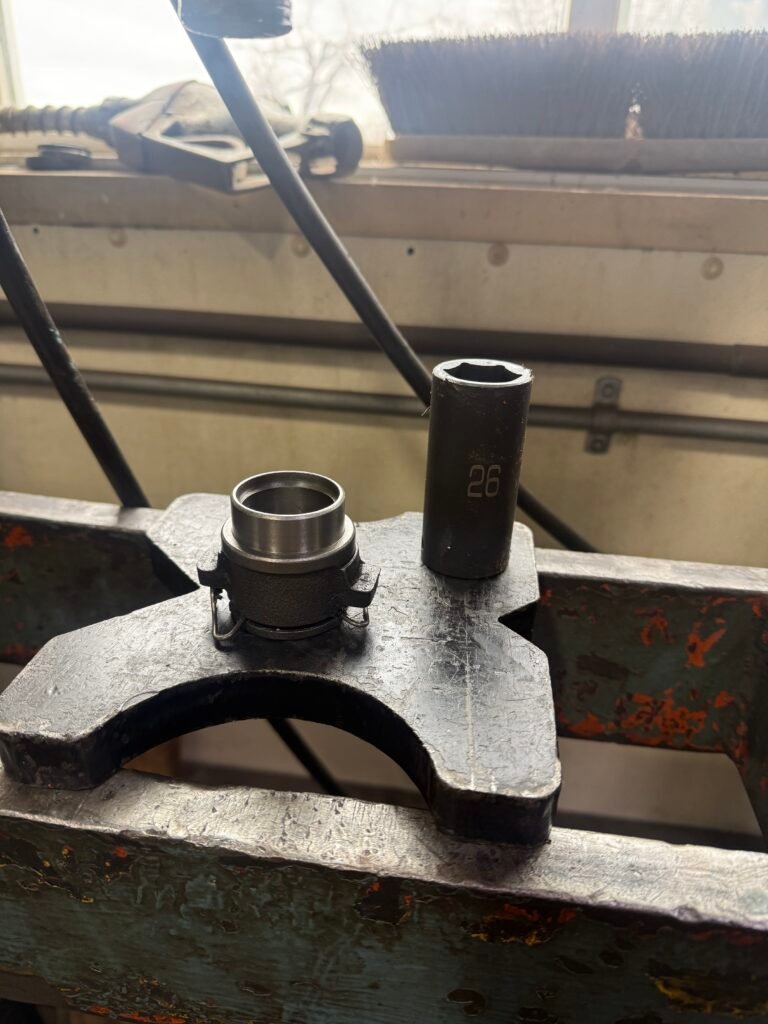
pilot bearing replacement
Pilot bearing removal
Removed the pilot bearing with the “Bread Trick”. Hilarious that this works. You just take one slice of bread, jammed it the pilot bearing hole, pound the tool in, and repeated the process until the bearing came out.
Mazworx makes a pilot bearing install tool that made this even easier. (Pilot Bearing Recess Tool, SRVQ RBVQ, Item# 10145.3)
Installed the new rear main seal as well. I didn’t have a tool or a big enough socket to install it so I found a old hub flange laying around that worked as my install tool.
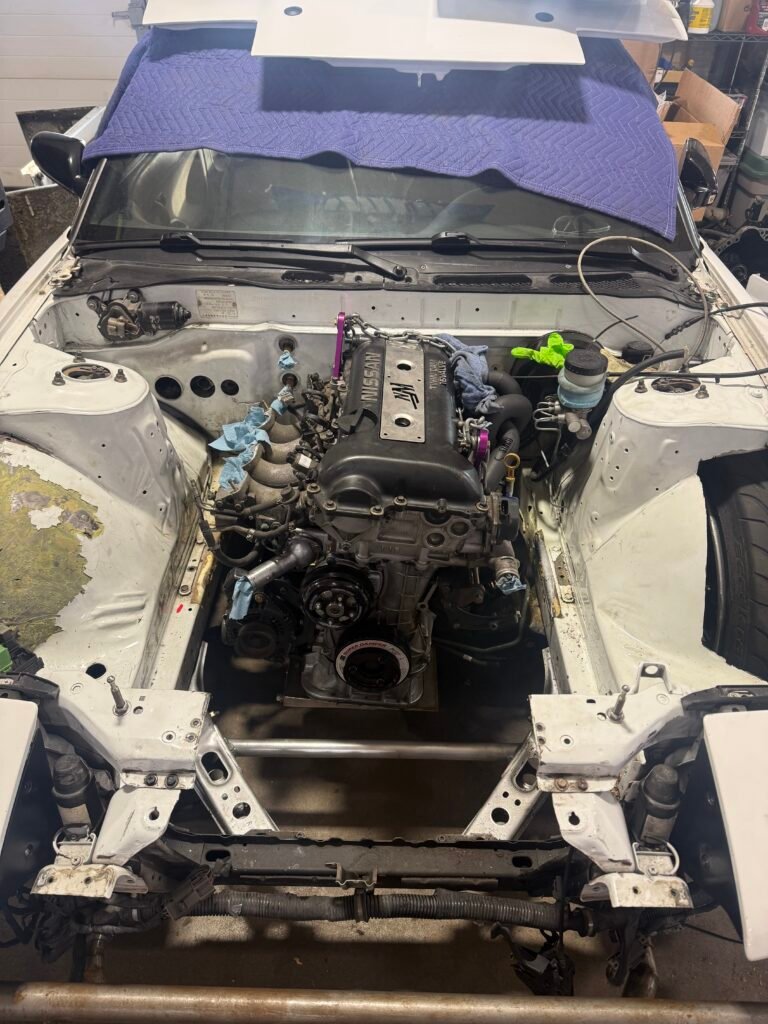
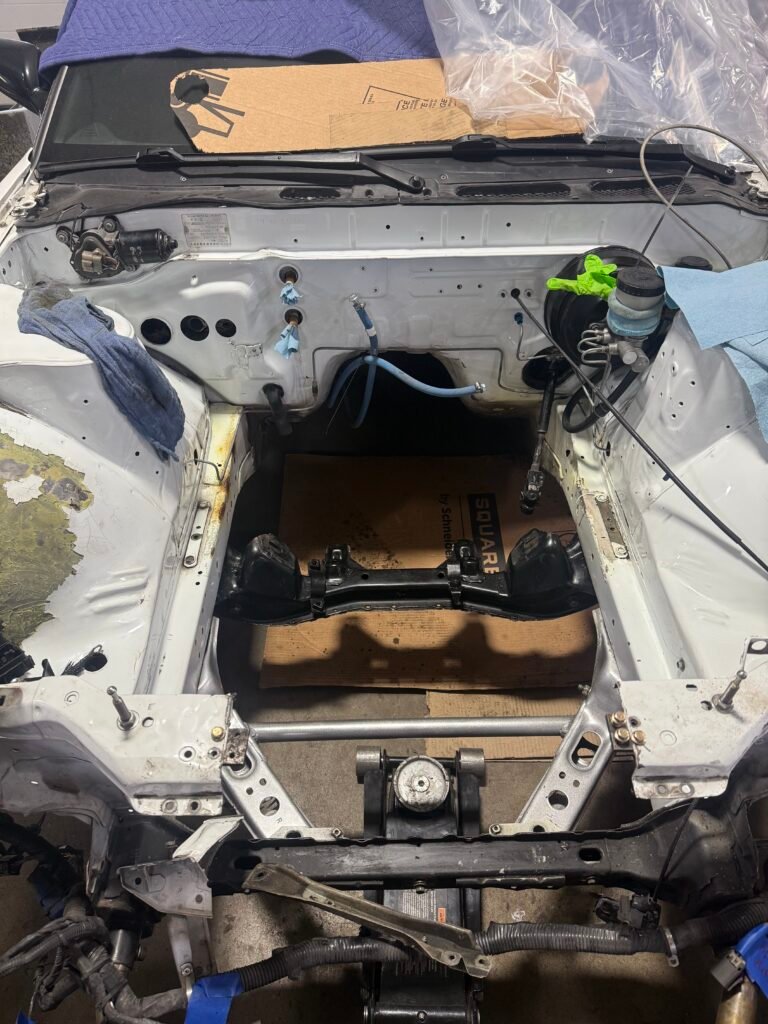
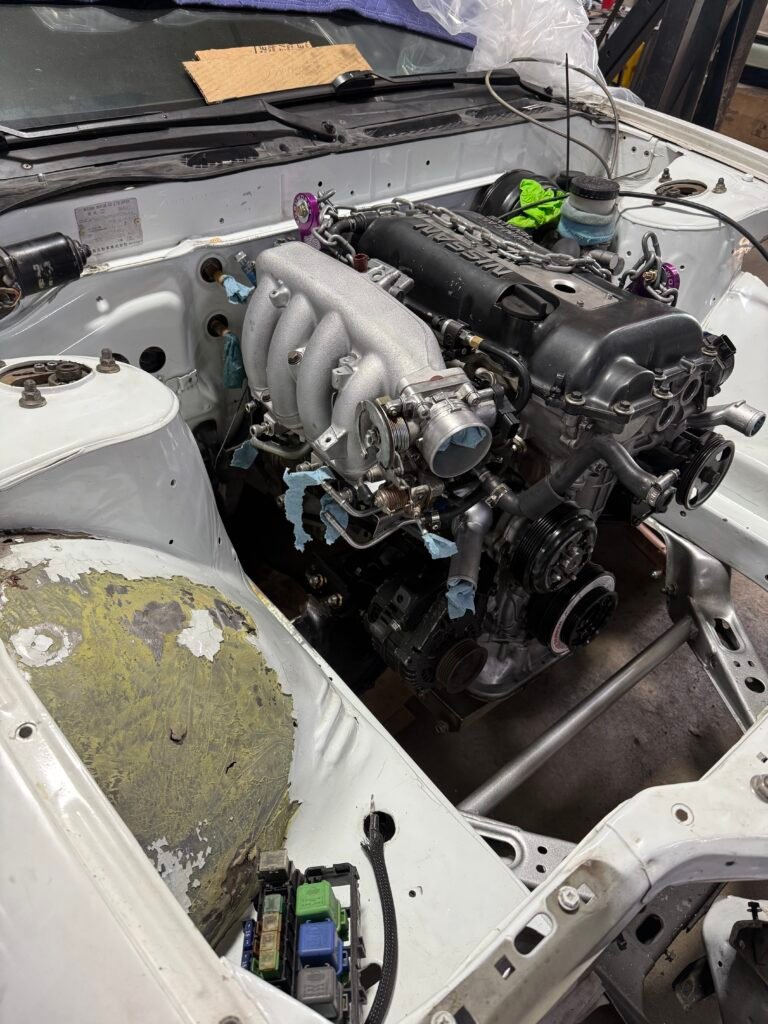
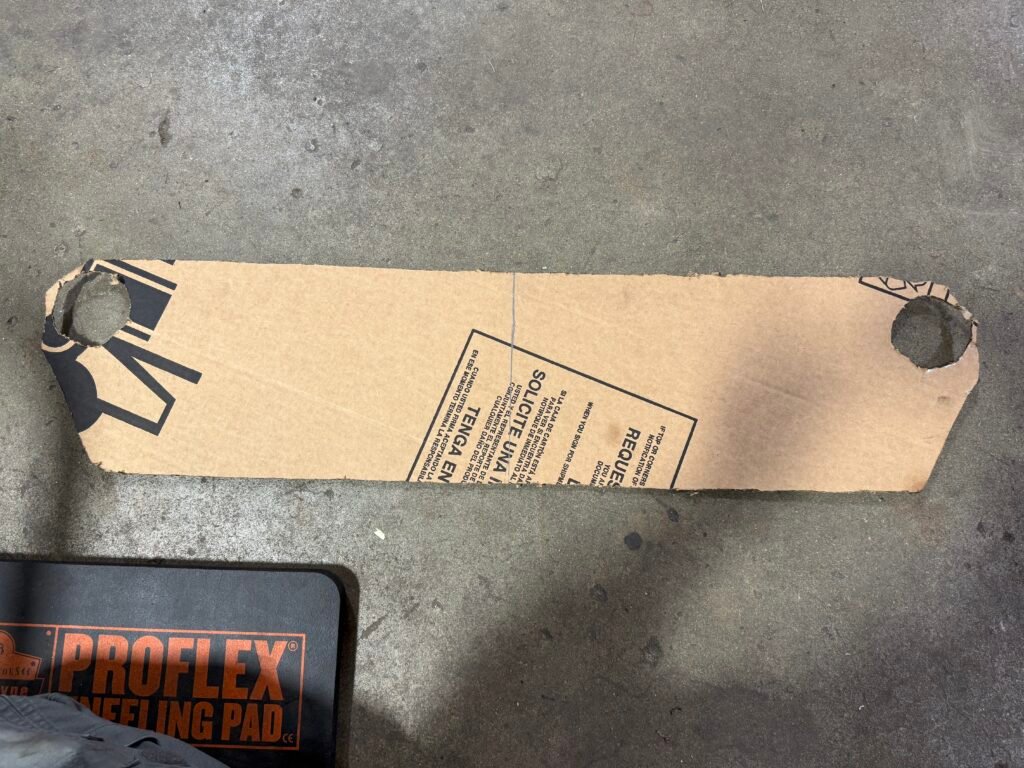
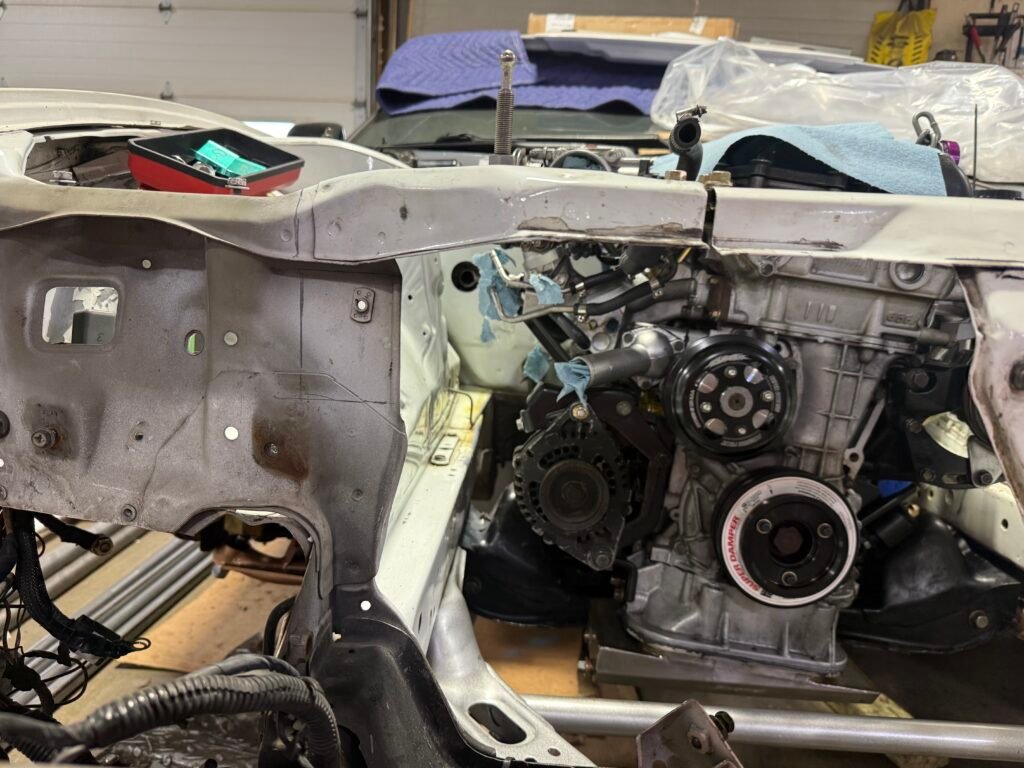
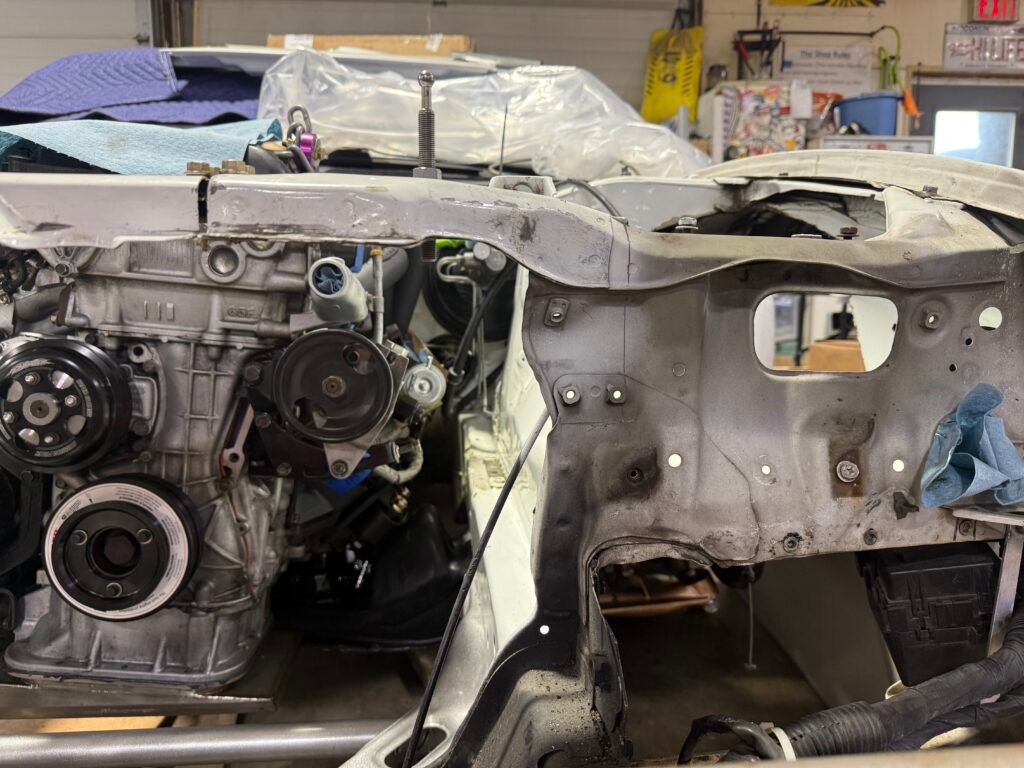
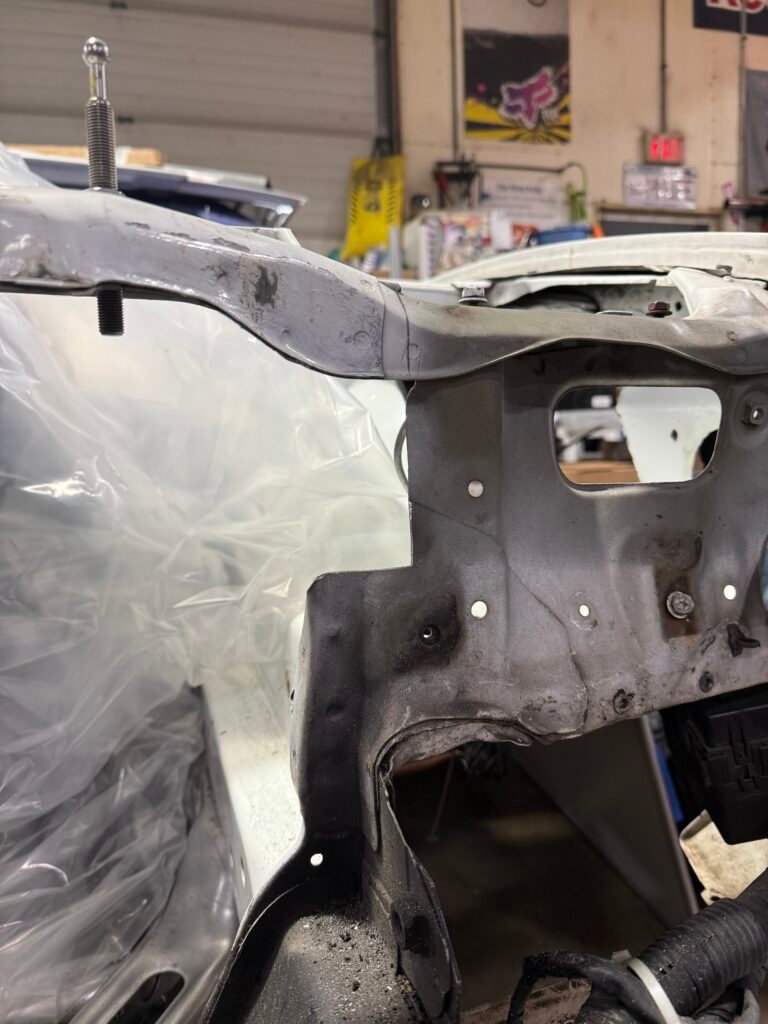
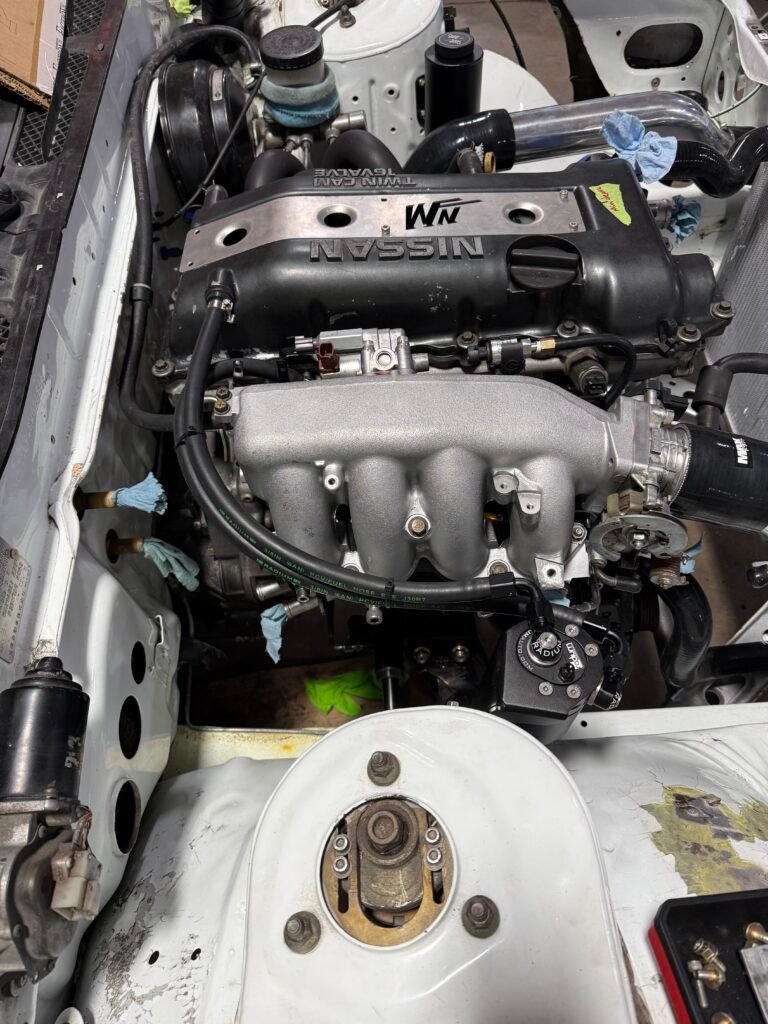
Engine test fit
Engine Test Fit
I test fit the engine to check brake line to turbo manifold clearance and to mock up intercooler piping, power steering cooler location, and the oil cooler location. I made some templates out of cardboard of the dimensions I planned on using.
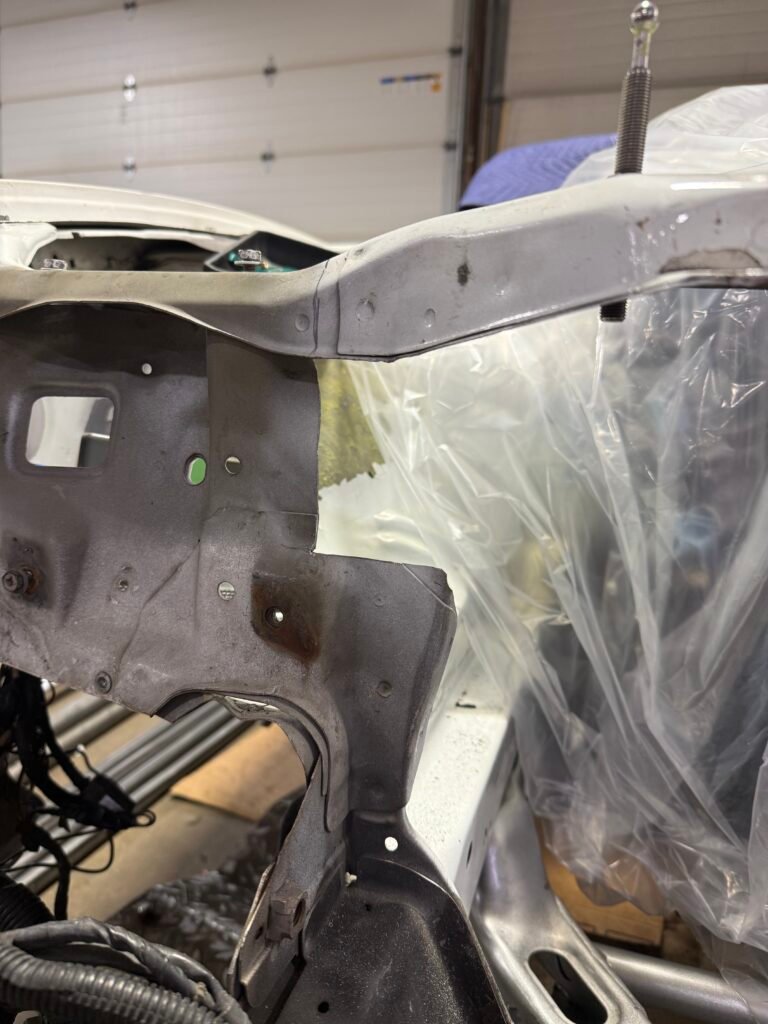
Some minor cuts in the core support will need to be made for the Intercooler piping and relocate my headlight motors to clear intercooler. Fingers crossed Englishtune will have have a restock on there headlight kit soon.
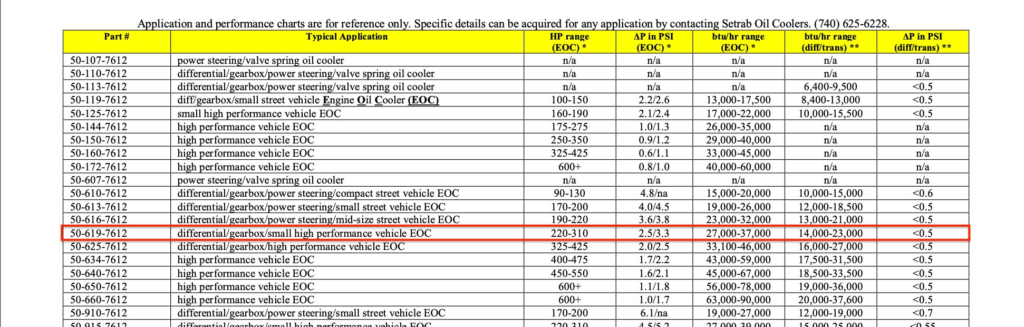
Choosing my Oil cooler and Power steering cooler
Heat Exchangers
Power Steering
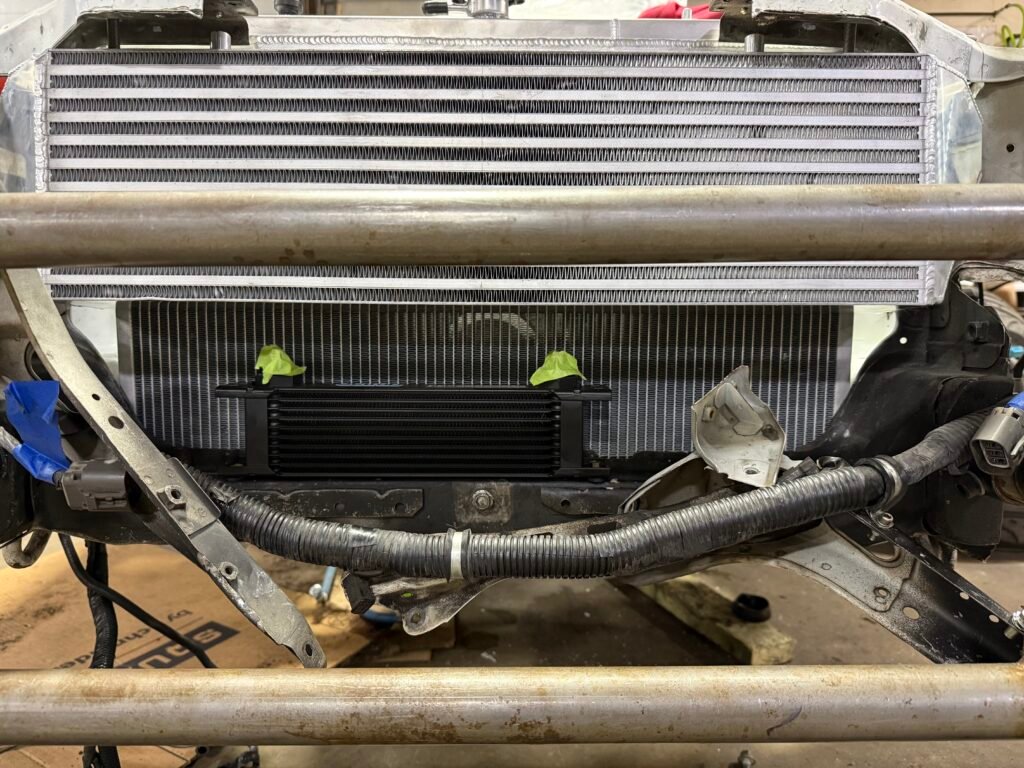
10 Row 13 x 3 x 1 7/8" Setrab Cooler w/ M22 Ports (P# SET-610-7612)
I didn't get too technical on deciding this — I simply copied the size Chase Bays used in their kit. Another good option I was looking at was a 13 Row, 8 3/4" x 4" x 1 7/8" if you want to go a little smaller for more space savings.
Engine Oil Cooler
19 Row 13 x 5 3/4 x 1 7/8" Setrab Cooler w/ M22 Ports (P# SET-619-7612)
Chosen based off the HP range in the application sizing chart Pegasus Auto Racing has on their site.
Setrab application guide — red box indicates my selection
January 22nd 2026
Back to dissaembly
After test fitting the engine and looking at it, I felt like I’d be doing myself a disservice if I didn’t take the time to clean up things a little more. With that being said, engine is back out to clean some parts.
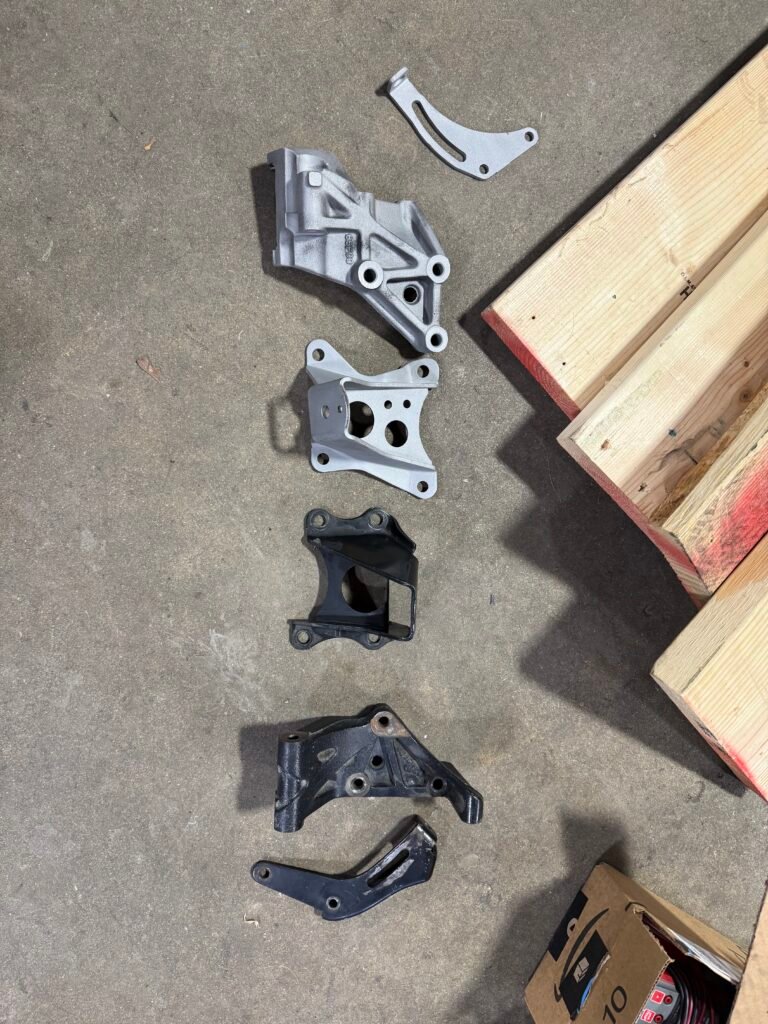
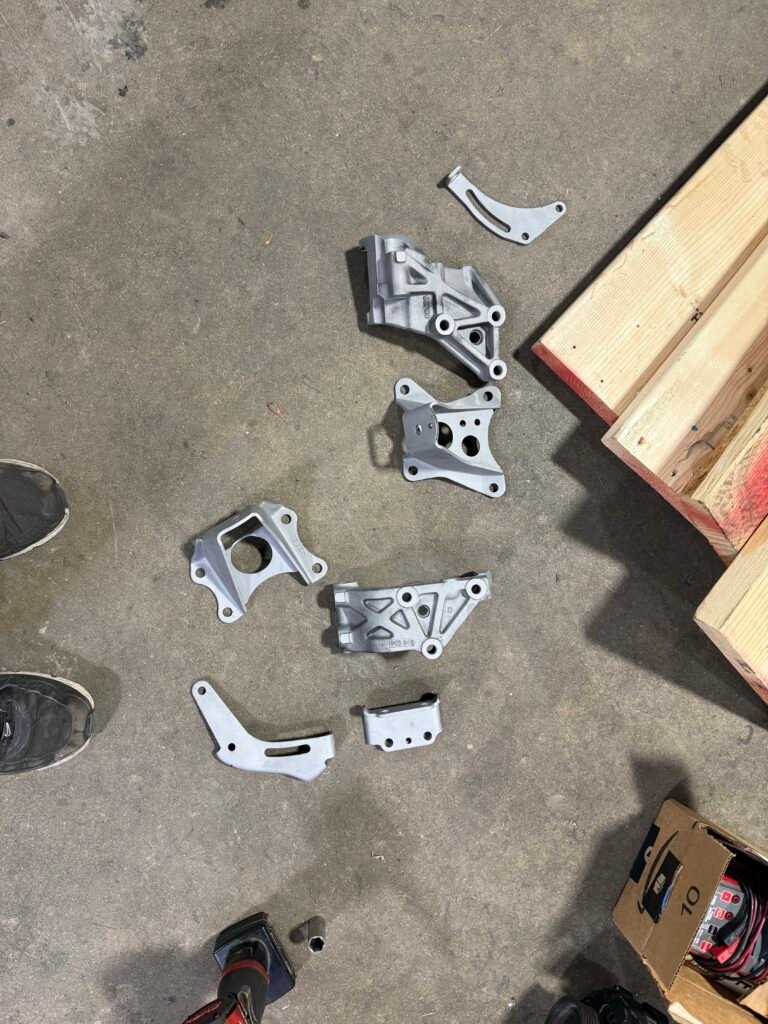
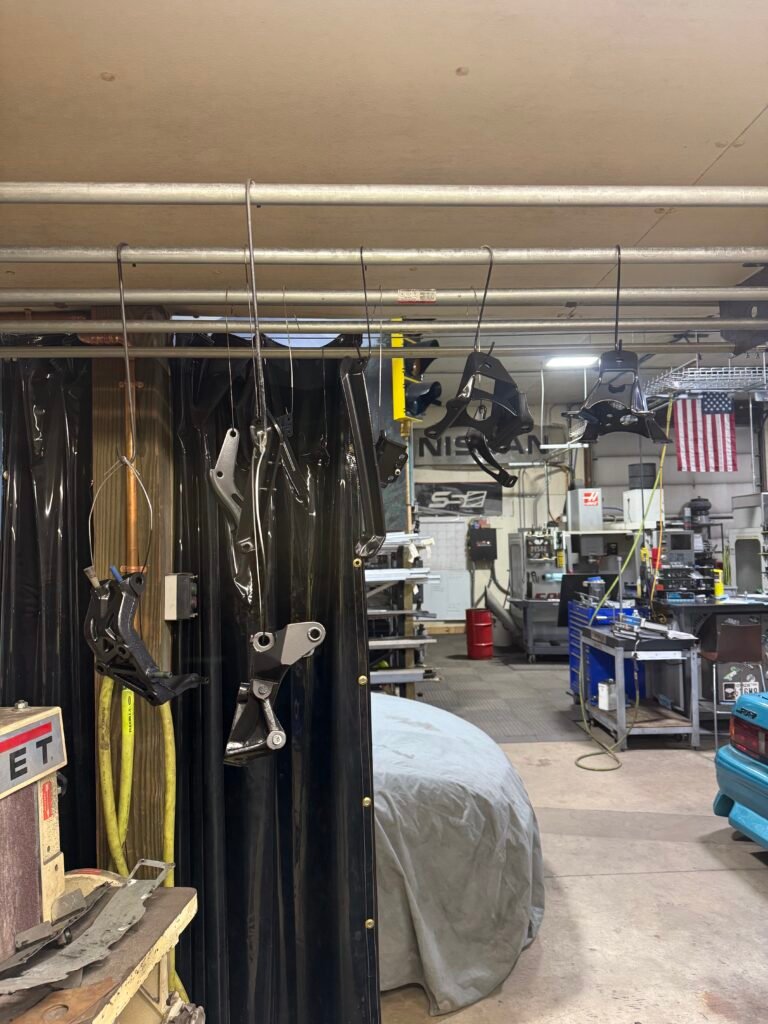
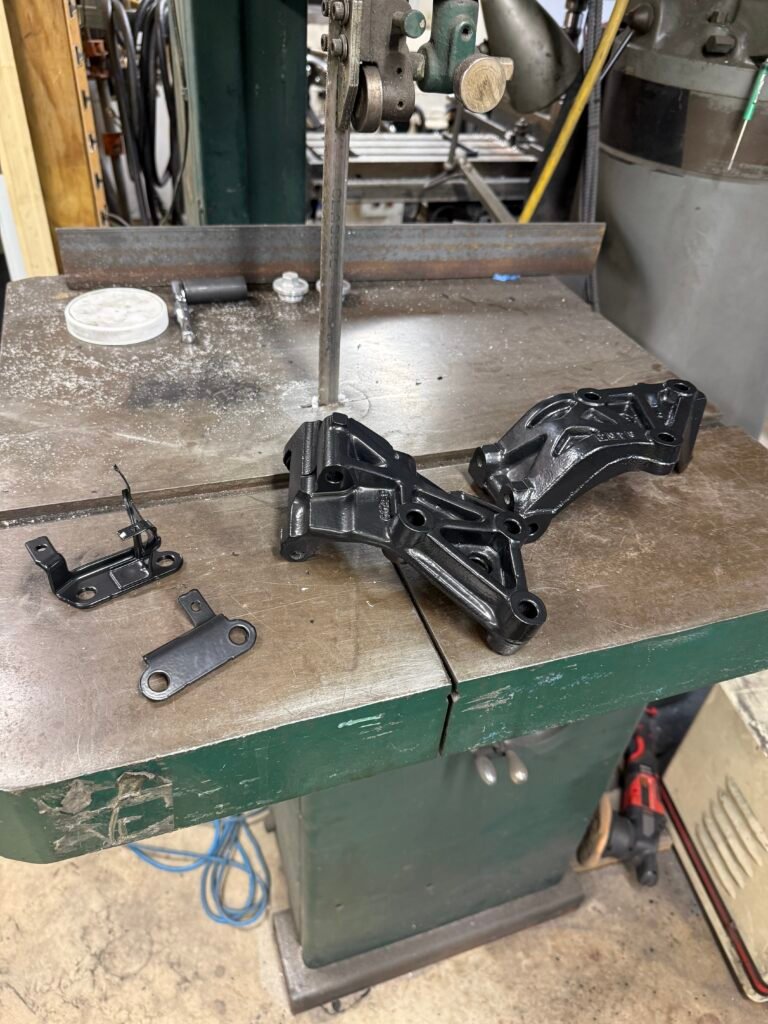
SAND BLASTING AND Painting
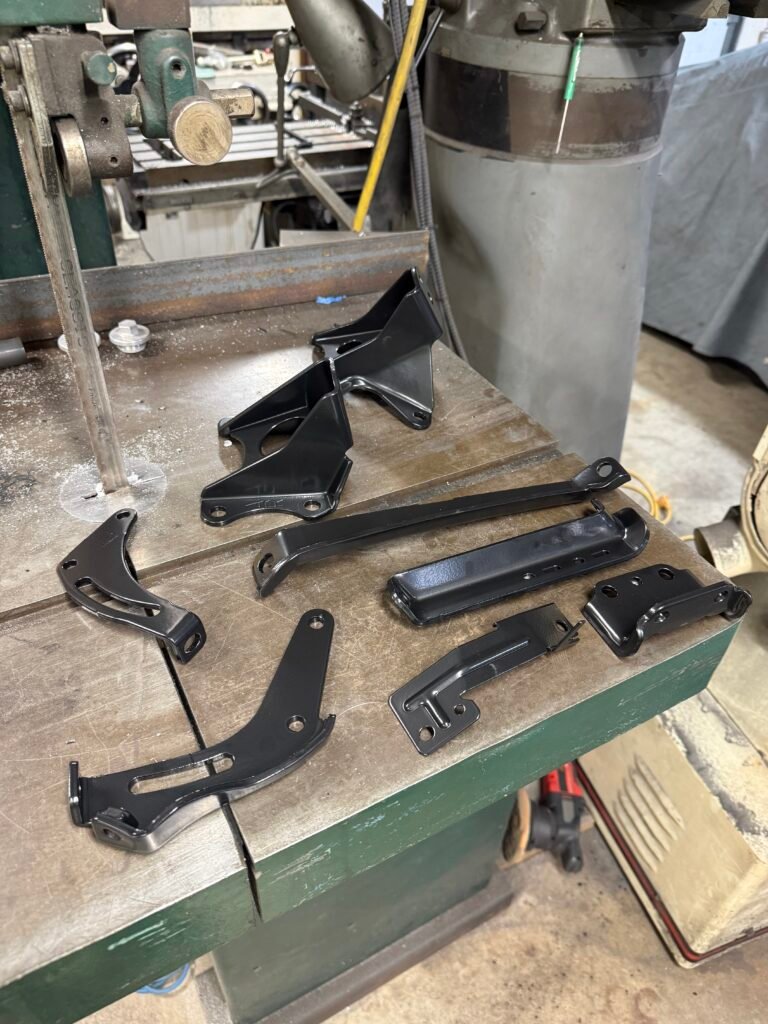
Sandblasting all of the engine brackets
Applied High temp paint
Vapor Honing
Make that shit bang
⚠ Things to note
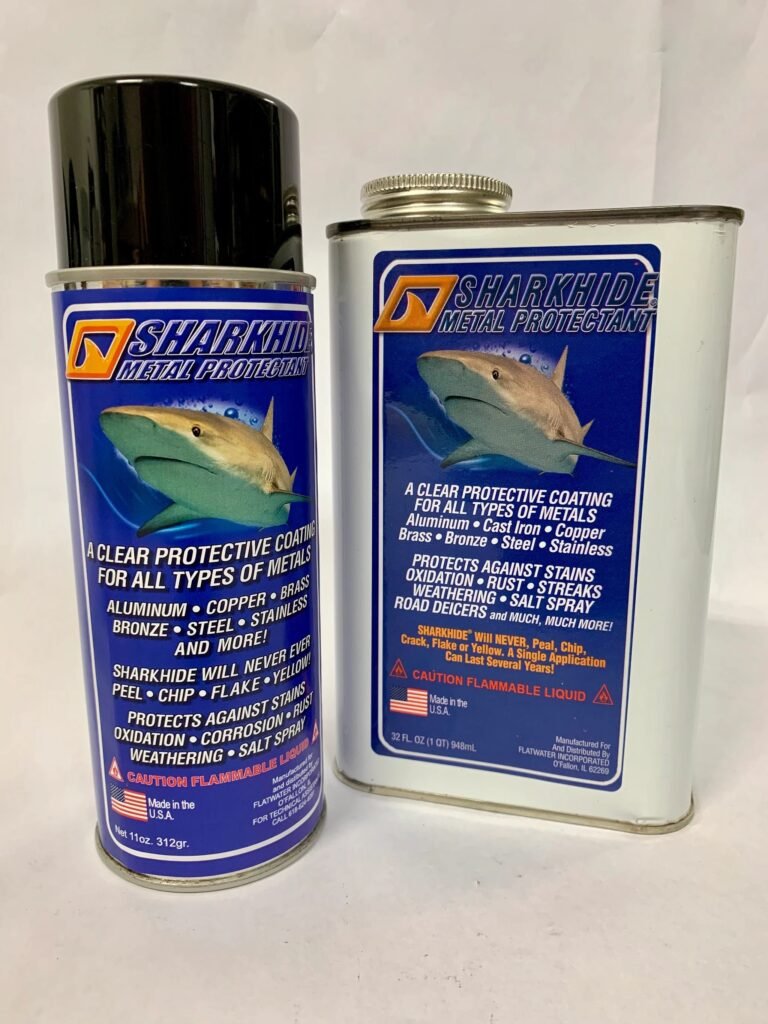
Vapor honing will remove the nickel plating on parts. I don't personally like the nickel look so I was indifferent with it being gone.
You'll need to apply metal protectant after the process to guard against future corrosion. My friend recommended Sharkhide Aerosol — apply after vapor honing and drying the parts off.
⚠️
Throttle Body Warning
Be careful not to spray the throttle blade shaft area — tiny bits of media can get into the bearings causing them to seize. At least in my case, it did. I had to buy a new throttle body after a failed attempt to replace the bearings.
⚠️
IAC Valve Warning
Make sure you get all of the media out of your IAC valve. In my case it still had remnants in it that caused issues during the tuning process.
Ryan from Car Shop D-Style luckily found it — was able to disassemble it, clean it, and bench actuate it to make sure it was all good. Thanks Ryan!
Before and after vapor honing
Before and after vapor honing
After vapor honing
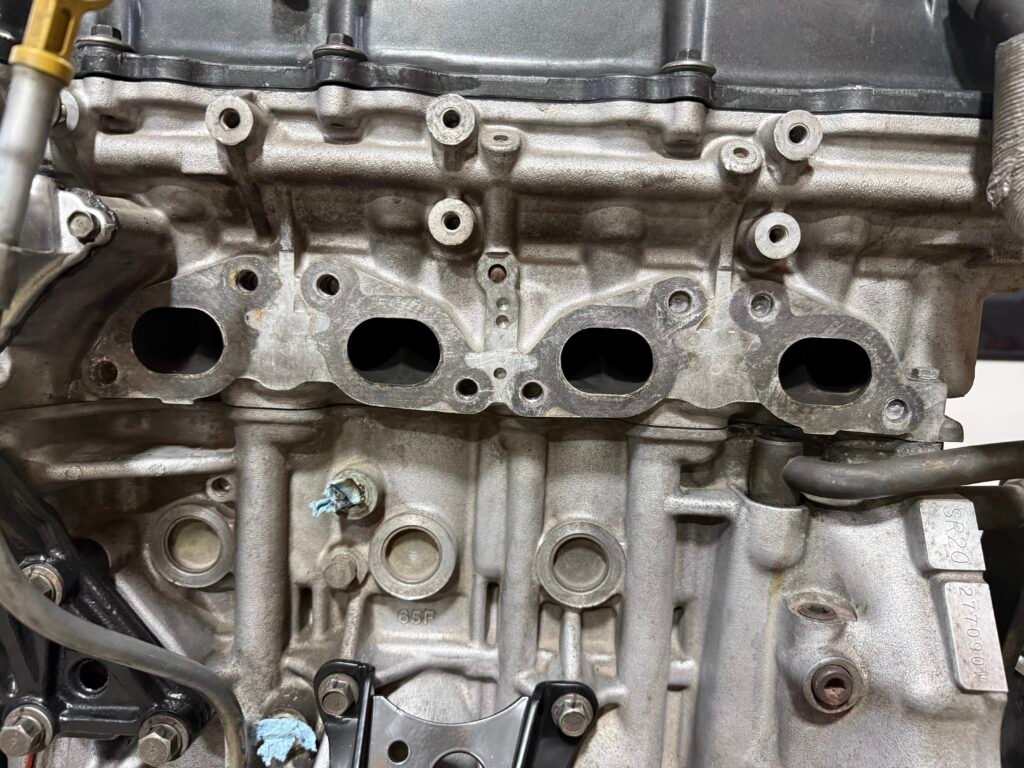
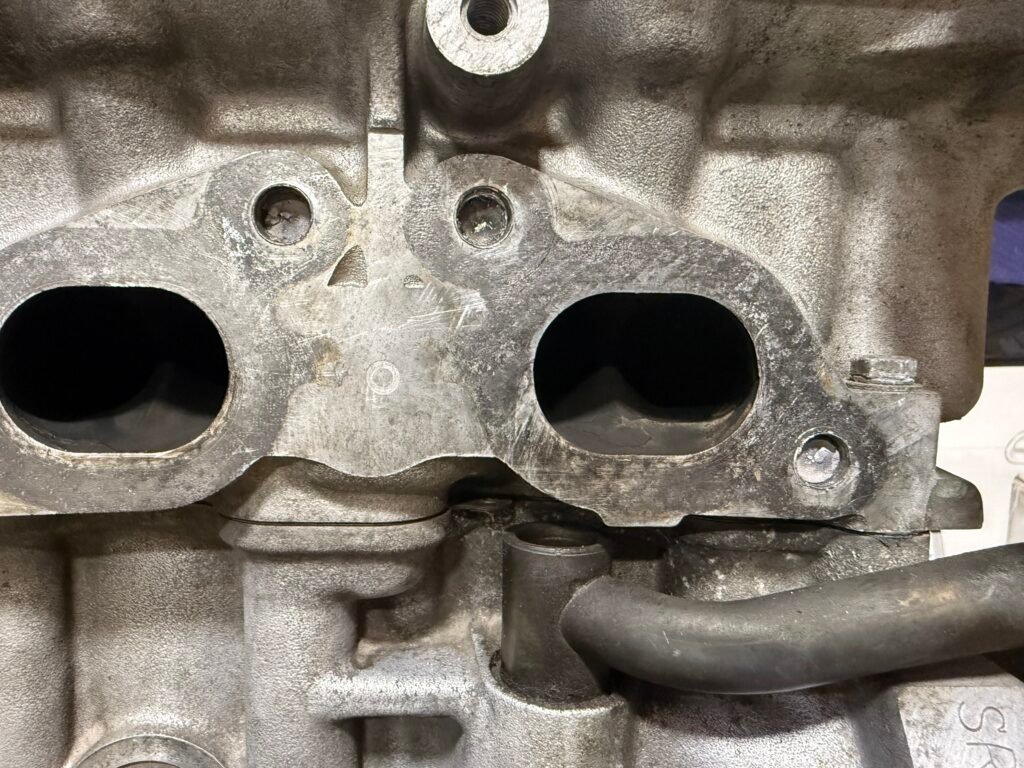
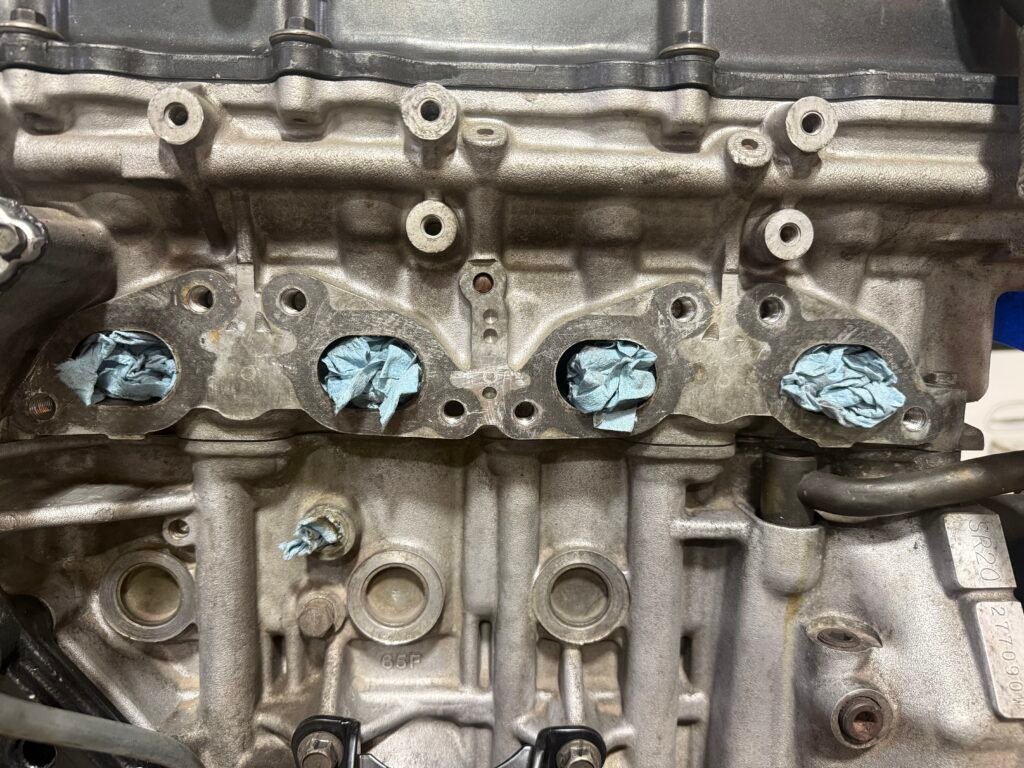
Intake manifold mocked up
Vapor honing is such a cool cleaning method. It pretty much sandblasting with water. Doesn’t damage your parts and makes them sparkle like brand new. I’m really glad I went and cleaned these parts up not just for visual purposes but to clean off areas of grime that would have posed a problem later. I had an injector bushing seat on Cyl #4 that was excessively corroded, it was screaming vacuum leak just looking at it. Just about every coolant neck had a layer of corrosion that needed to be cleaned off for my hoses to seal right.
Sharkhide Spray
January 25th 2026
Don't half ass it
Coolant necks and intake pipe vapor honed
Since I started vapor honing, everything I cleaned with degreaser looks like shit in comparison. So naturally I had to redo them.
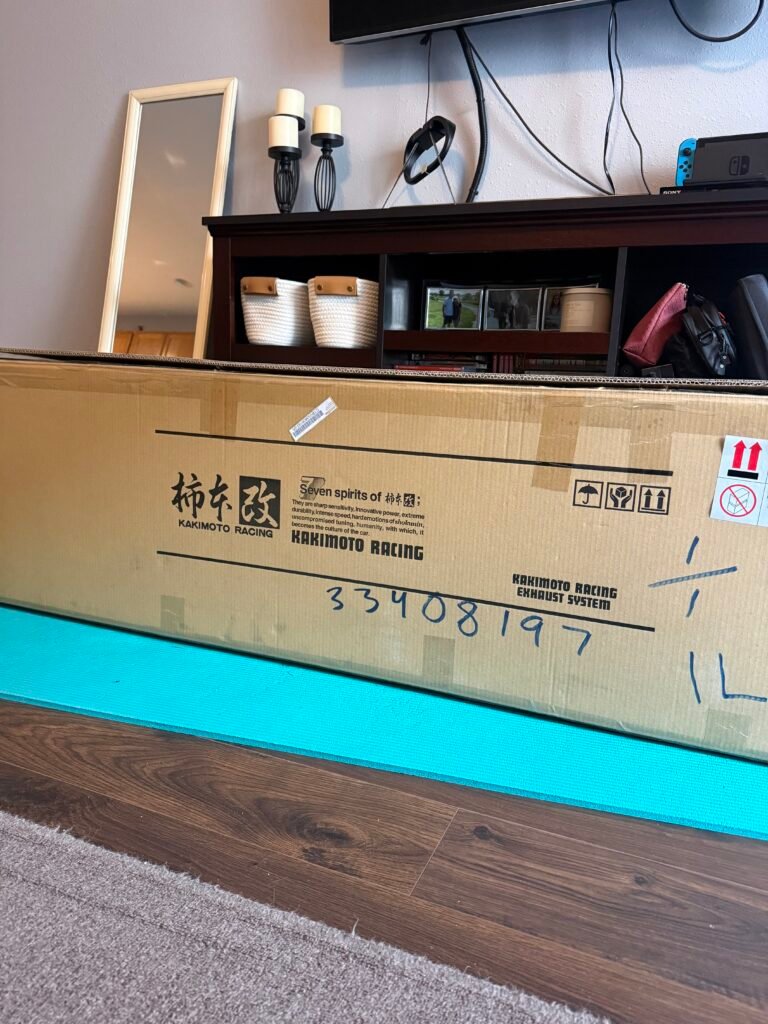
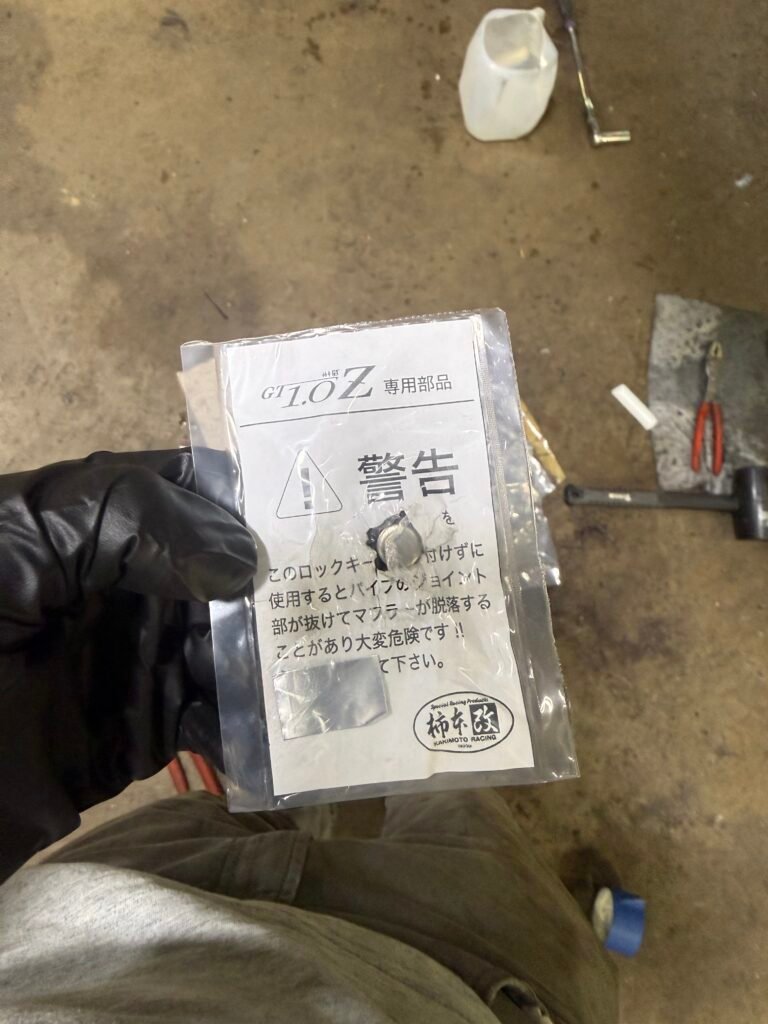
After seeing a couple video’s of Josh Deliz’s giveaway car and hearing it’s exhaust (Kakimoto GT1.0Z), it made my decision on the route I want to go for the exhaust. It sounds sooooo good. Called up Touge factory the next day and they were able to order one directly from Kakimoto, should see it in 2 months.
February 18th 2026
Parts collection continued
Powered by Max Cobra downpipe and S15 xmember exhaust hanger
Down pipe showed up today. I went the PBM route for the ease of “plug in play” and the flex pipe is installed already. Originally, I wanted to go the custom route but right now I don’t have the means to easily get my car to my fabricator homies. My buddy Brendon hooked me up with his crossmember exhaust hanger off his S15 that he’s not using anymore, so that was super cool not having to buy one of those.
February 21st 2026
Parts Collection Continued
Brains of the operation
Link FuryX | MXS 5" Dash Street Edition| Wiring specialties Pro harness
Link Boost Control Solenoid | Carshop D-Style IAT sensor, Oil pressure, Oil temp, and Fuel pressor sensors | AEM MAP sensor | Bosch 4.9 LSU Wideband| Five-O 550cc Side feed injectors | NGK Iridium plugs Heat Range 7
Shoutout Dale Hornsby at Carshop D-Style. He was extremely helpful at helping me align what I needed to achieve my ECU/Harness/ Dash/ failsafe goals and was able provide insight on questions I didn’t think of to ask. Highly recommend.
💭 Thought Process
Link FuryX ECU
I chose this ECU because there is a local tuner nearby (Car Shop D-Style) for support and as I've mention earlier I wanted to "future proof" the engine for any route I want to go while installing fail-safes to protect it.
Link MXS Strada 5" Street Edition
After running the numbers it cost about the same as buying all the gauges individually. All sensor info is in one place — no unnecessary holes, pods, or blocked vents.
OEM speedo was dropping out — moving to GPS makes sense
Track logging capability
Street edition keeps standard icons (CEL, temp light, etc.) and turn signal indicators for street driving
ECU Connection
Connects to the ECU via CAN — just a 2 wire connection accompanied with a power and ground. Connecting the headlights and turn signals to the dash is a little more involved due to having to hook up inputs from each to the optional harness.
🔧 Future Proofing & Fail Safes
Future Proofing my ECU
Maximum I/O for any potential adds down the road
E85 capability
Onboard Wideband Control integrated in the ECU — no external controllers needed
Drive by wire capability
Resale appeal beyond SR swaps — compatible with JZ and other setups
⚠ Fail Safes
Oil Pressure Sensor — protects the engine if the oil cooler gets hit or fittings fail
Oil Temp Sensor — prevents oil from overheating and breaking down, keeping lubrication in check
Fuel Pressure Sensor — realtime data to the ecu for optimal AFR adjustments, eliminates a gauge in the engine bay
ECU Rev Limiter — adjustable cut-off settings built right in
February 25th 2026
Parts collection continued
MAKO Motorsport 3D printed dash insert
The quality of the dash insert is top notch, tabs are rigid, Link Dash fits perfectly, and all the edges are smooth. It’s an expensive piece but it’s worth it seeing the quality of it.
Chase Bays power streering reservoir
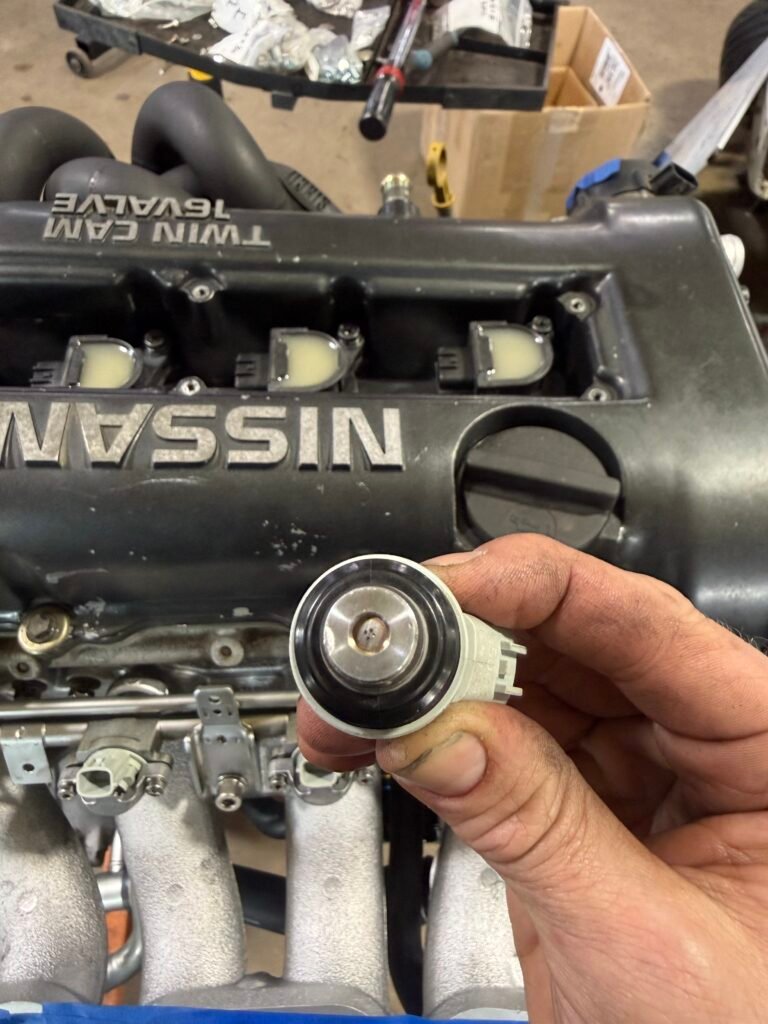
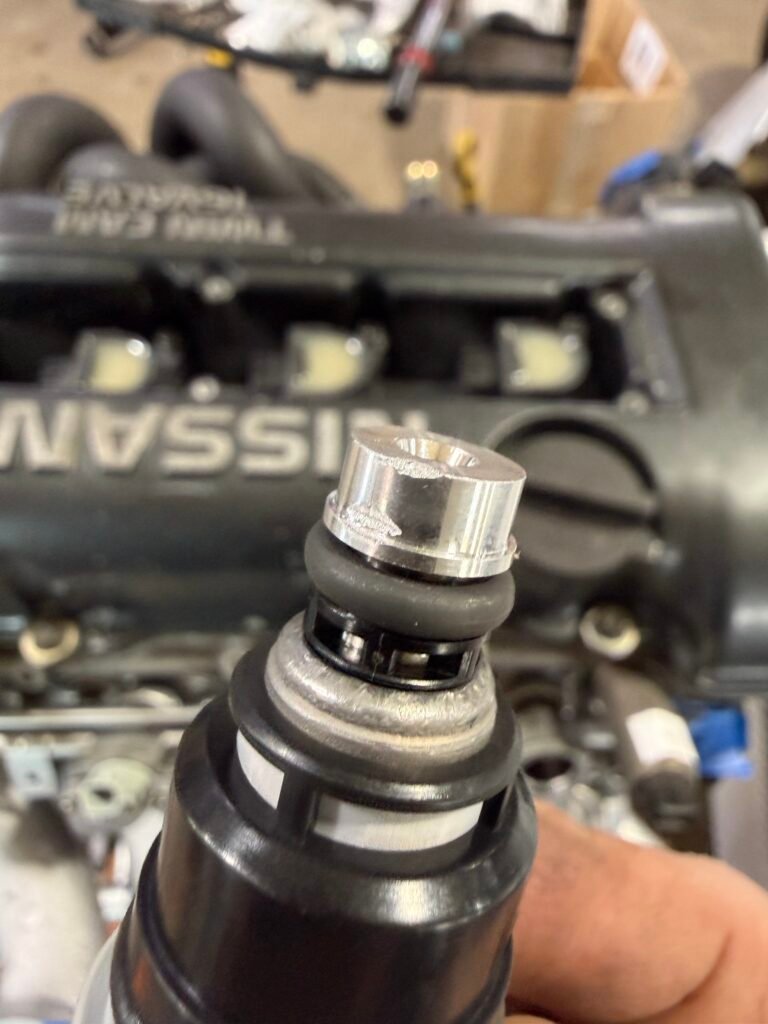
FIve-o 550cc injector install
550cc Five-O injectors installed
My dumbass dropped one of the injectors
Dinged the side of the cap on one injector, it should be OK. If I run into some issues, it’s going to be my first spot to look (#1 Cylinder).
Vapor honing
Make that shit bang
Coolant hard pipes before vapor honing
After vapor honing. Coolant hoses installed
March 1st 2026
Assembly continued
Intake vacuum hoses installed
New vacuum hoses, IAT solenoid, and lower IAT pipe installed
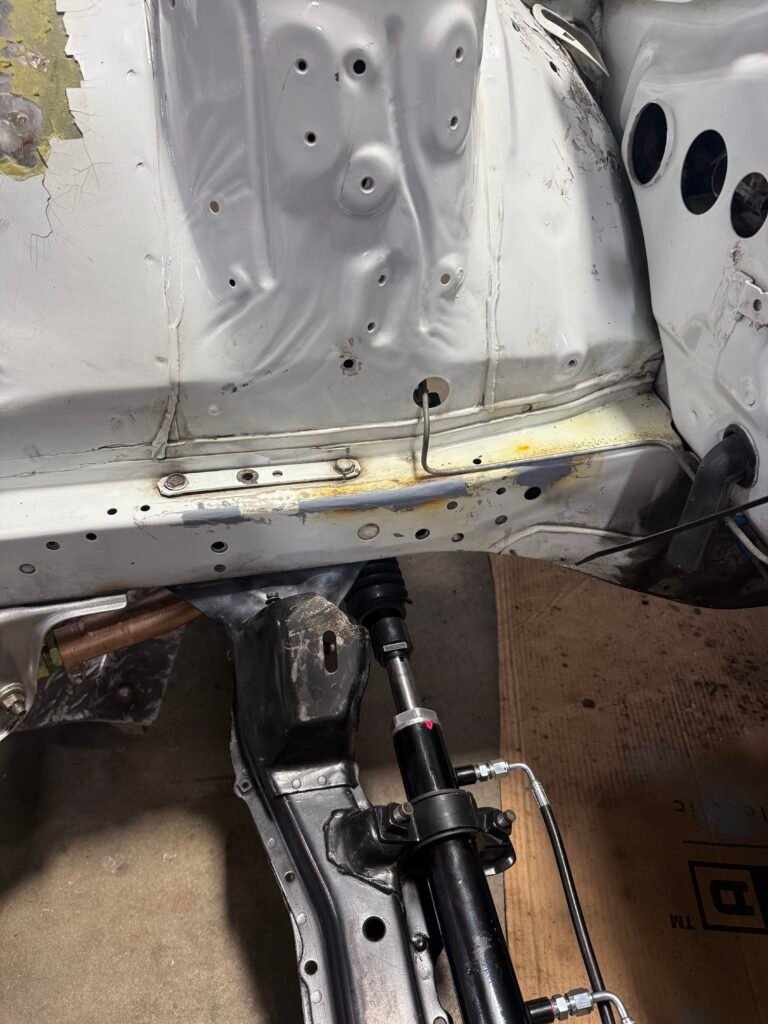
Removed my power steering rack and cleaned up the area
March 3rd 2026
Parts collection continued
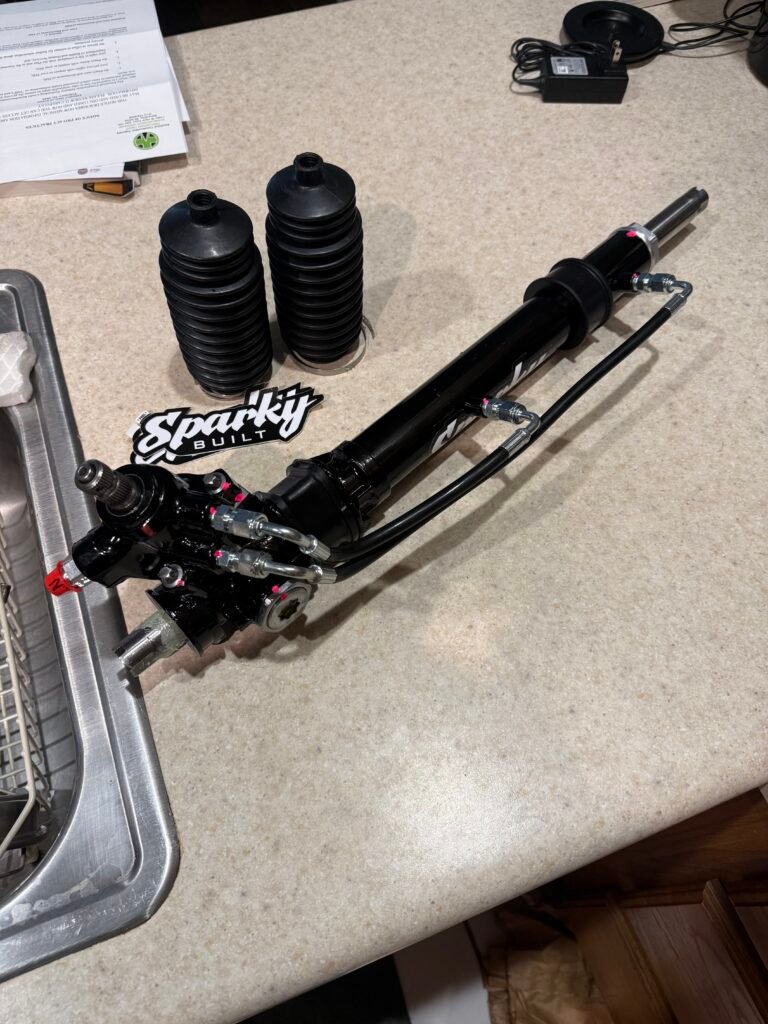
Sparkybuilt power steering rack
The rack I sent off to Sparkybuilt showed up today. This rack looks SO good! I highly recommend this service if your looking to replace yours. The rack is completely rebuilt, powder coated, and converted to AN fittings.
After installing all my brackets/ supports after painting them I realized I must’ve did a poor prep job. All the paint seemed to scrape off rather easy with bolt and accessory contact. So since my buddy had a powder coating setup., I decided to learn how powder coat everything. Everything turned great!
March 7th 2026
Assembly Continued
Exhaust stud removal and extraction
Exhaust stud removal
Broken exhaust studs
Studs removed
I decided to remove the new studs I put in and install OEM studs. Reason being, I didn’t like how the studs didn’t extend past the nut.
Upon removal, three of the studds snapped off in the head, which was pretty lame. Thankfully my buddy Brendon helped me out to remove them. He was able to use a fine tip cone bit to grind a center point in the stud (a center punch wouldn’t work in this situation) then drill the center and pound on an extractor tool to back the studs out.
GK Tech shifter return spring install
GK Tech Shifter Return Springs
I bought some GK tech shifter springs after seeing Josh Deliz talk about them on his latest raffle car, he mentioned they made the return feel better so I wanted to see for myself. The kit comes with 3 different strength springs, Hard, medium, and soft. I tried the hard springs first and did not care for it. It reminded me of my Z32 trans with my VH (Maybe it was also due to the short shifter, idk). It felt less natural and you had to put more “muscle” into your shifting. So I took swapped them out for the medium springs. These felt great. It has a very natural flow to the shifter now, shifting from 2nd to 3rd is simply pushing up with no slop. The springs center the shifter very quickly with just the right about of tension to make shifting very smooth. I didn’t bother with the soft springs after installing the medium. Install was easy, one bolt on each side of the shifter. Remove it, pull the old spring out, install the new one, and your done.
🎥 Reference Video
GK Tech Shifter Return Springs
Accessories Install
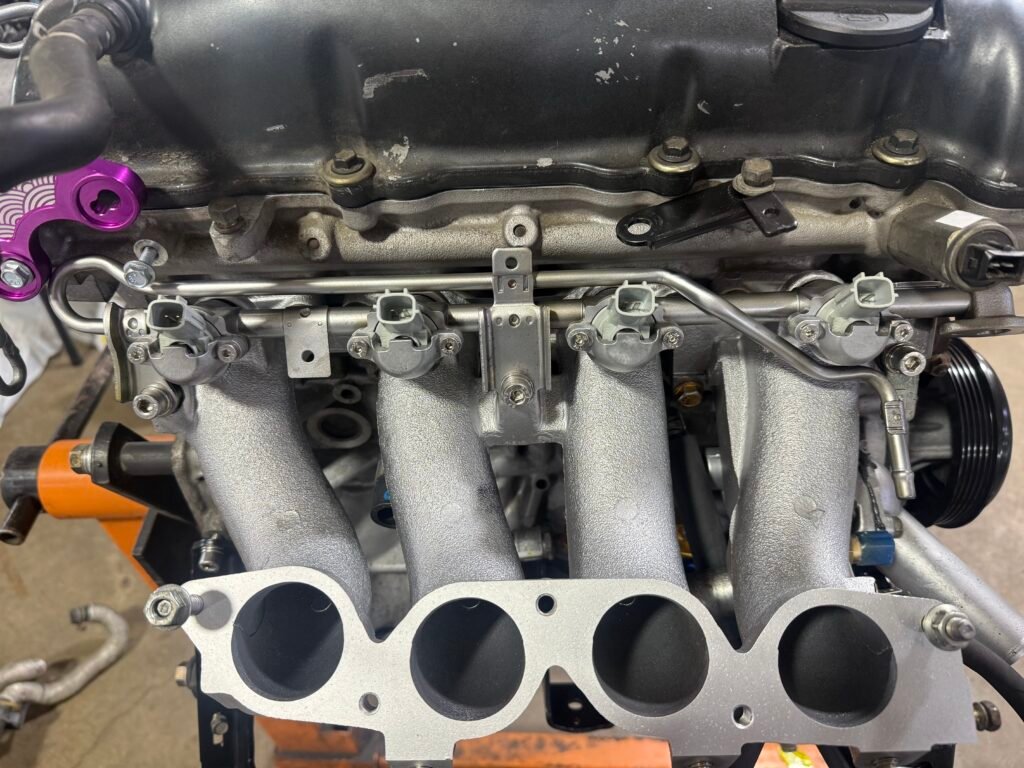
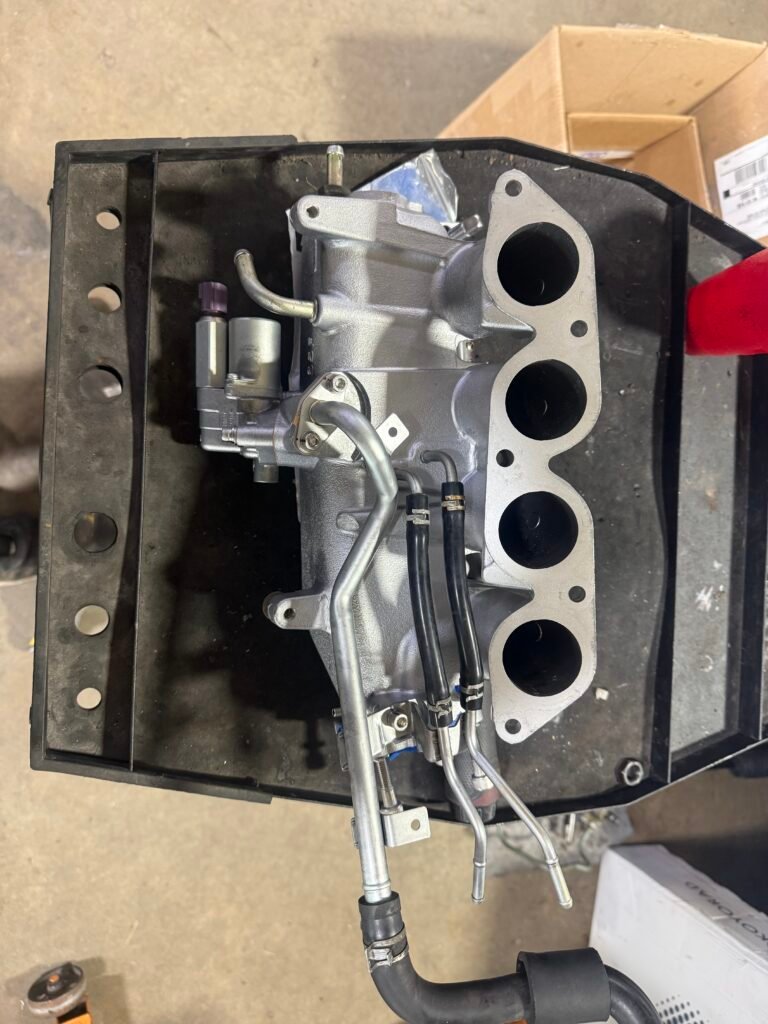
Accessories and intake manifold installed
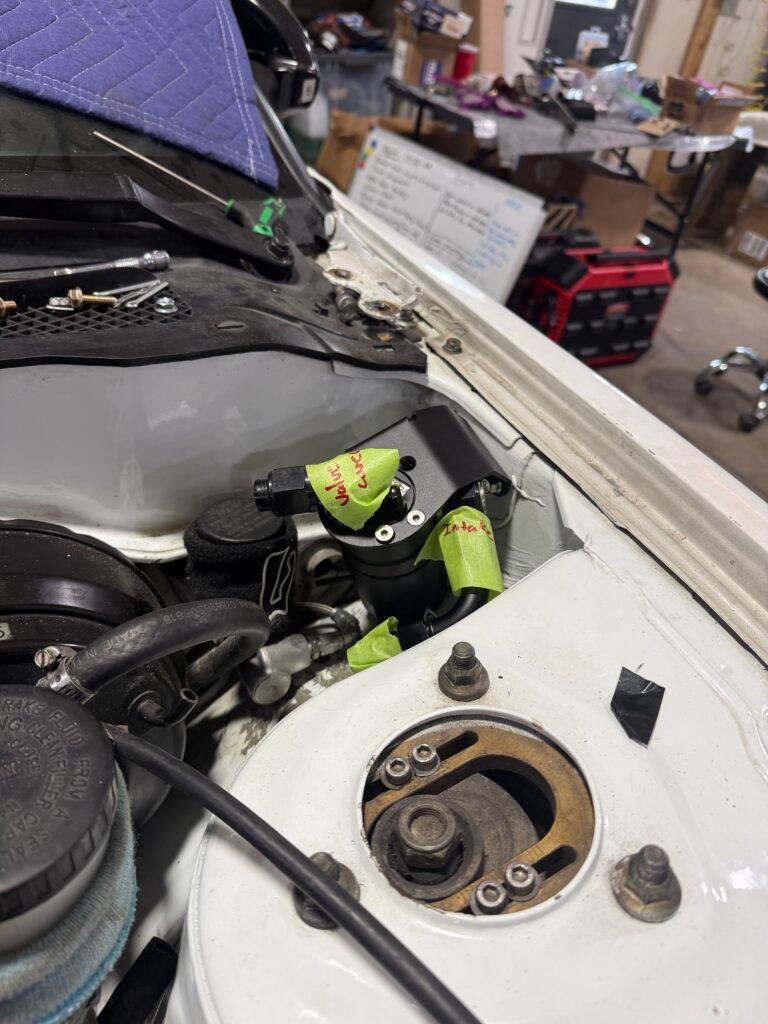
Remote MAP sensor installed
I did my best to mount the sensor in a way to have the shortest vacuum hose possible while keeping it easily serviceable. As for the vacuum line, I made it a dedicated line to have the most accurate readings. I found a sensor specific mount on Colab garage. Really impressed with the quality and intuitiveness.
💡
Pro Tip
This is a cool idea, but for added safety you should additionally zip tie the sensor in place.
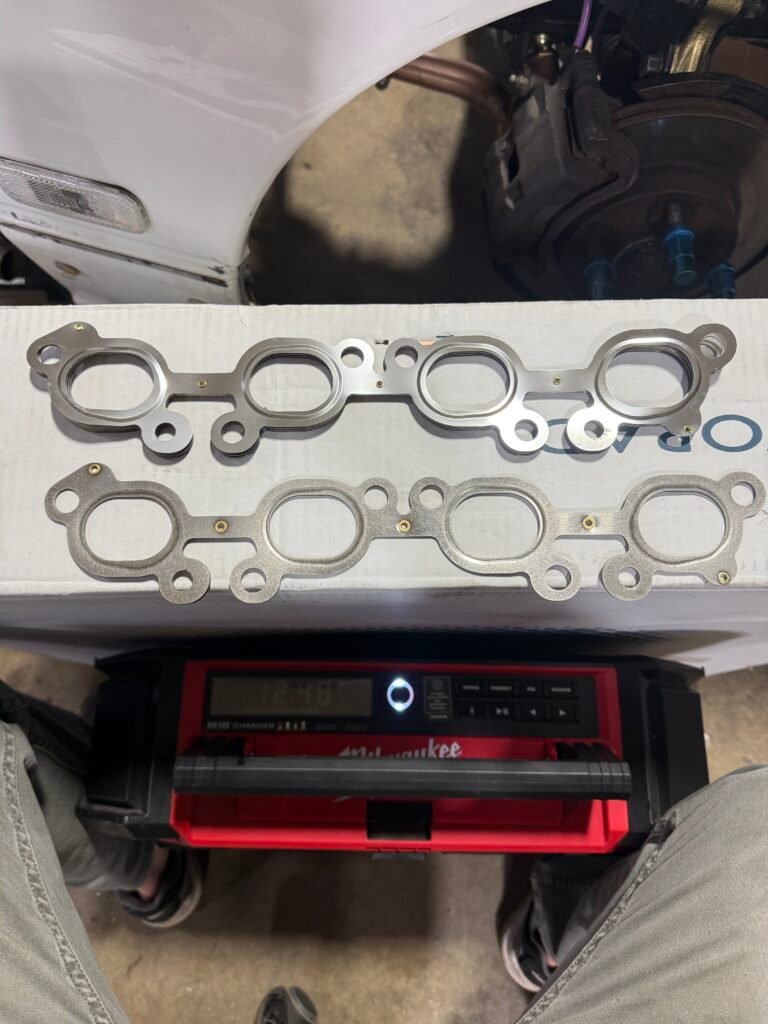
I ordered a OEM turbo manifold gasket to have as a spare and noticed a couple key differences from the Sinco gasket. OEM is the upper gasket, lower gasket is the Sinco OEM: 7 layer Sinco: 5 Layer
The most subtle thing I noticed is that the stampings are opposite (OEM is inward while the Sinco is outward). I’m not to sure how this effects anything but it was worth noting.
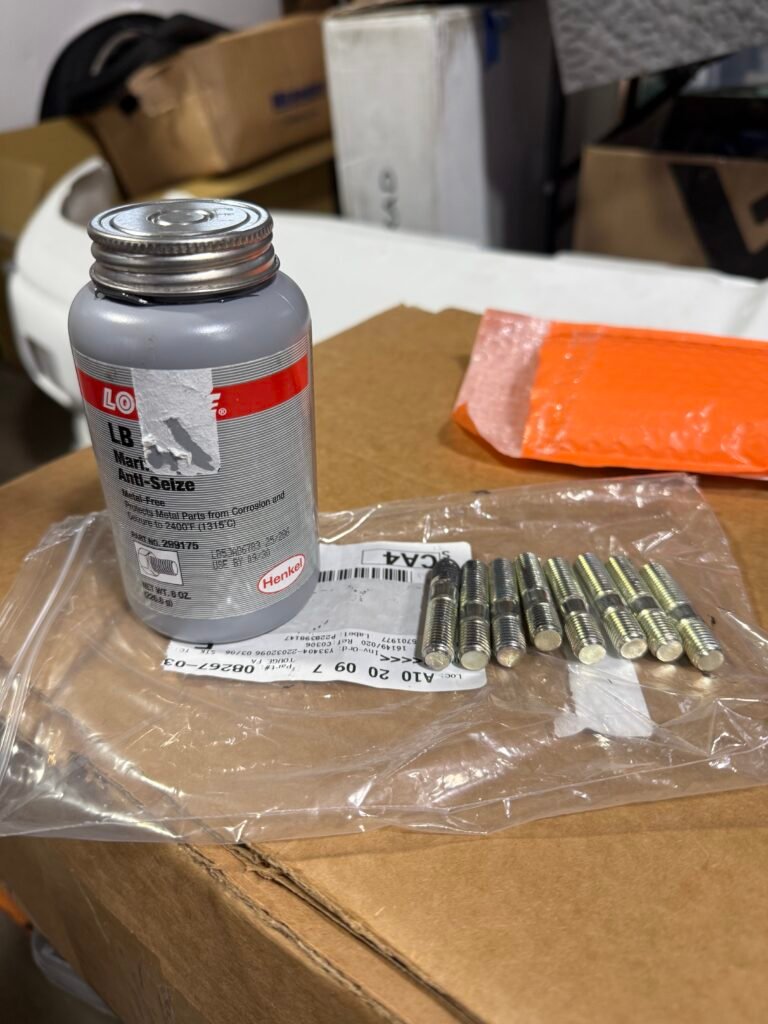
OEM studs and high temp (2,400 degrees) marine grade antiseize
OEM exhaust studs installed
Studs installed. I fastened them until they were good and snug then measured each stud to ensure equal lengths were protruding out (1″). After loosening the double nuts, the stud still stayed fixed so i’m confident they aren’t going to back out.
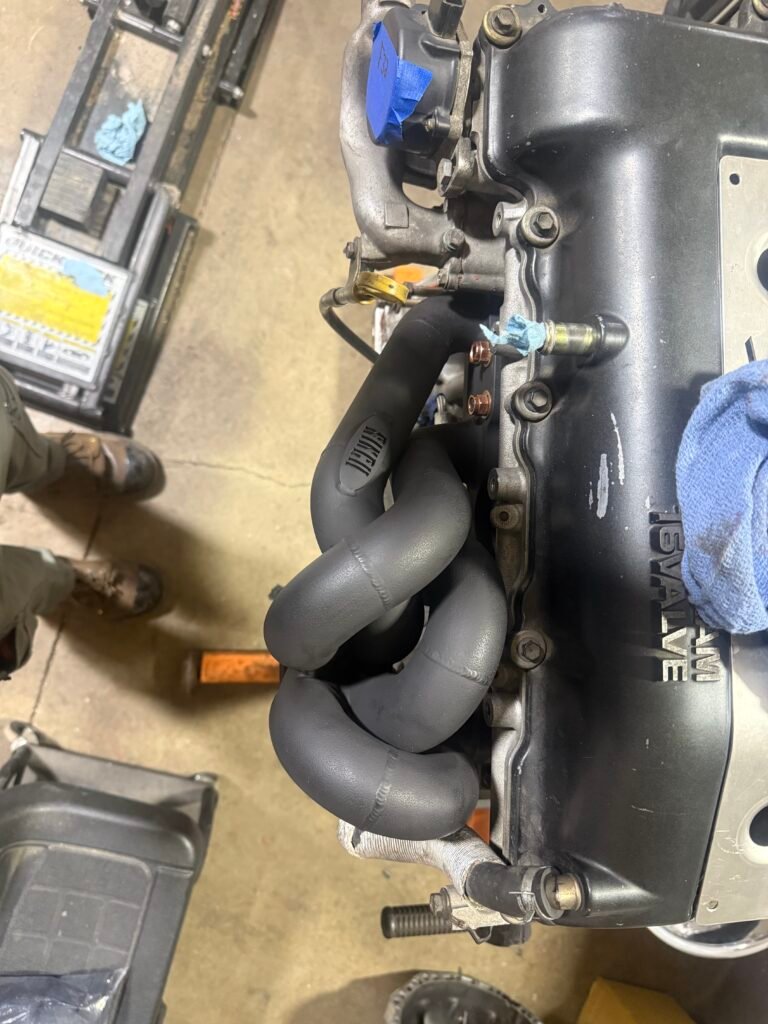
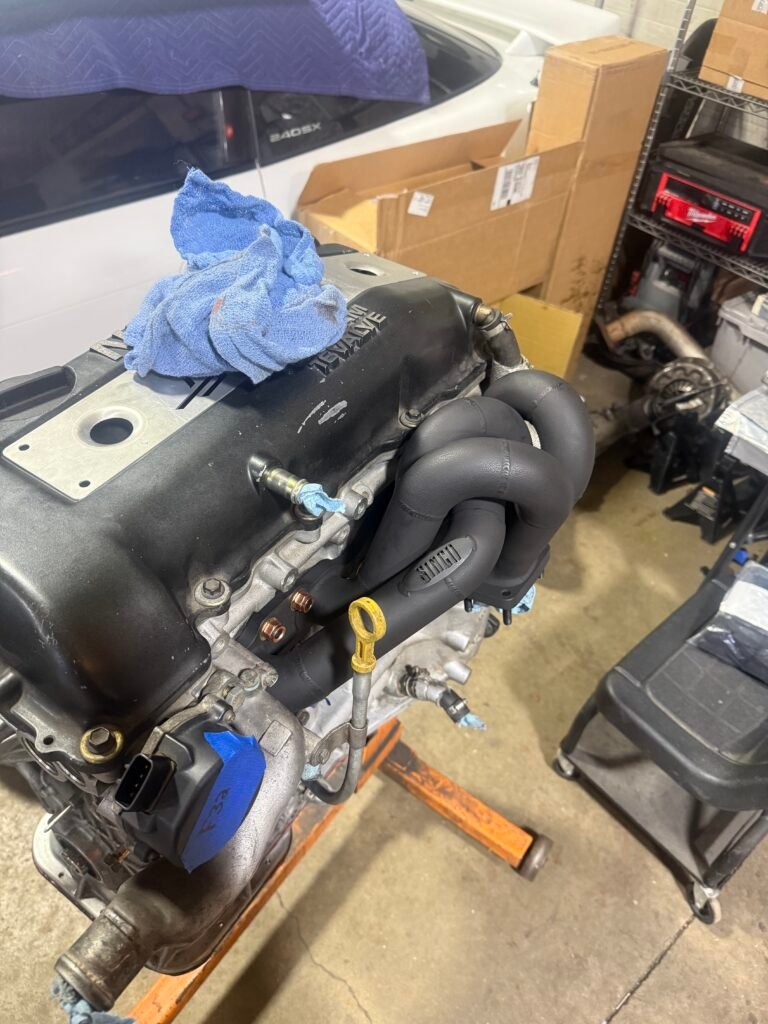
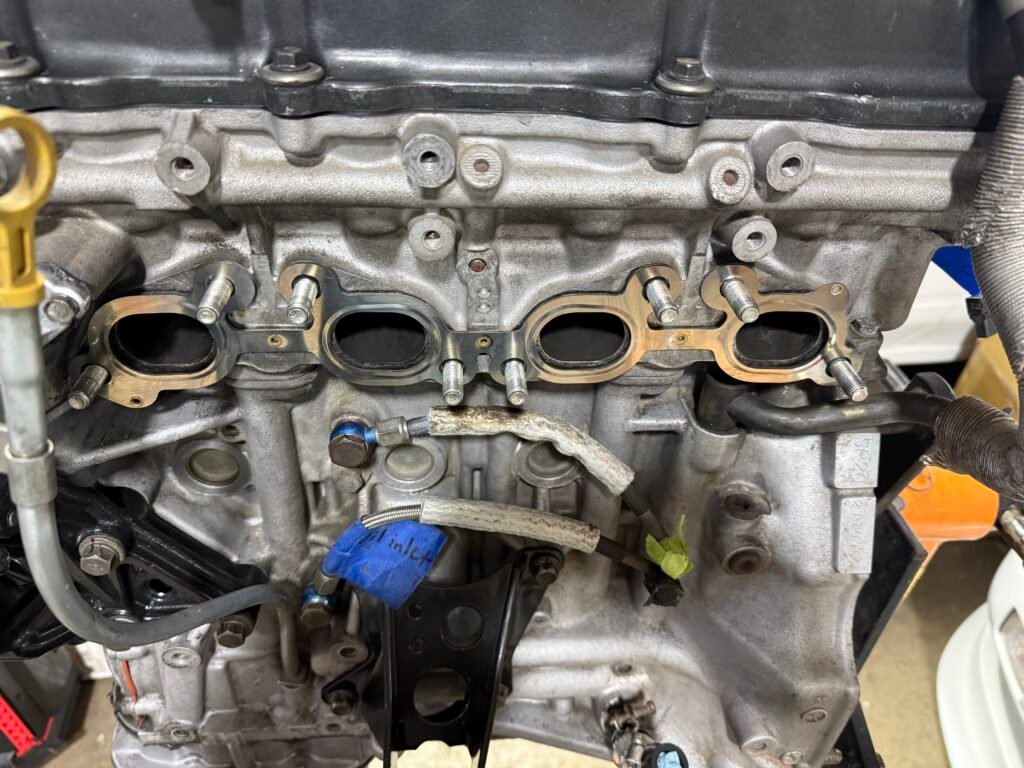
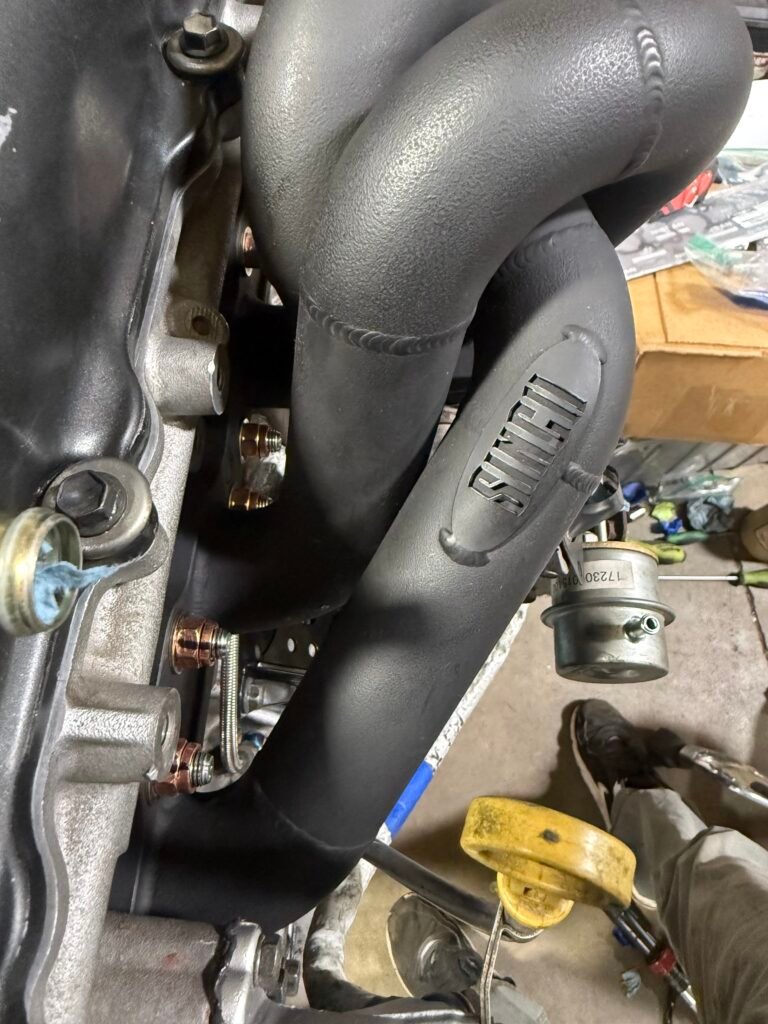
Exhaust manifold and turbo installed
Exhaust manifold and turbo installed
Flywheel, Clutch, throwout bearing, and transmission install
⚠️
Warning
Make sure you install the engine plate before you install the flywheel.
I found mine at the bottom of a box after everything was already in the car — now it's time to get reps pulling the trans. 🙃
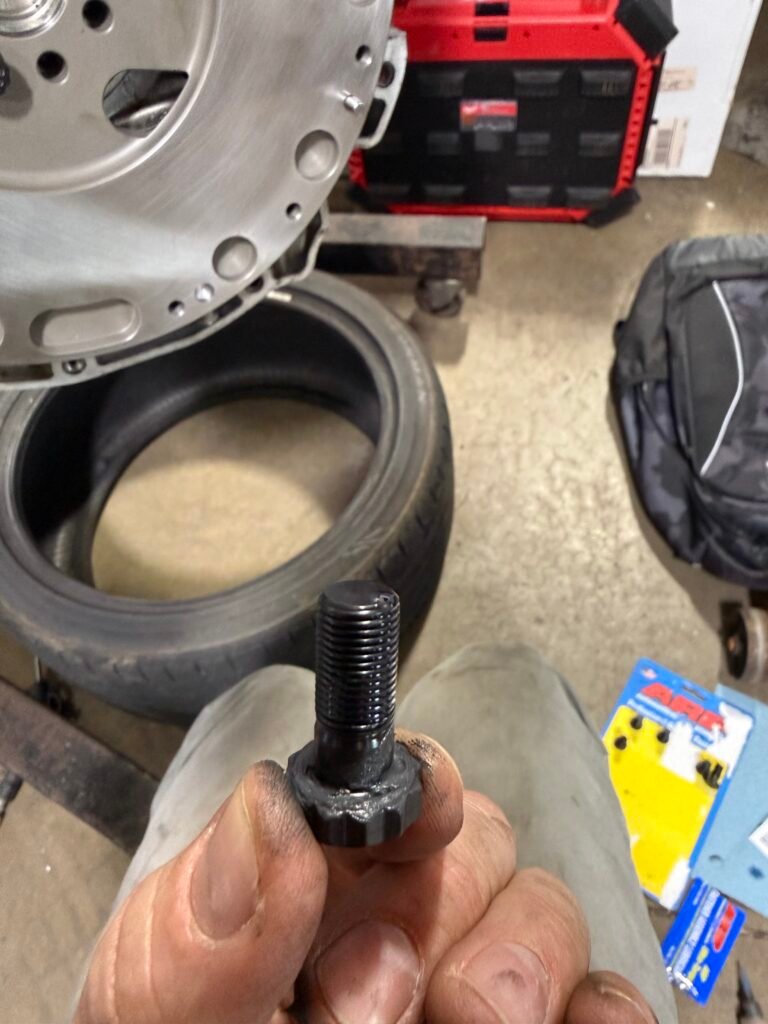
Flywheel Install
I replaced the old hardware with ARP. Following the instructions I used a medium strength loctite 243 (anaerobic, and oil resistant) and applied the provided ARP assembly lube to the bottom of the bolt head.
Flywheel installed
Flywheel installed and torqued. I started by snugging up the hardware in star pattern, then I torqued in two stages. Stage 1: 50ft lbs
Stage 2: 100ft lbs
Notes: The Exedy flywheel did NOT come with the dowel pins installed. So I took a measurement of the depth in the flywheel, marked the dowel pin, then used a small socket (I think it was a 6mm) to sit on top of the dowel pin, then used a hammer to lightly tap on the socket until it bottomed out to my mark.
Clutch install
Exedy Stage 2 Clutch Installed
I used the same tightening sequence as I used for the flywheel install.
Stage 1: 15 ft lbs
Stage 2: 33 ft lbs
Notes: Clutch is a metallic compound with 290 ftlbs torque rating
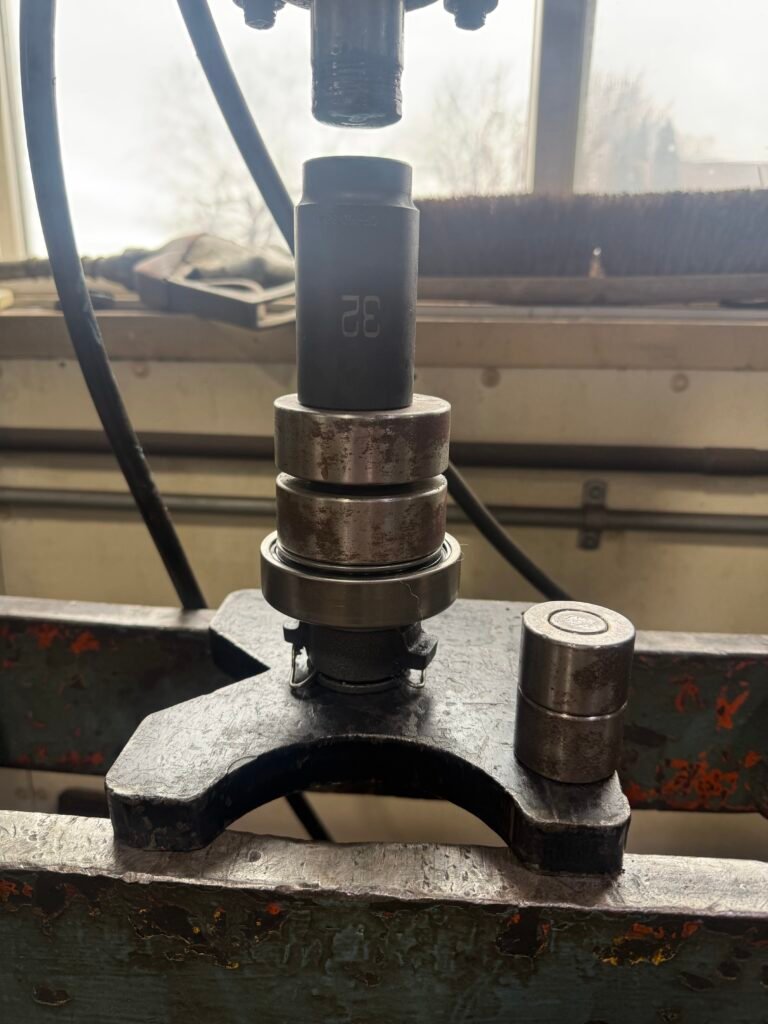
Throwout bearing install
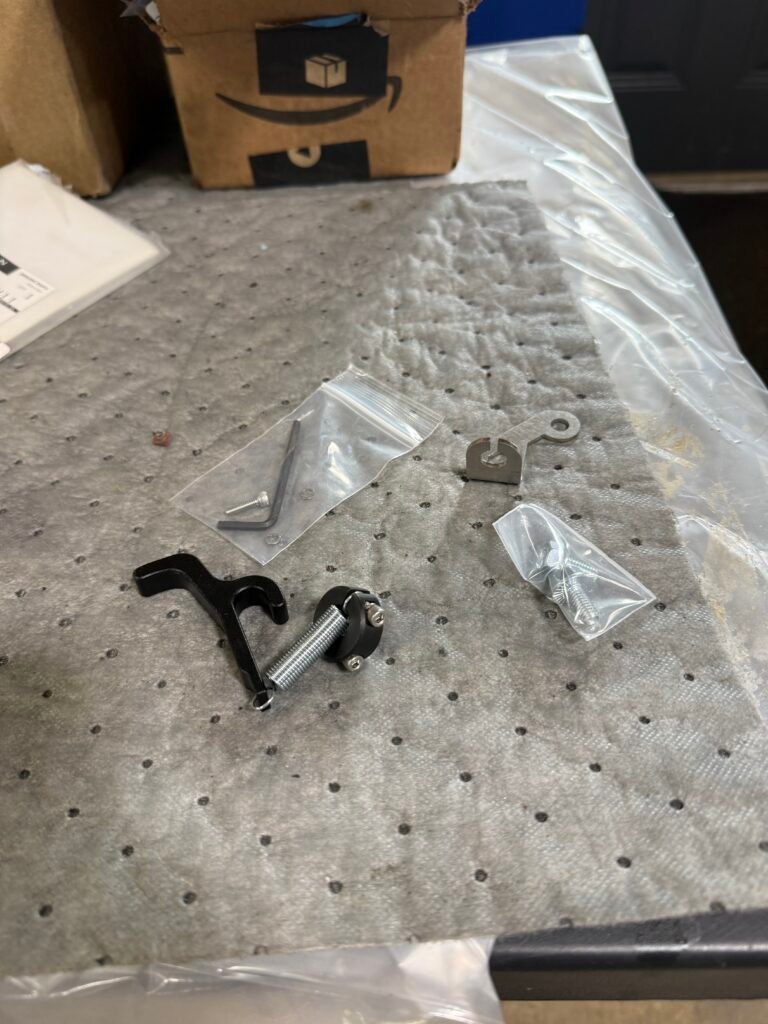
I started by using a 26mm socket to remove the throwout bearing sleeve.
Once out, I used a 32mm socket to install the new bearing, the socket will bottom out on the sleeve before it seats fully. So you’ll have to use a separate piece to place on the inner race to finish seating the bearing.
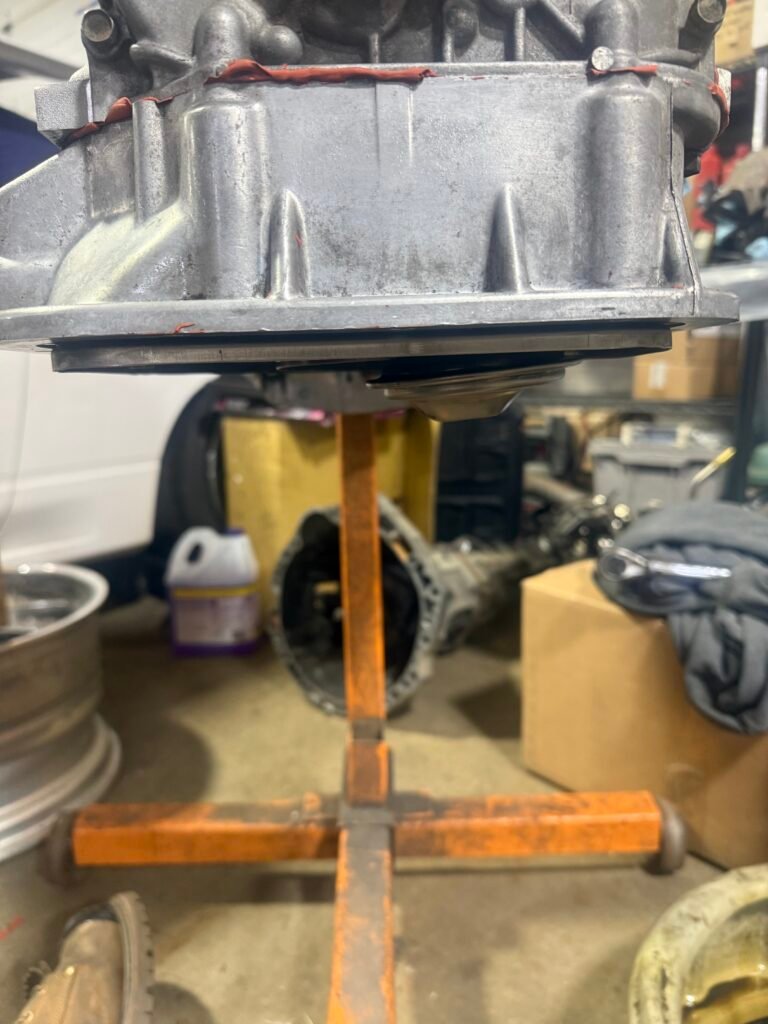
Transmission installed
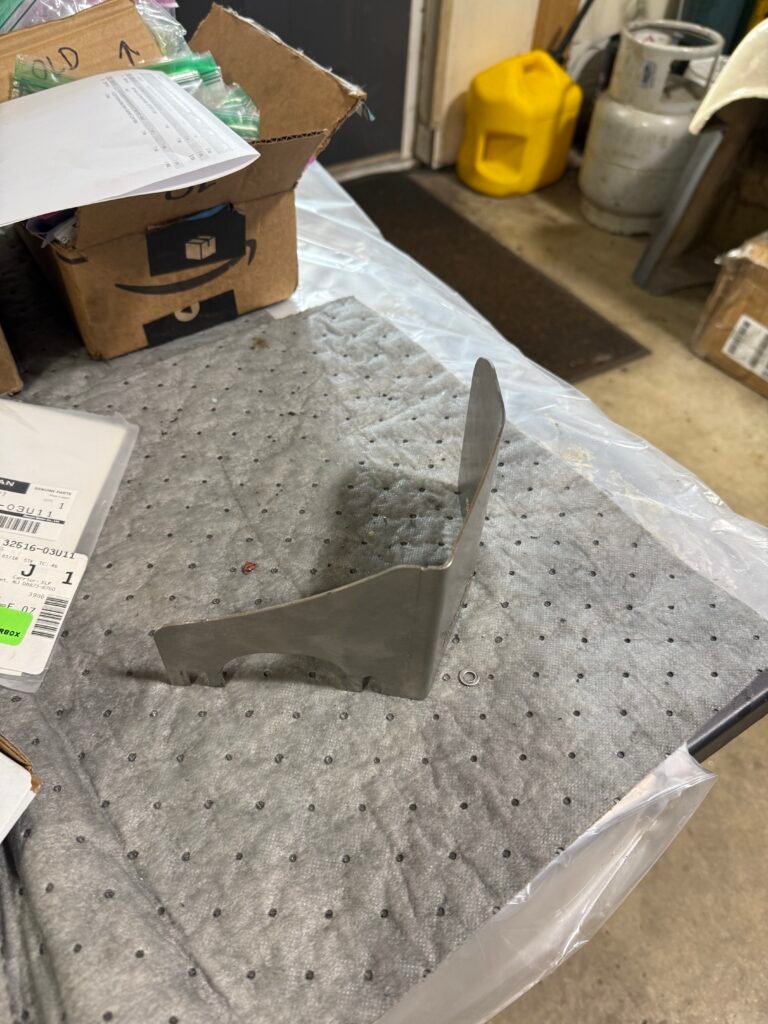
Surface rust repair
Some slight rust repair from when my VH45 was in. The headers rubbed on the frame exposing the paint, after 10+ years it finally had surface rust developing. Ground it down and sprayed it with primer. It’ll do for now until I can address it after the season.
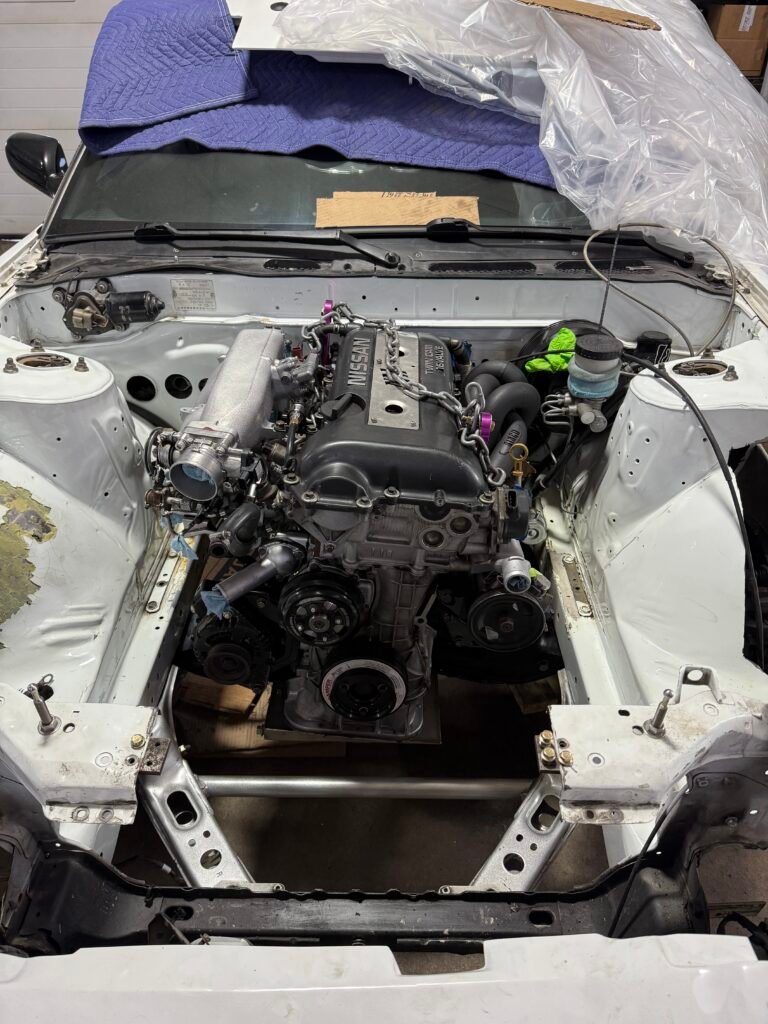
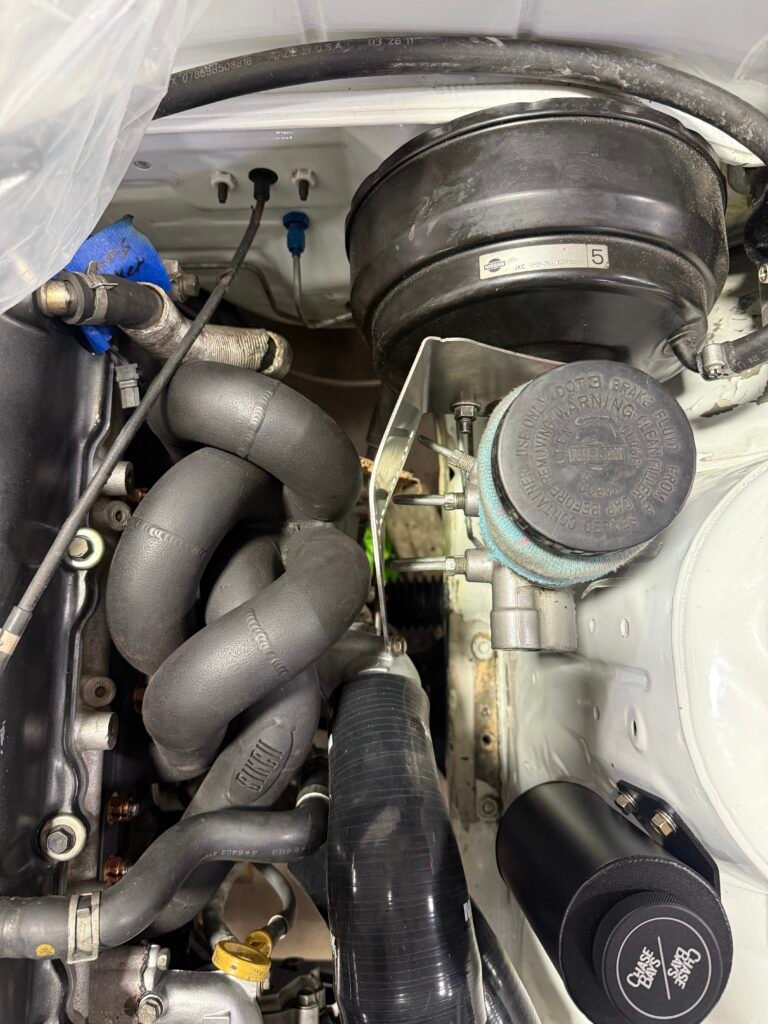
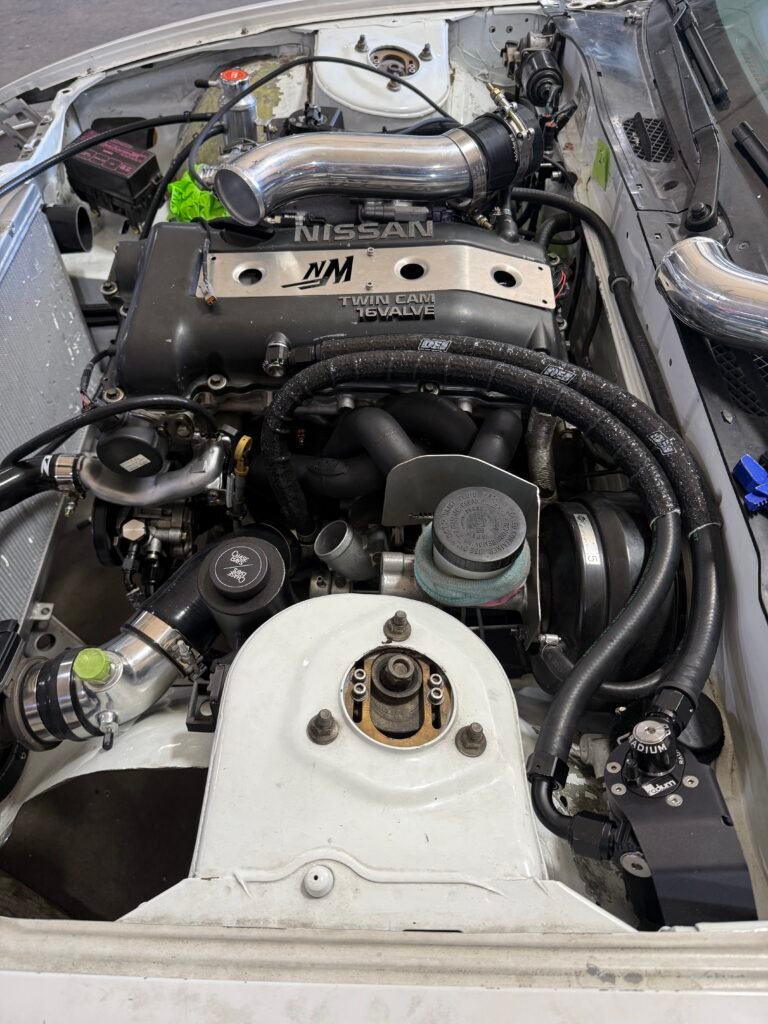
Engine installed
Engine Installed
Engine Installed
Engine Installed
I’m waiting on a shifter gasket and some transmission crossmember hardware to finish securing/ leveling the engine. In the mean time I can start getting the intercooler installed, pick locations for the remote oil filter, power steering cooler, and the oil cooler.
March 29th
Assembly Continued
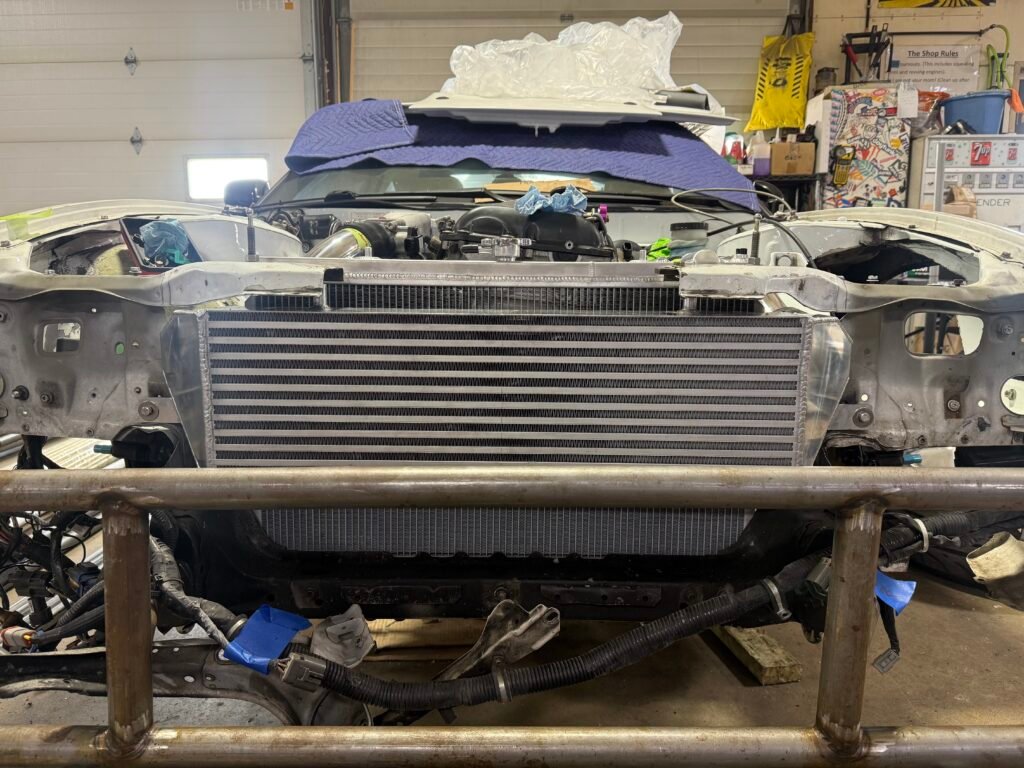
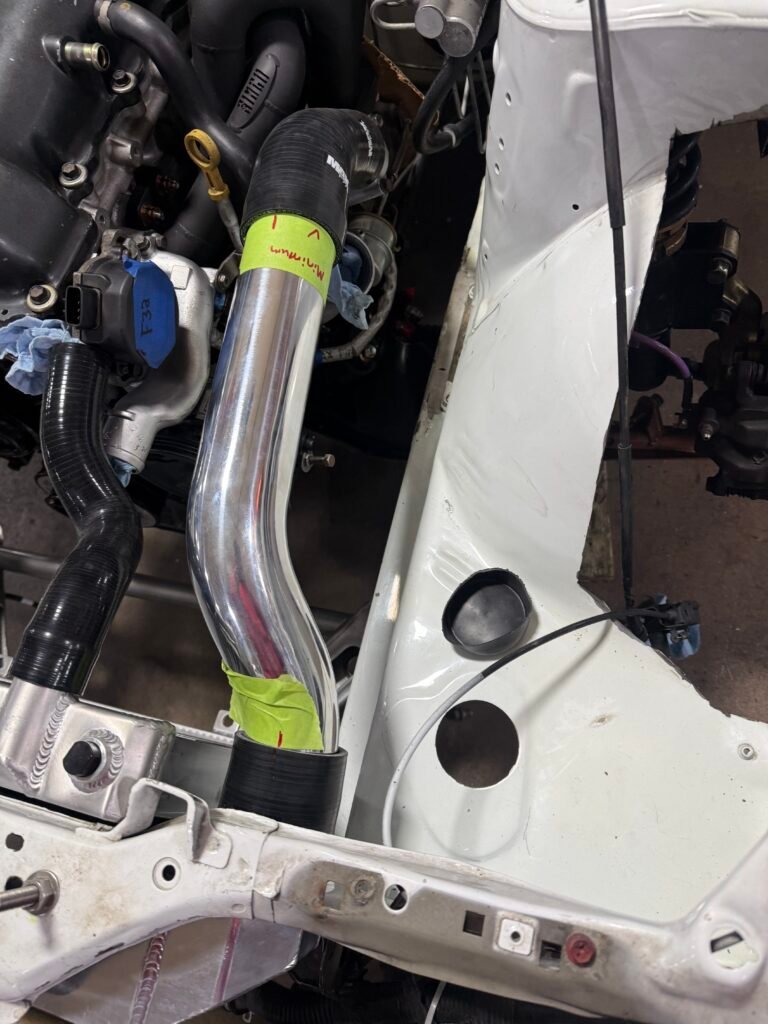
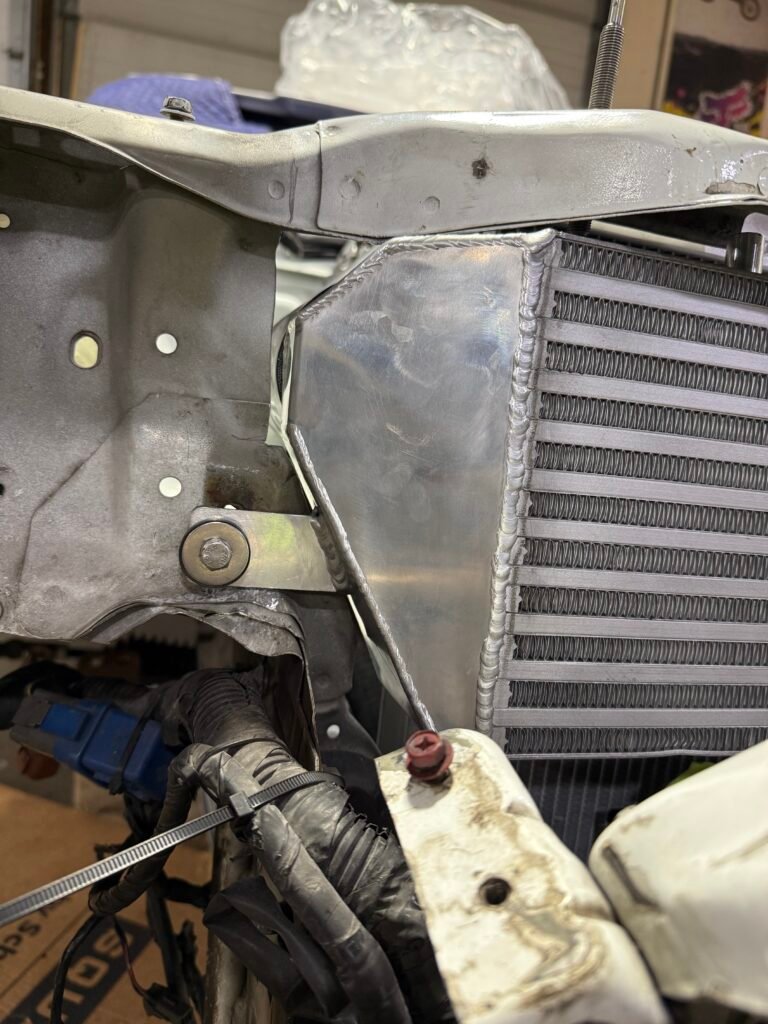
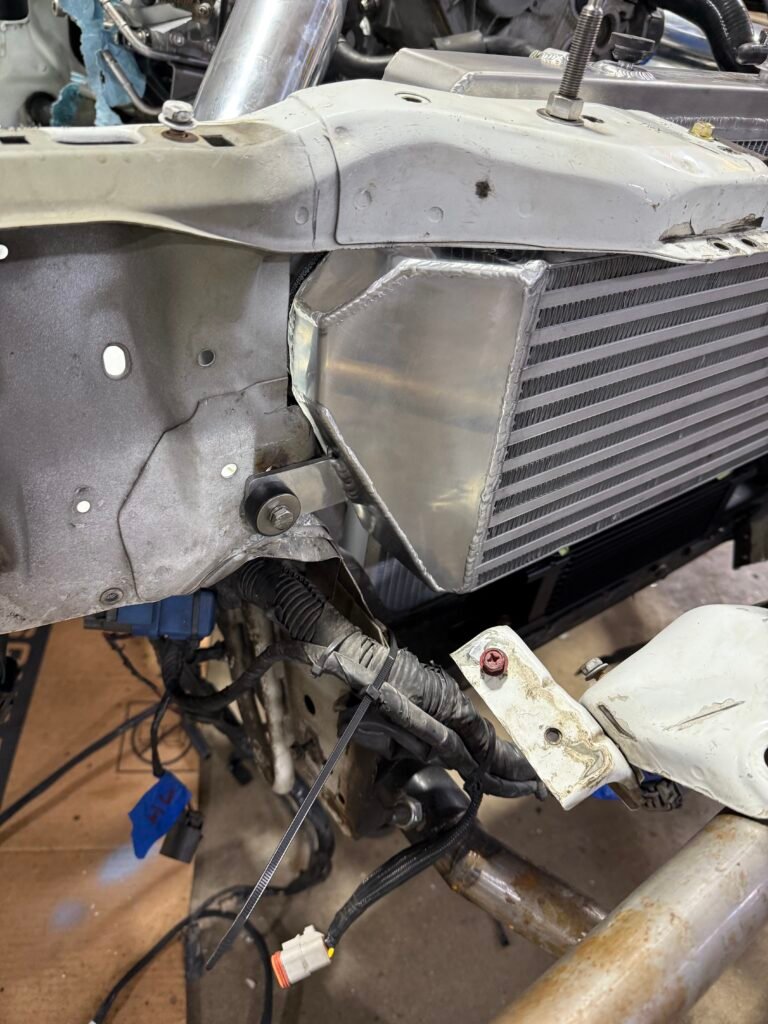
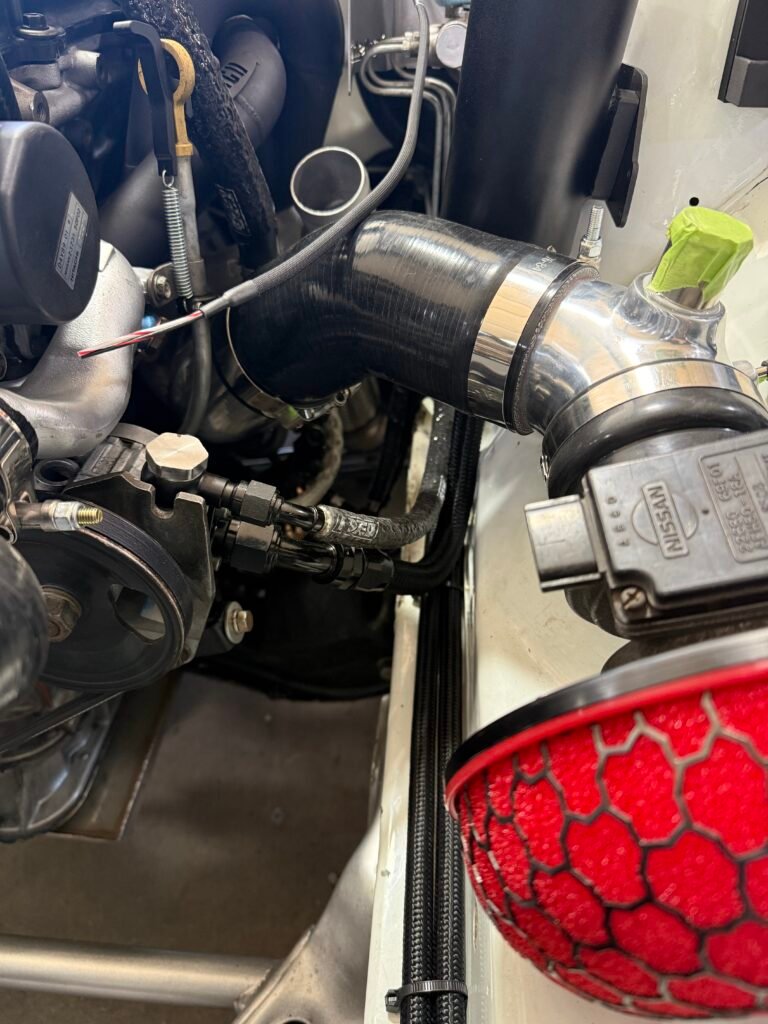
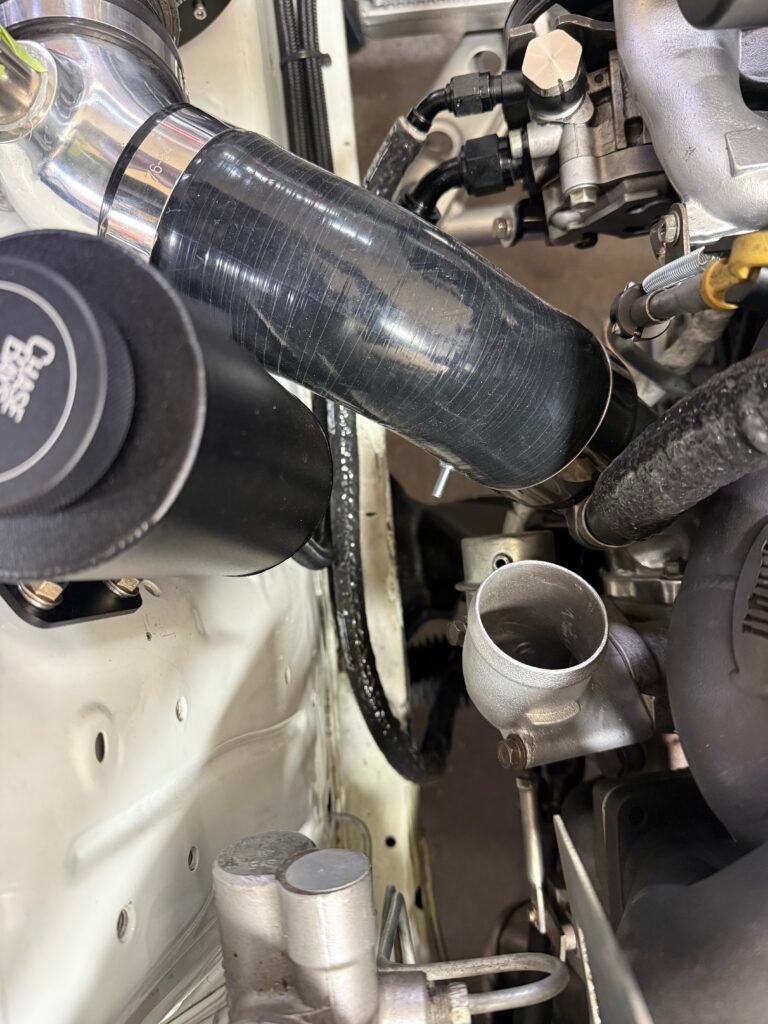
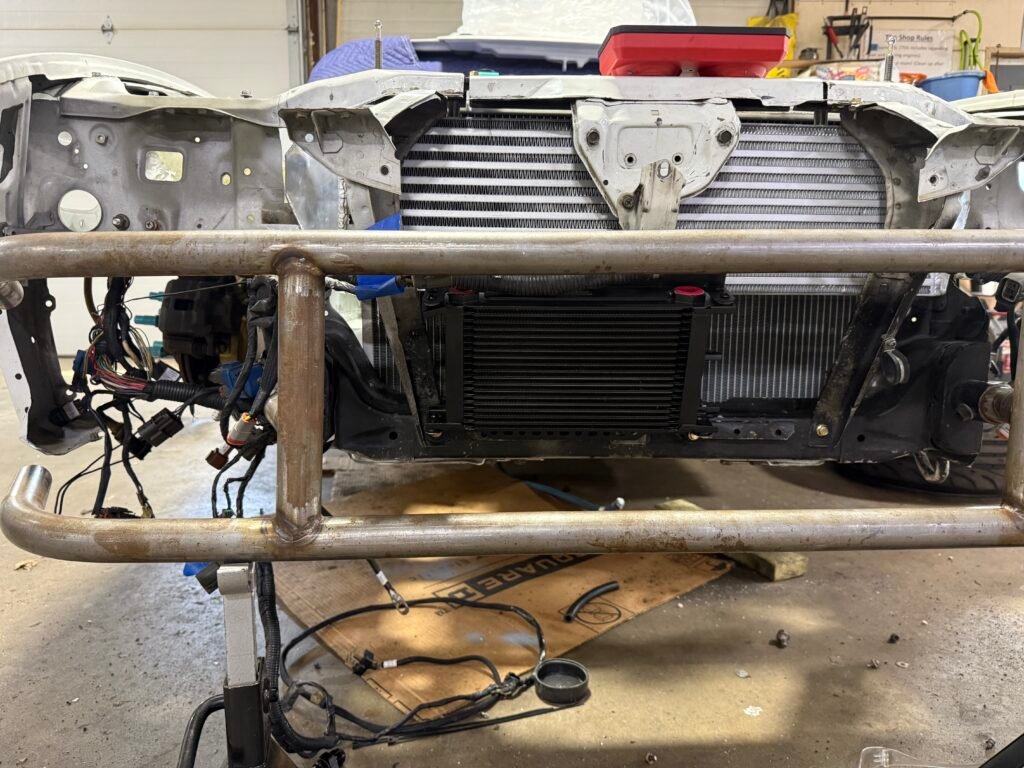
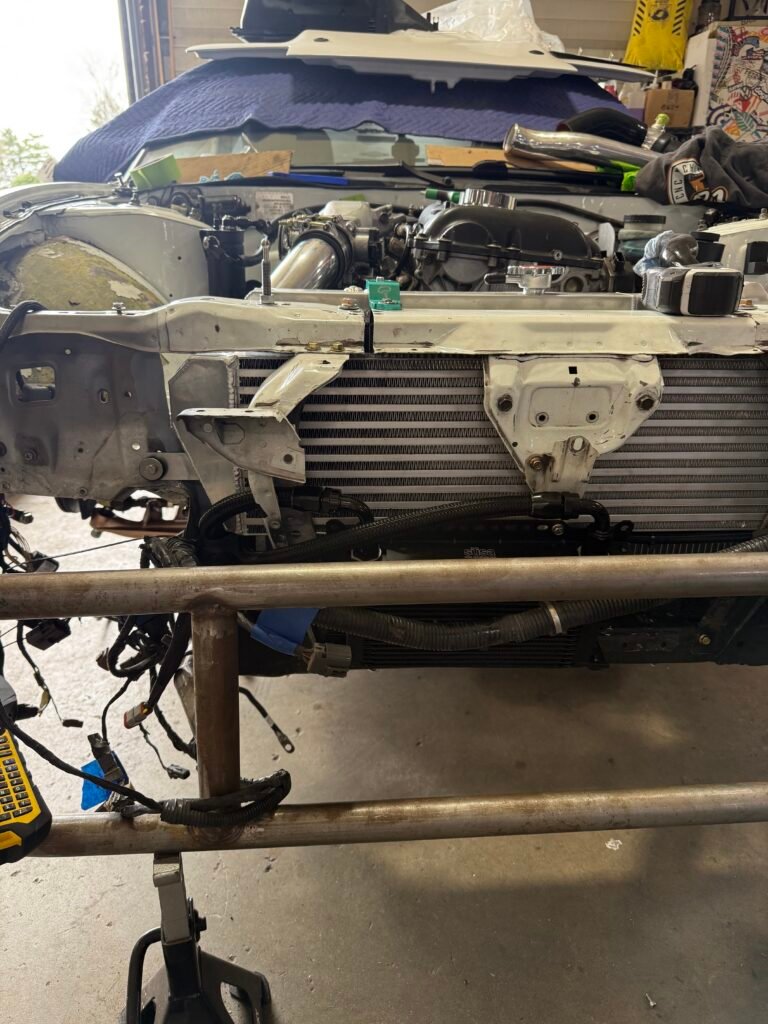
HMIC Install
I made a template to figure out the exact areas to cut
Marking out areas to be cut
Core support cut
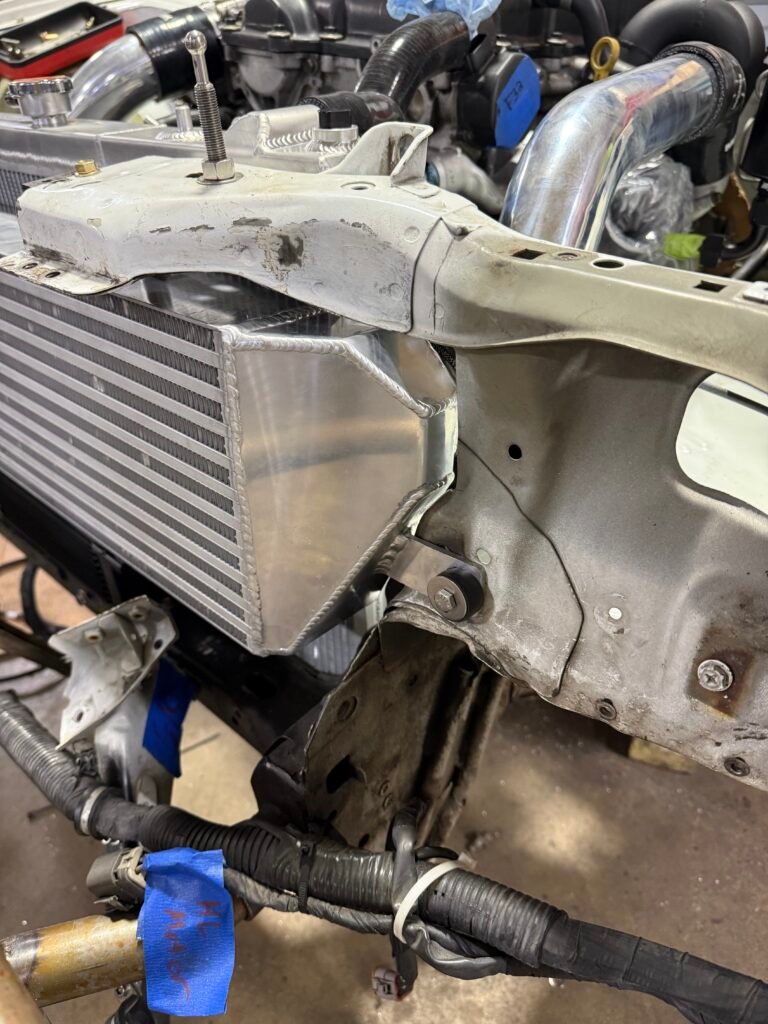
HMIC Test Fit
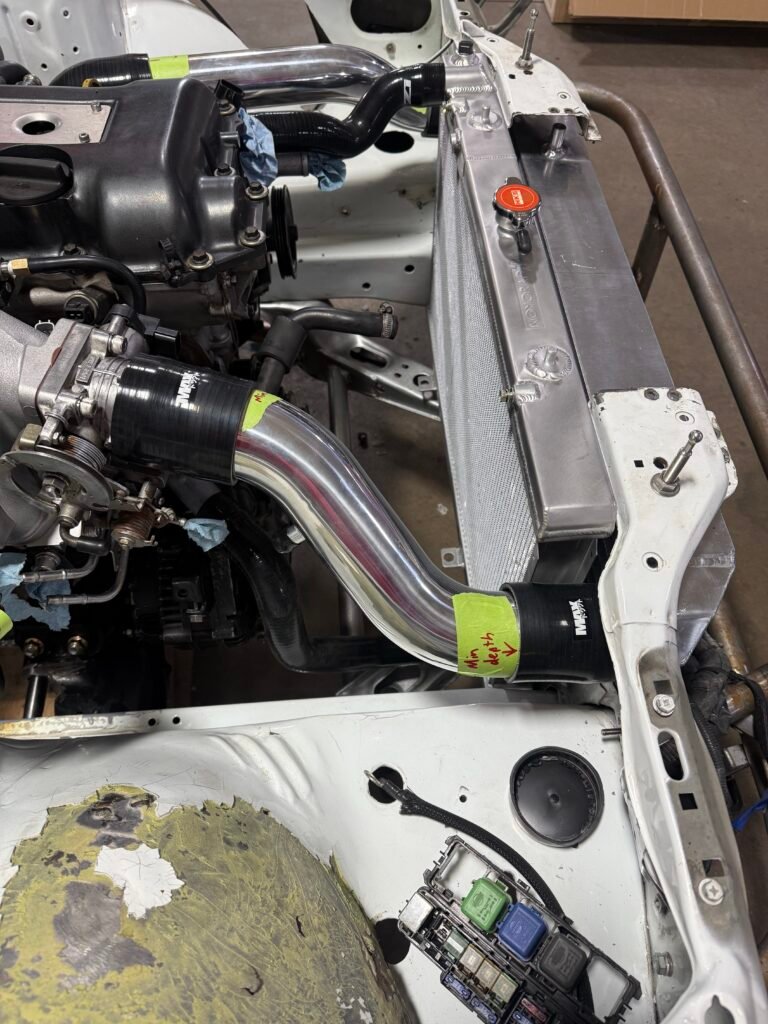
Hot and cold pipe test fit
Hot and Cold side pipes installed with the radiator to check clearances, I had to mark out the minimum areas as the pipes didn’t fit fully in the couplings.
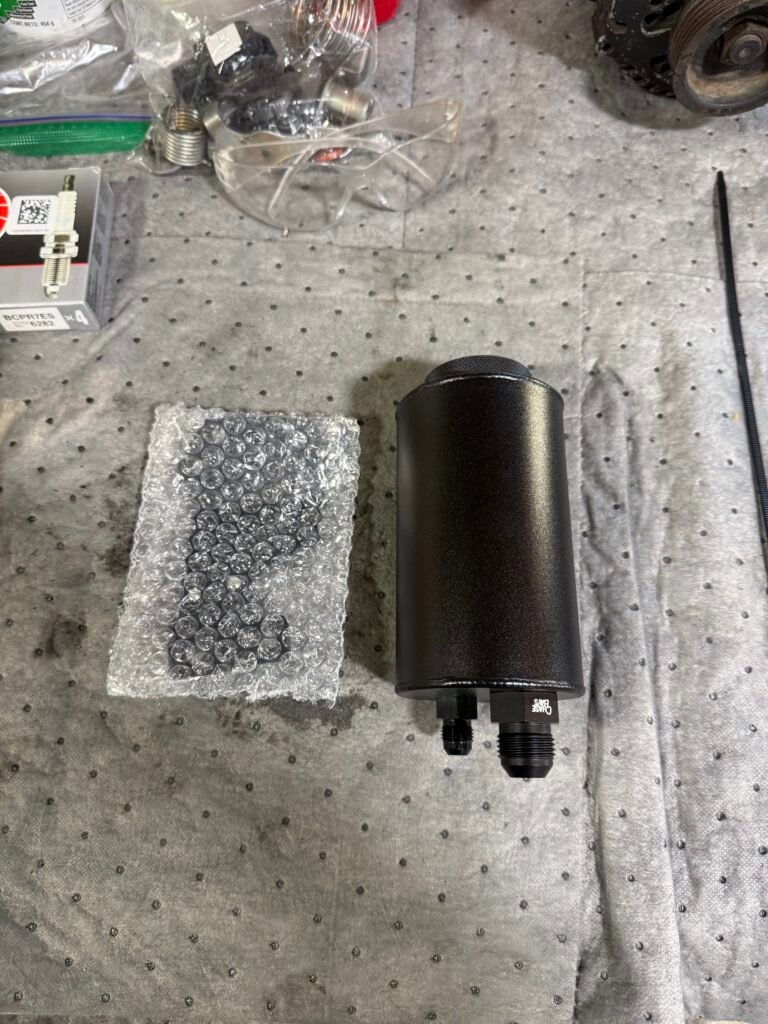
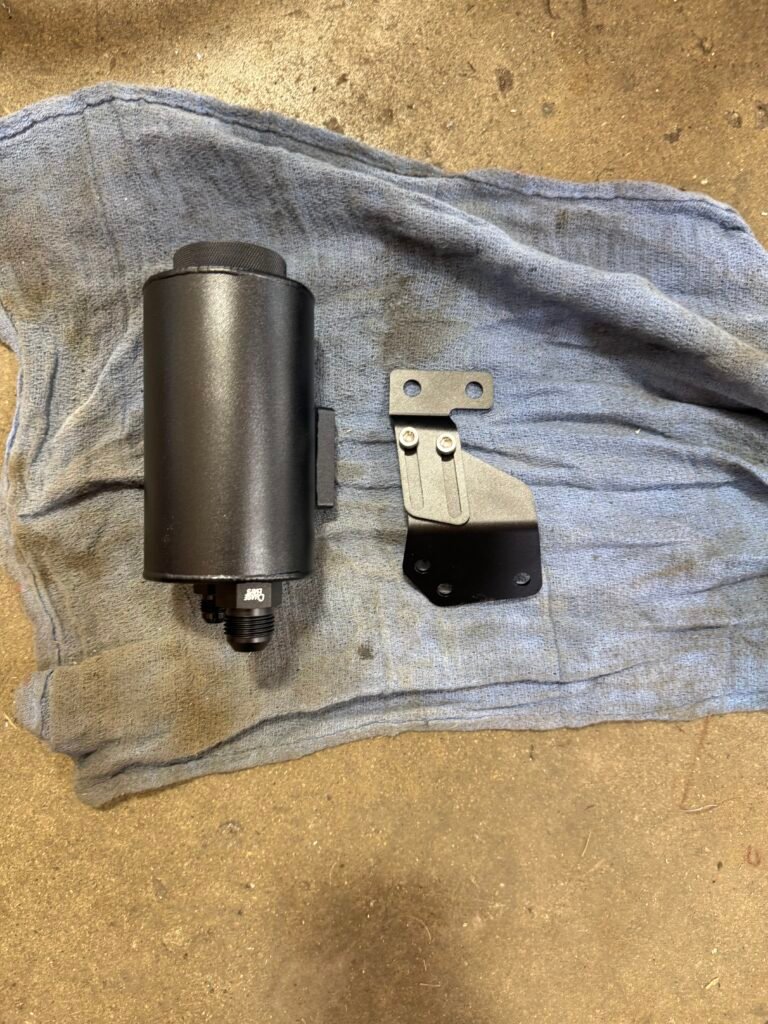
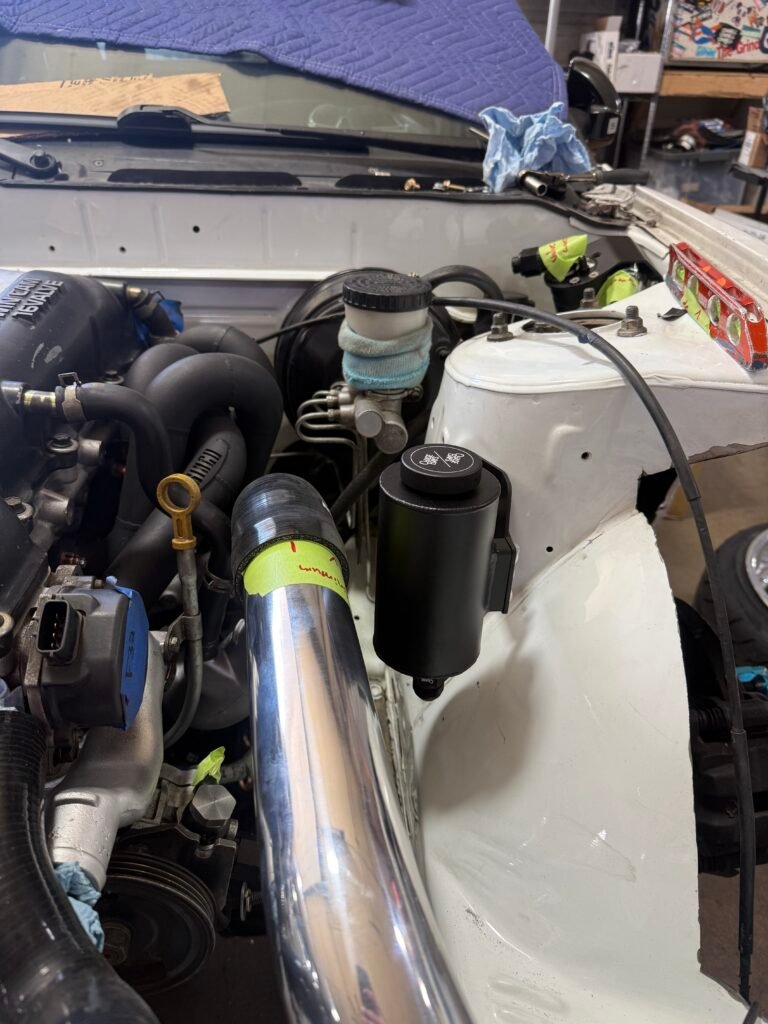
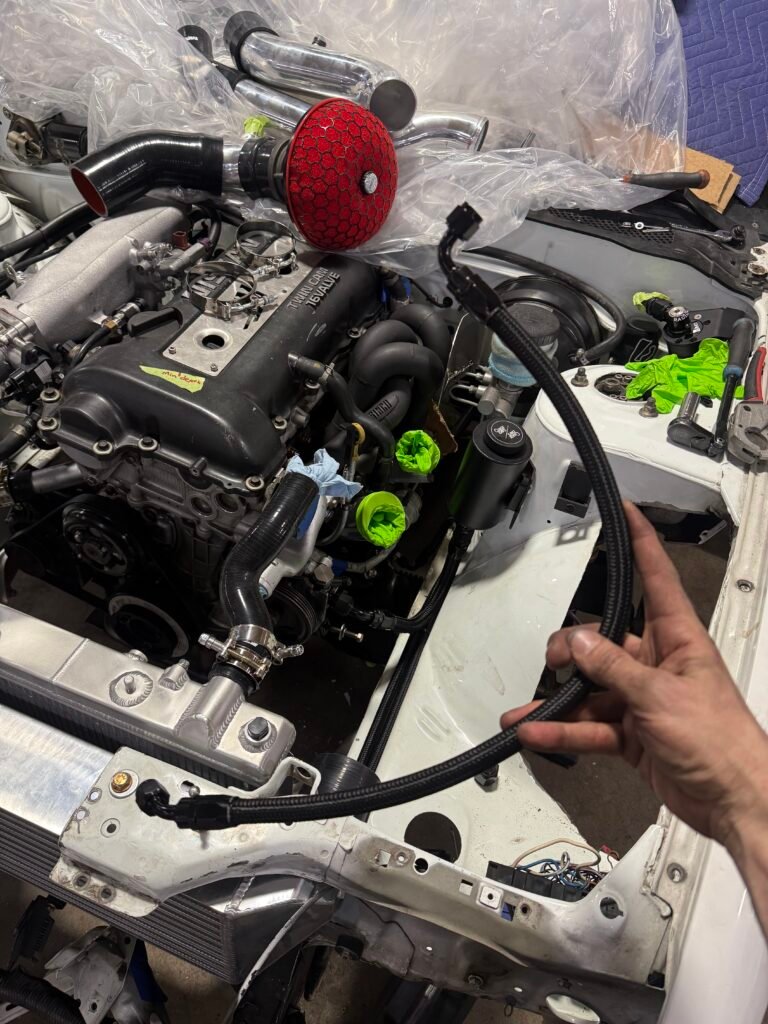
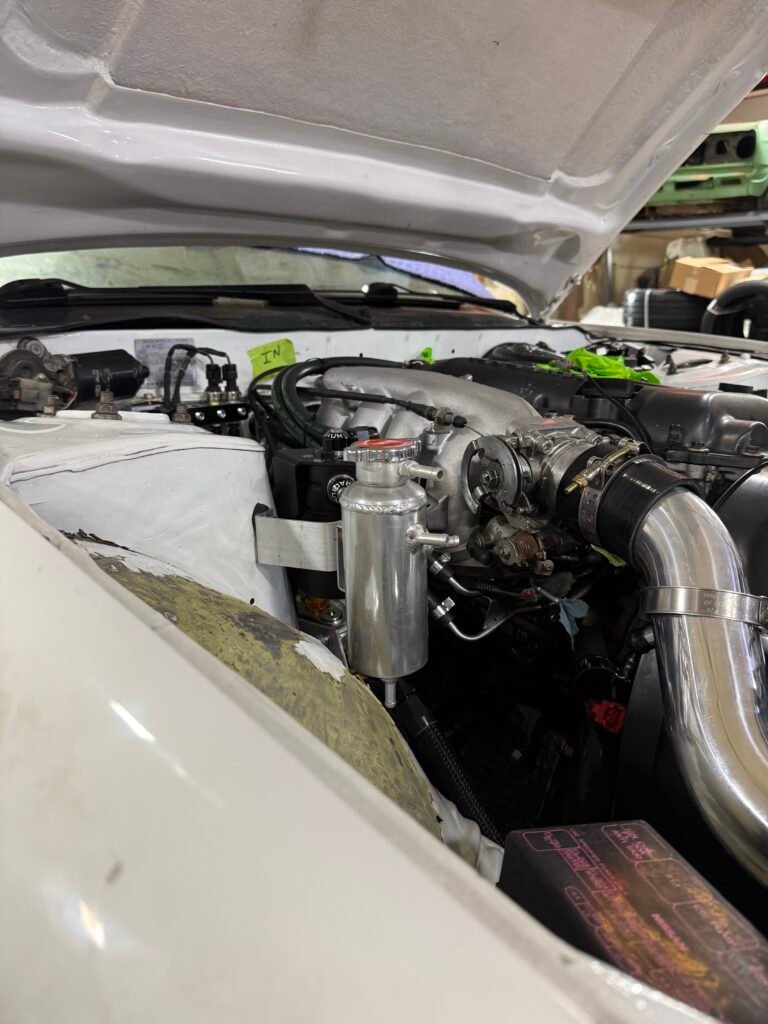
Radium Dual Catch can install (PCV and Crankcase)
Radium catch cans installed
PCV catch can on the left. Crank case catch can on the right.
Power steering reservoir install
Power steering resewrvoir installed
HKS intake pipe test fit
HKS intake modification
I was disappointed to see it didn’t fit on the turbo inlet. One hole was slightly off so I had to take a cone bit and oval out the hole more.
April 1st
Parts collection and assembly continued
Turbo gaskets, transmission shifter fork boot, slave cylinder bolts, shifter assembly gasket, PS cooler fittings and mount
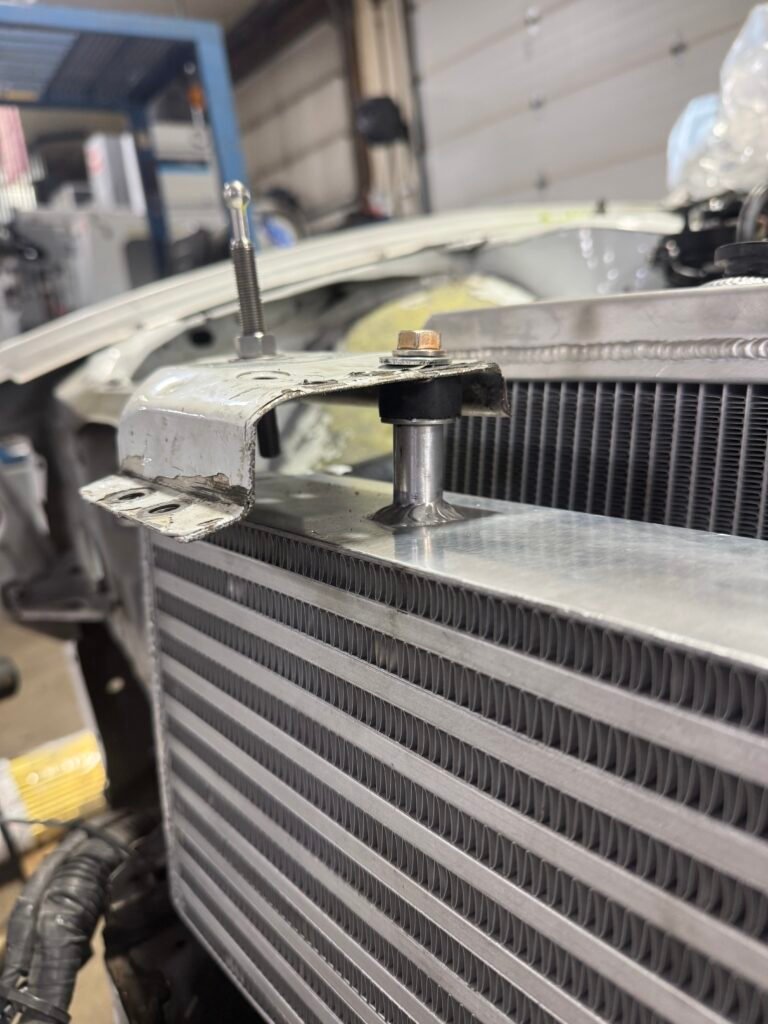
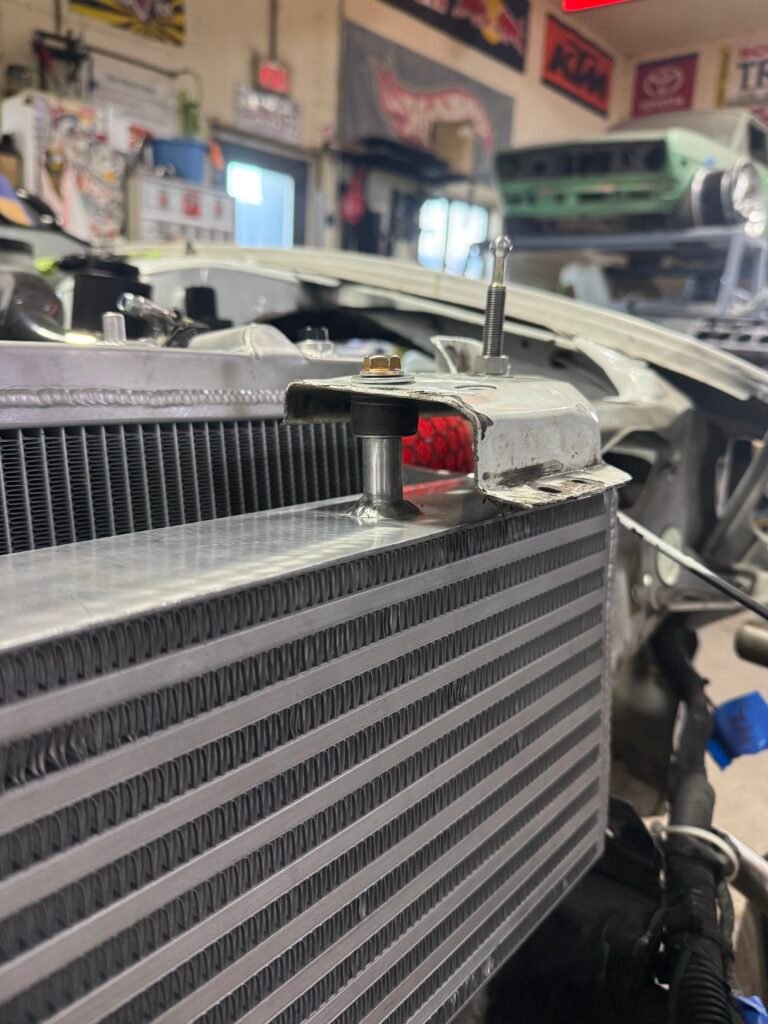
PCV valve and bushing, radiator mounts
Transmission mount and X-Member Install
⚠ ISR Bracket Install — Things to Note
Order of Operations
1
Test fit the Xmember mount on the car, then find the center of the transmission mounting holes and transfer them to the Xmember bracket
2
Remove the Xmember mount and install the mount on the bracket
3
Install the bracket
💡 If you're not perfectly placed on the first shot you'll need to drop the trans mount, loosen it, and reposition inside the slotted bracket holes. Take your time with measurements instead of guessing.
Polyurethane Mount — Torque Warning
Torque to spec if you can. In my case the mount kept compressing and never reached spec — the washer started tearing the polyurethane during tightening.
Snug it to a comfortable level and monitor how it holds up over time.
ISR trans xmemeber and GK Tech polyurethane trans mount
ISR trans bracket, GK tech polyurethane trans mount, s15 exhaust hanger, and new trans bracket hardware.
PCV Valve / Catch Can Lines Installed
PCV catch can hookups
PCV catch can lines ran, PCV valve and bushing replaced
Replacing the PCV valve and bushing was for preventative maintenance. Upon removal I found the bushing for the PCV valve was super dry rotted so I’m glad this came as a kit.
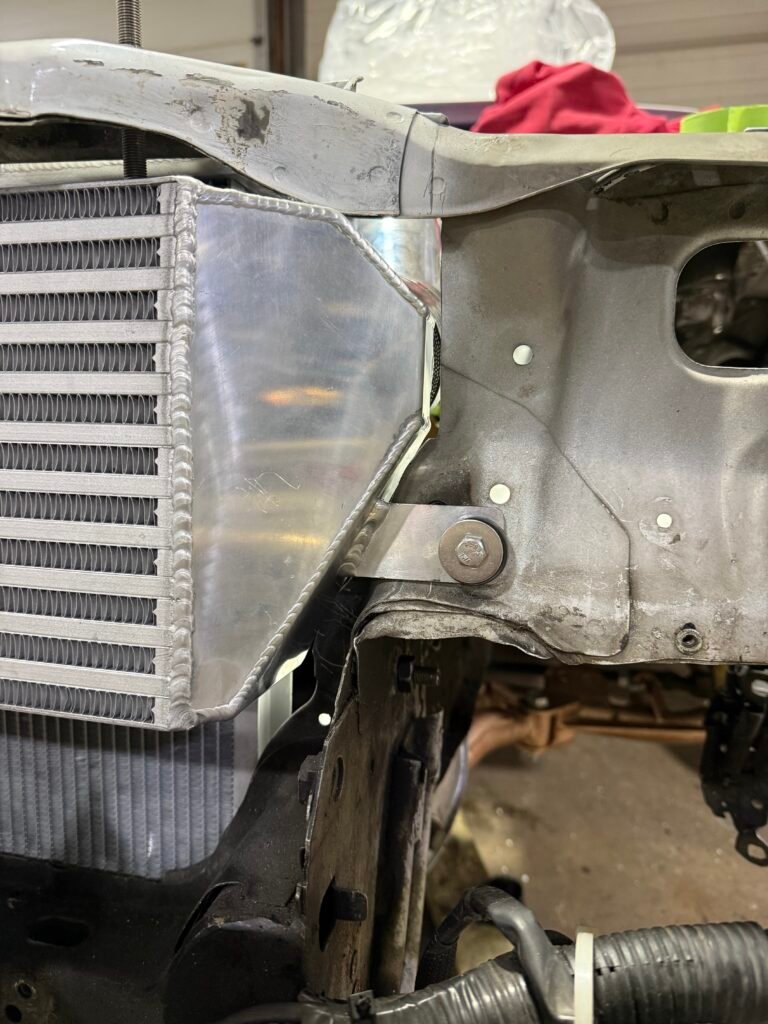
hmic Install continued
More cutting needed for HMIC fitment
More cutting needed for HMIC fitment
Final fitment
Initially I thought I cut enough for everything to work, but after trying to fit my headlights back on, I was wrong. They hit the end tanks. Hindsight I should have checked this right away. This was an easy fix though, I simply traced out the edges of the end tanks with a sharpie and trimmed it out. On the plus side the hot and cold pipes fit a lot further in the couplings so I don’t need a minimum mark anymore.
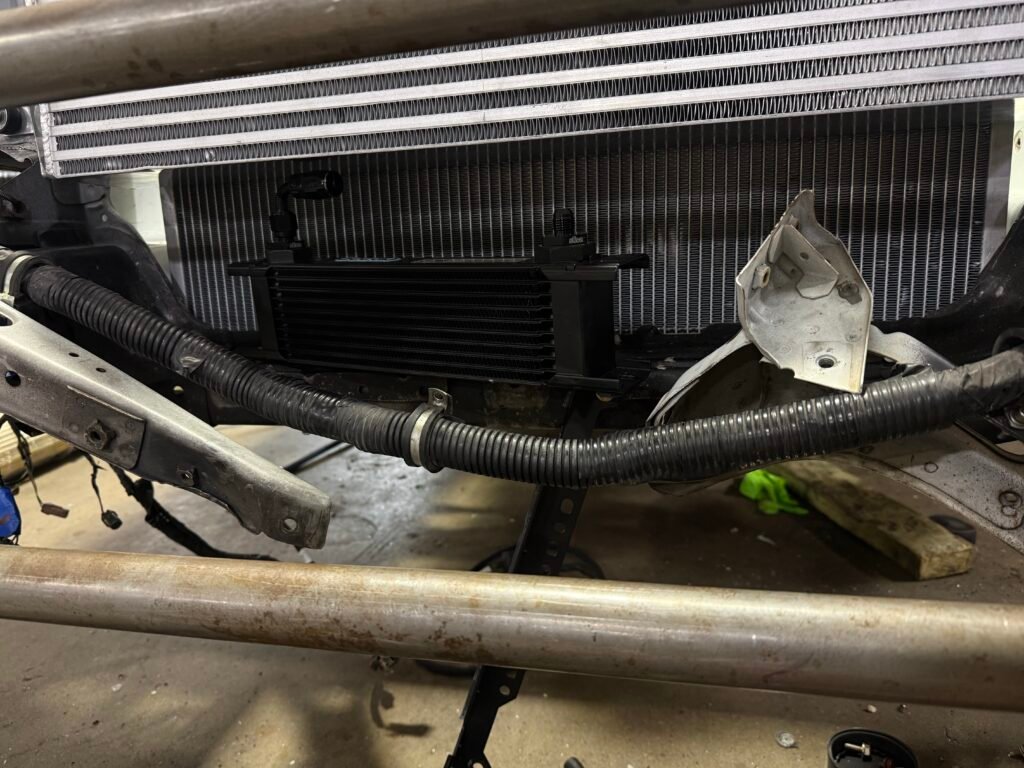
power steering cooler Install
Power steering cooler mocked up
The fittings are very close to the bottom of the intercooler. To install the hoses i’m going to have to use each side as a pivot point and swing the cooler out.
April 11th
Parts collection and assembly continued
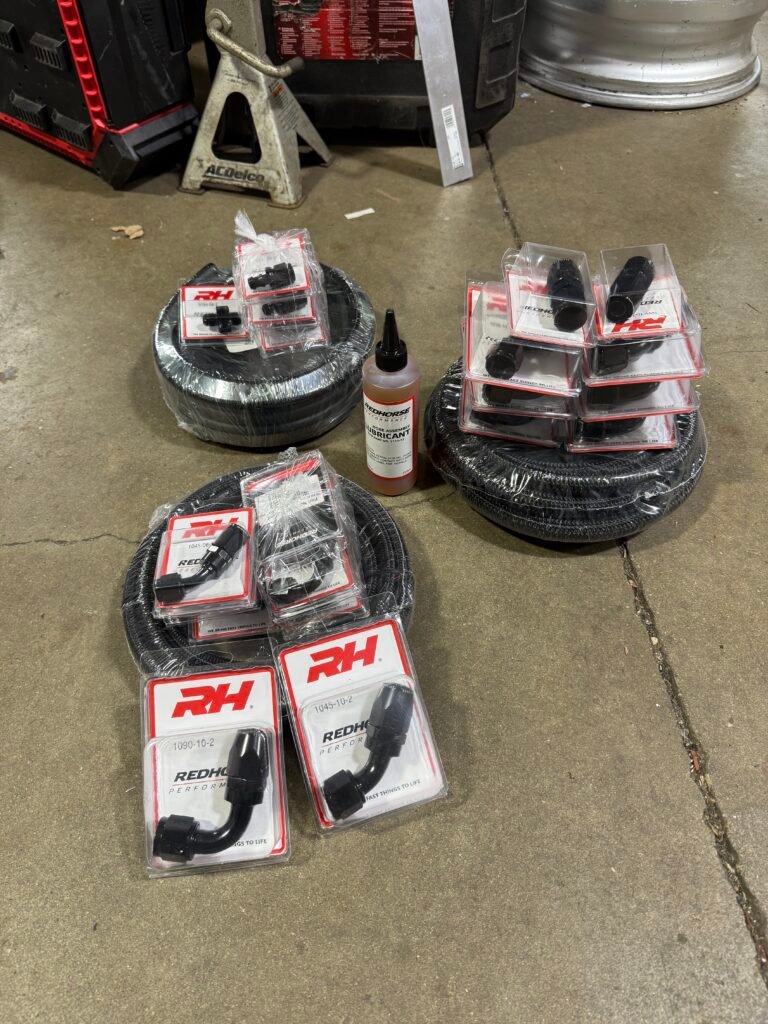
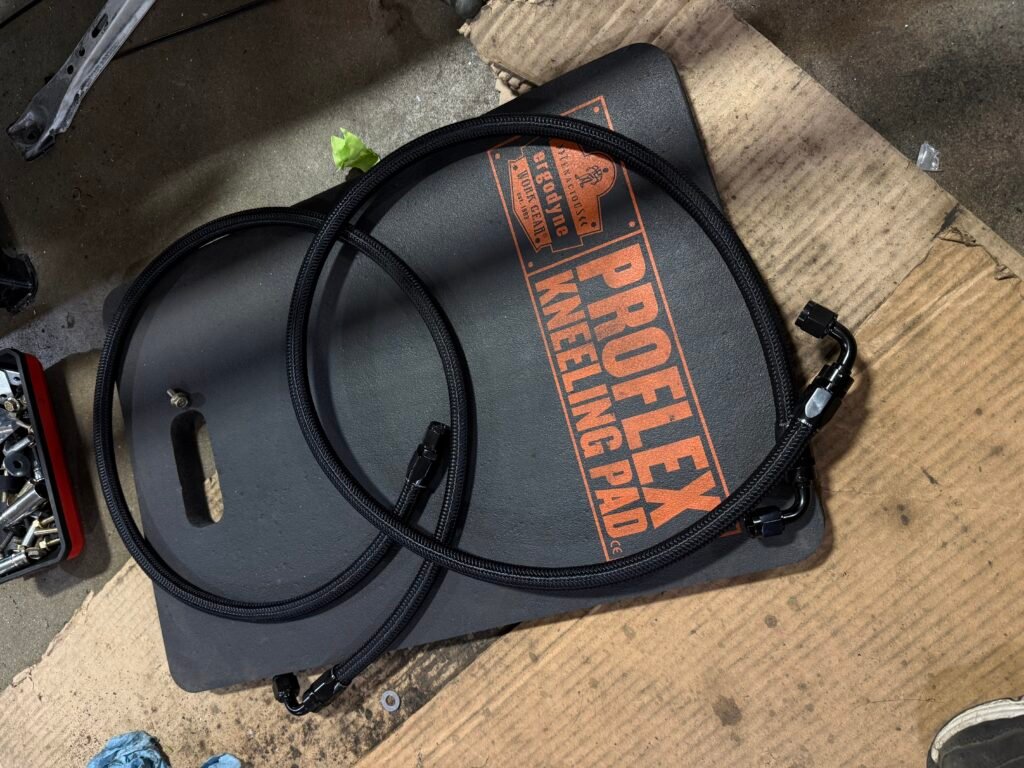
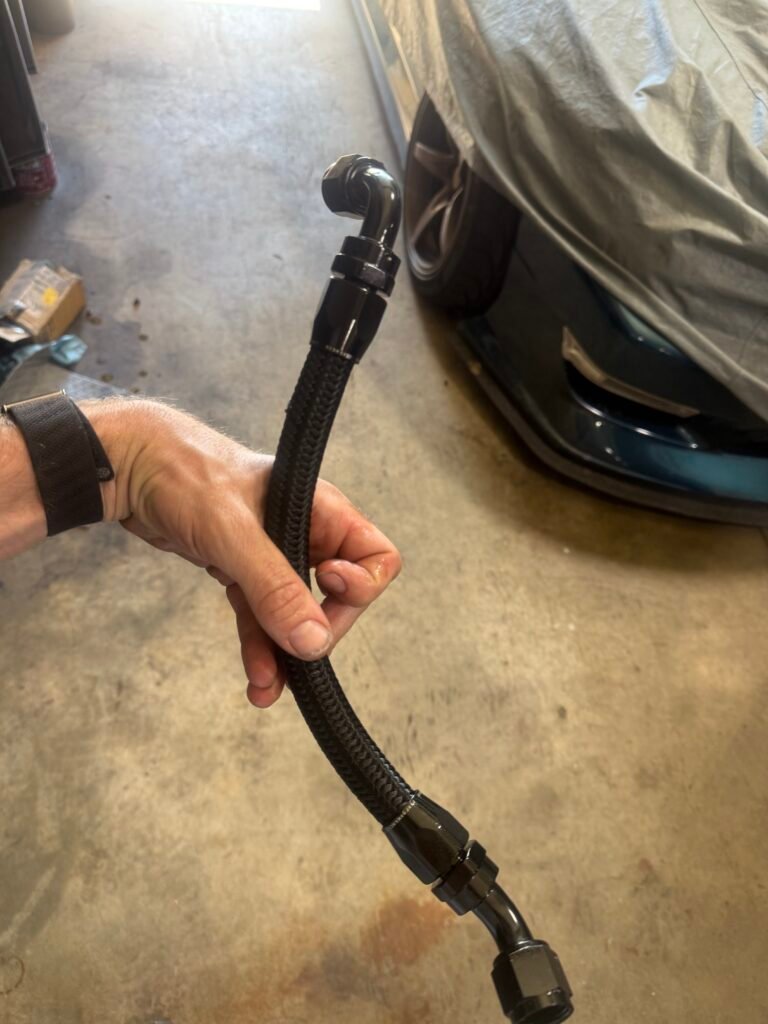
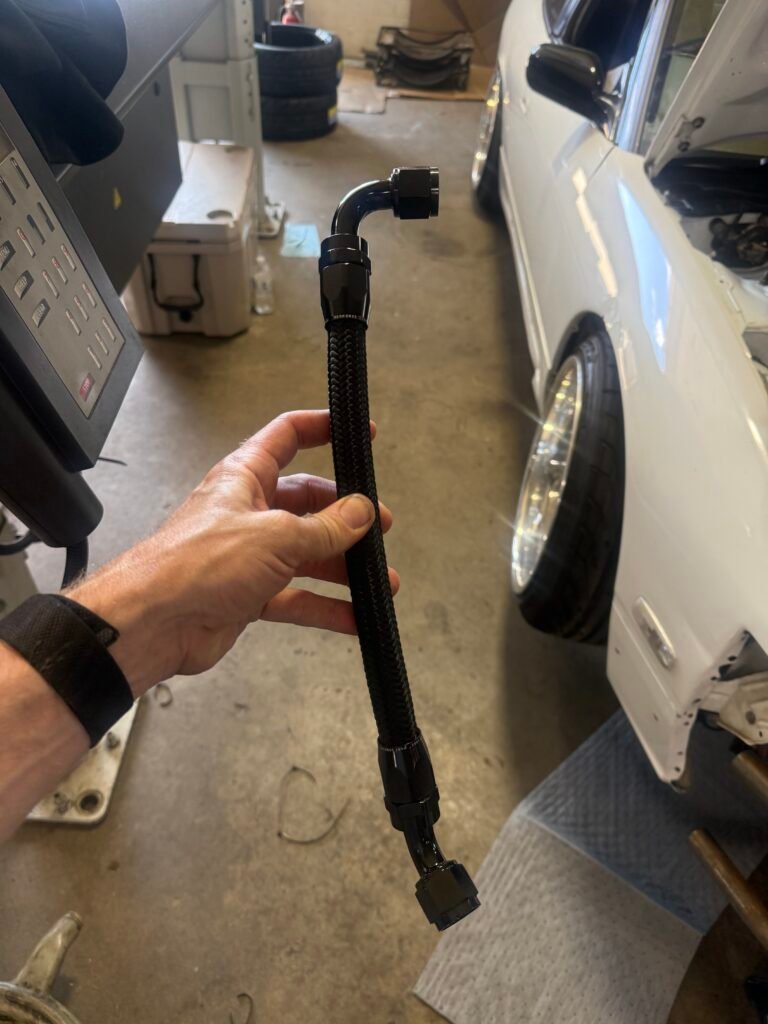
Power steering cooler, oil cooler, and fuel lines
This is the fist time using Redhorse hose/ fittings and I must say, I really like them. In the past i’ve typically used Earls/ fragola/ aeroquip. The fittings have this gel like coating on them which stops them from getting dinged up from tightening them. Also, the hose has better pressure ratings than other brands and is incredible flexible and aesthetically look good.
dipstick hold down Install
Englishtune dipstick hold down
Englishtune dipstick hold down installed
I’m really impressed with the quality of this piece and the simplicity of the design. I’ve heard some SR’s like to blow dipsticks out so this was a must add.
Brake master shield Install
Modified Englishtune brake reservoir fluid shield
Modified Englishtune brake fluid reservoir shield
Shield installed
I had to put it in a vice to bend it so it would fit around my brake lines, I still want to apply some heat tape to the shield for some added protection.
Intercooler install continued
Upper HMIC supports
Added some rubber bushings and supported the top of the intercooler as well.
Power steering cooler lines install
-6AN Power steering cooler hoses made and installed
-10AN Power steering pump feed hose and mockup -6AN high pressure hose
-10AN Power steering pump feed hose installed
Made up the power steering lines, I decided to make a mockup of the high pressure hose to get an exact length and fit so I when I have a crimped hose made I know 100% it will work.
-6AN High pressure hose installed
-6AN High pressure hose installed
High pressure hose made up and wrapped in a DEI heat sleeve. My VH45 had a power steering hose burst and start a fire so i’m not taking any chances.
April 17th
Assembly Continued
Oil cooler Install
⚠️ Learned the Hard Way — AN Fitting Install *UPDATE 6/20/2026*
Do not leave a gap between the collar and the fitting. I thought mine were as far as they would go — they were not. After running the car they started to seep and I had to remove all the -10 hoses and re-tighten everything.
Be very liberal with Redhorse assembly oil on the threads and taper — the fittings will go in no problem with proper lubrication
💡
Tip from Dale & Ryan — Car Shop D-Style
Sil-Glyde or a silicone spray works as an alternative if you don't have assembly lube on hand
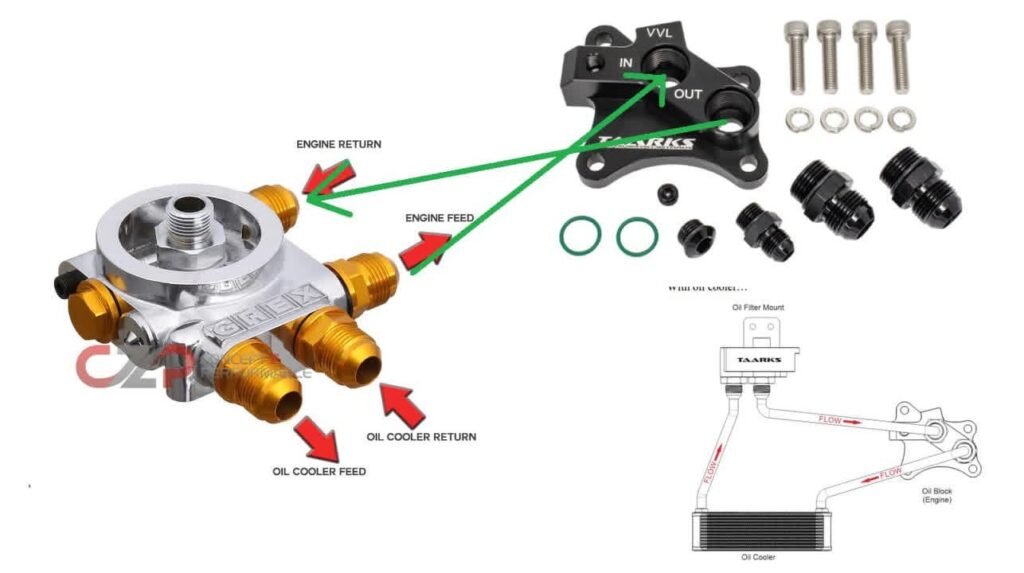
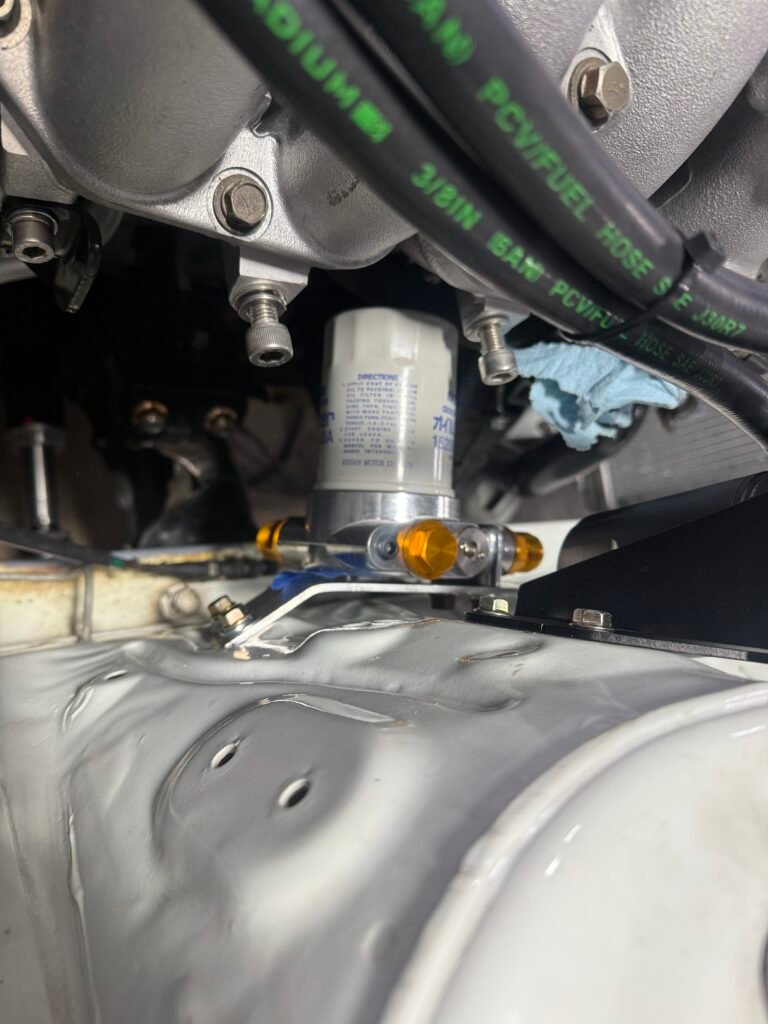
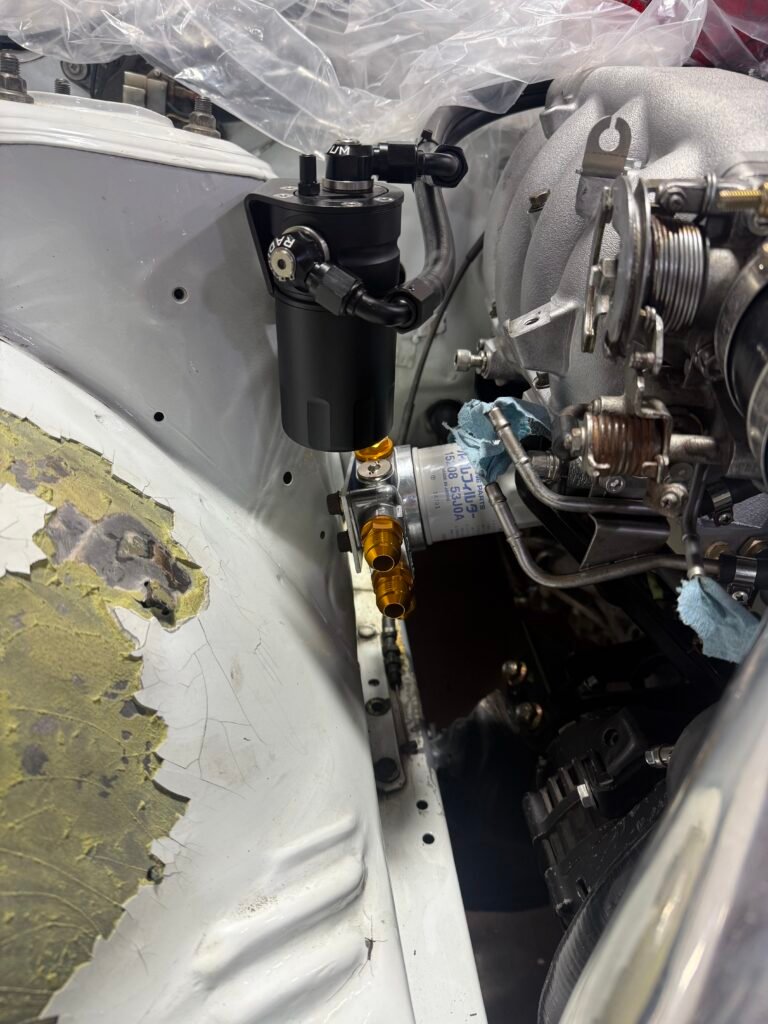
Greddy remote filter diagram
Remote filter and bracket mounted
Remote filter and bracket mounted
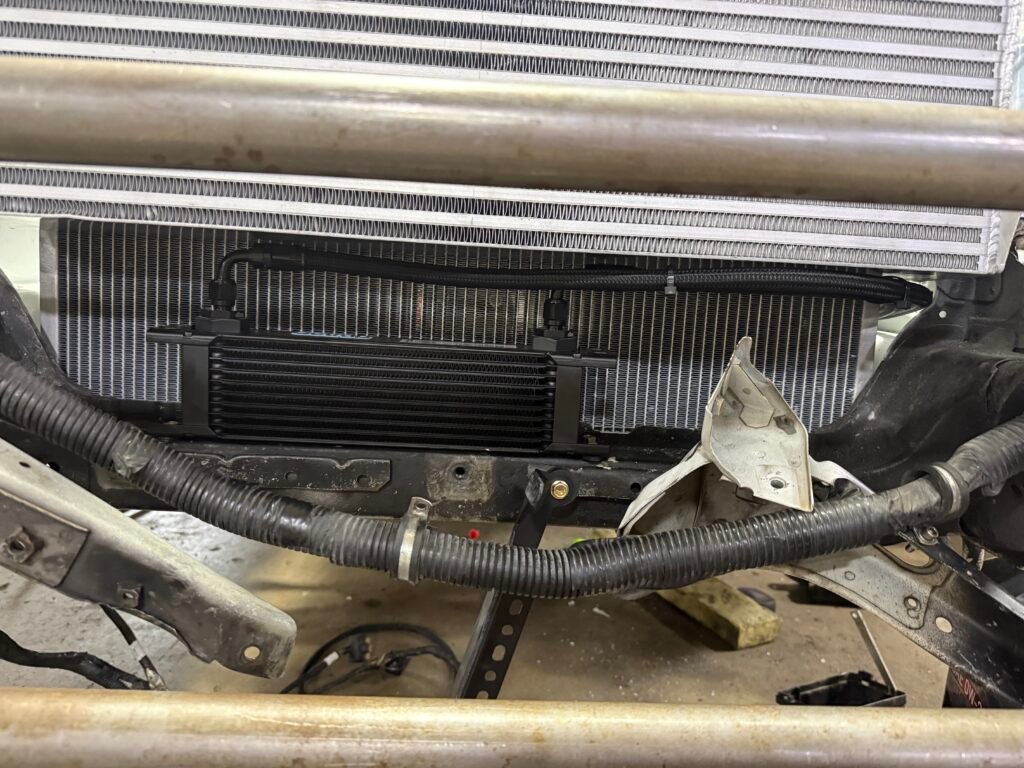
Oil cooler mounted
Oil cooler lines installed
Oil cooler lines installed
I made a mounting bracket out of aluminum flat stock from Menards. It turned out pretty good. I chose this spot because I wanted the feed and return lines as short as possible. I tried to have the hoses go directly into the engine oil block but due to the in/out’s of the remote filter and engine oil block being opposite of each other it wasn’t possible. So I had the hose returning to the engine as short as possible and the one leaving with a small loop.
ALternator and power steering belt Install
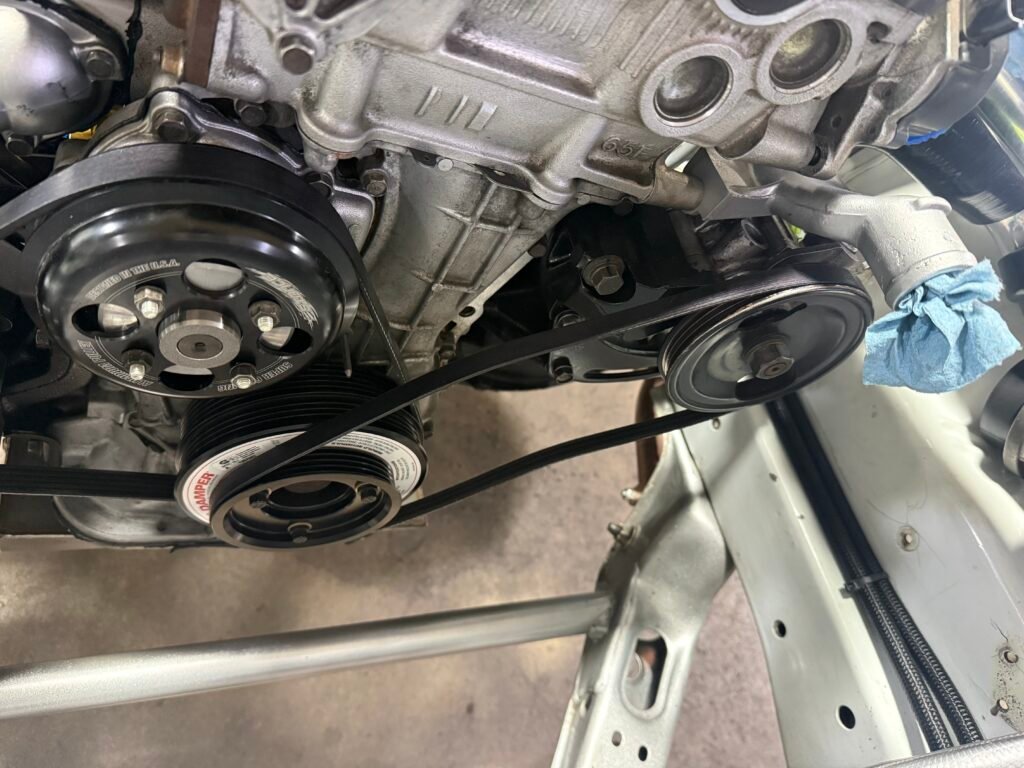
ℹ️ ATI Super Damper — Belt Info
⚠️ If you're using an ATI Super Damper you cannot use the stock SR power steering belts.
ATI Damper Belts
Alternator / Water Pump — 5PK915 · 36.00in
Power Steering — 3PK855 (S14/S15) · 33.7in
AC — 4PK880 · 34.64in
Factory Pulley Belts
Main Belt / ALT — K050370 · 37in
Power Steering — K030350 · 35in
AC — K040347 · 34.7in
💡 From My Build
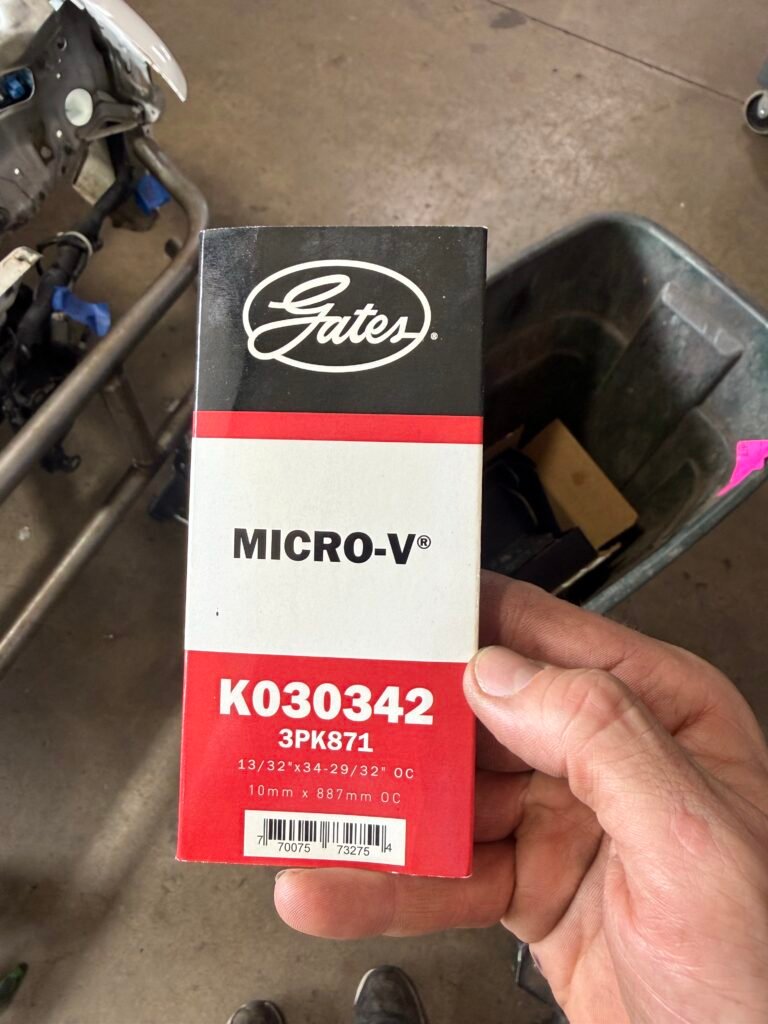
Found a similar belt for Power Steering that also worked — P# K030342
If you're running an ATI pulley with a Stance water pump pulley, be aware of a belt size conflict — the ATI requires a smaller belt while the Stance pulley runs stock size. The stock belt ends up too large and the ATI recommended size too small. Fix: Dayco 5050368 (36.81" long) - Thanks Dale for figuring this out!
Belt information provided via Enjuku Racing
Stock SR belt, full tension, you can see how this won't work
Belt I used for my power steering
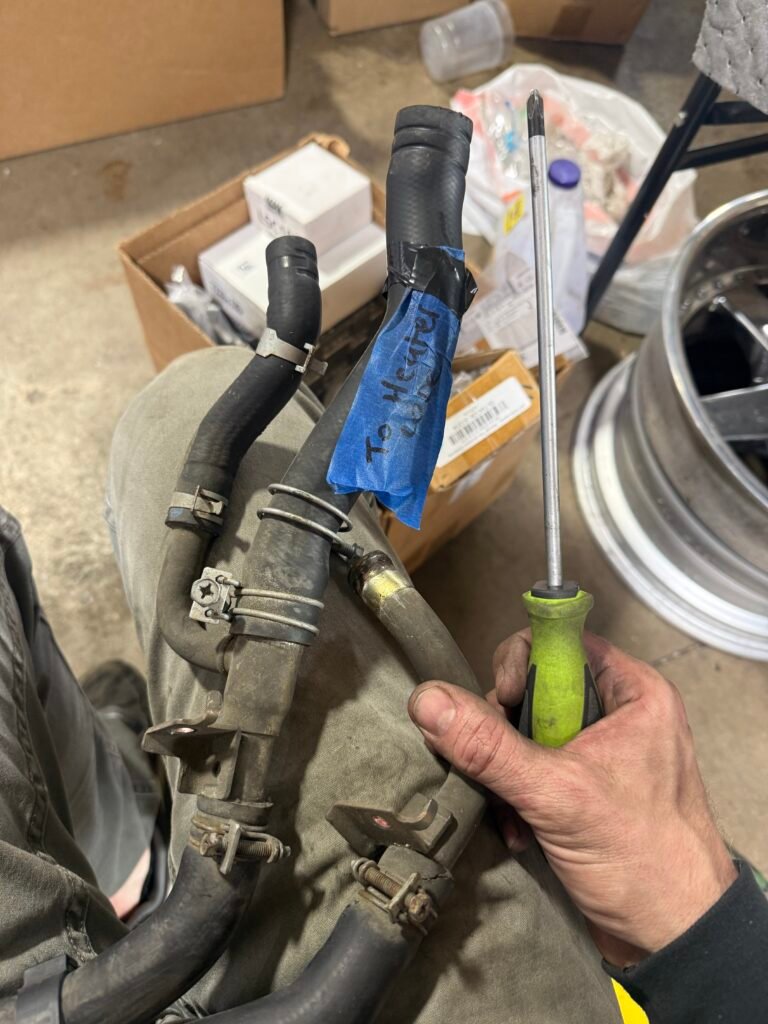
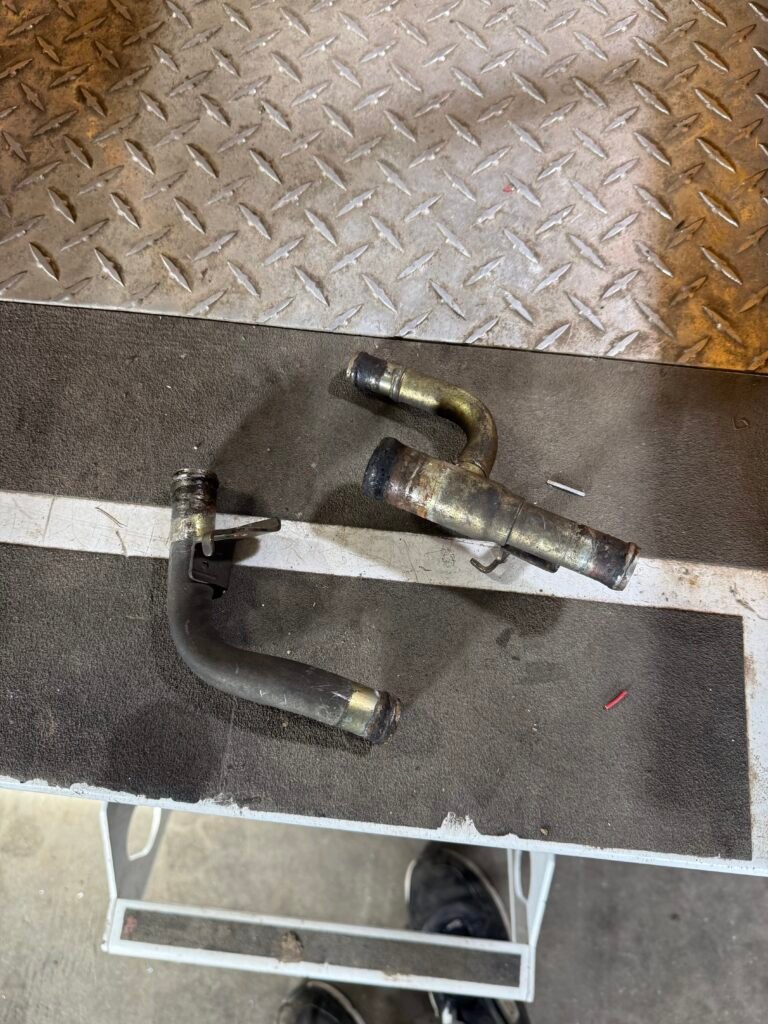
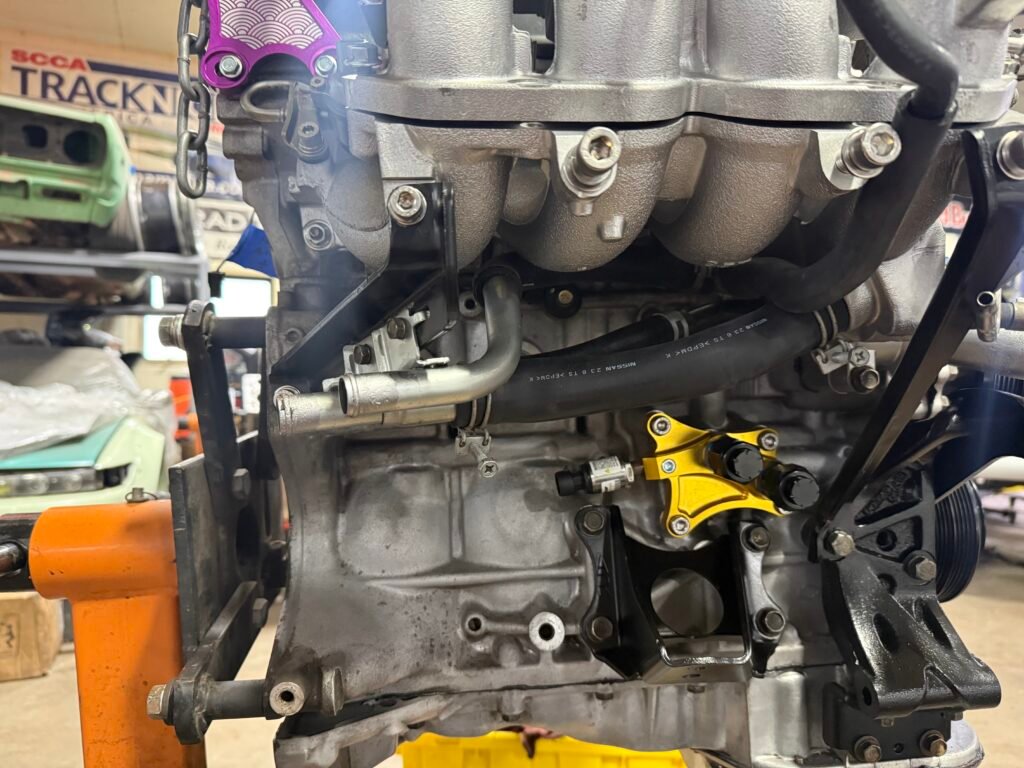
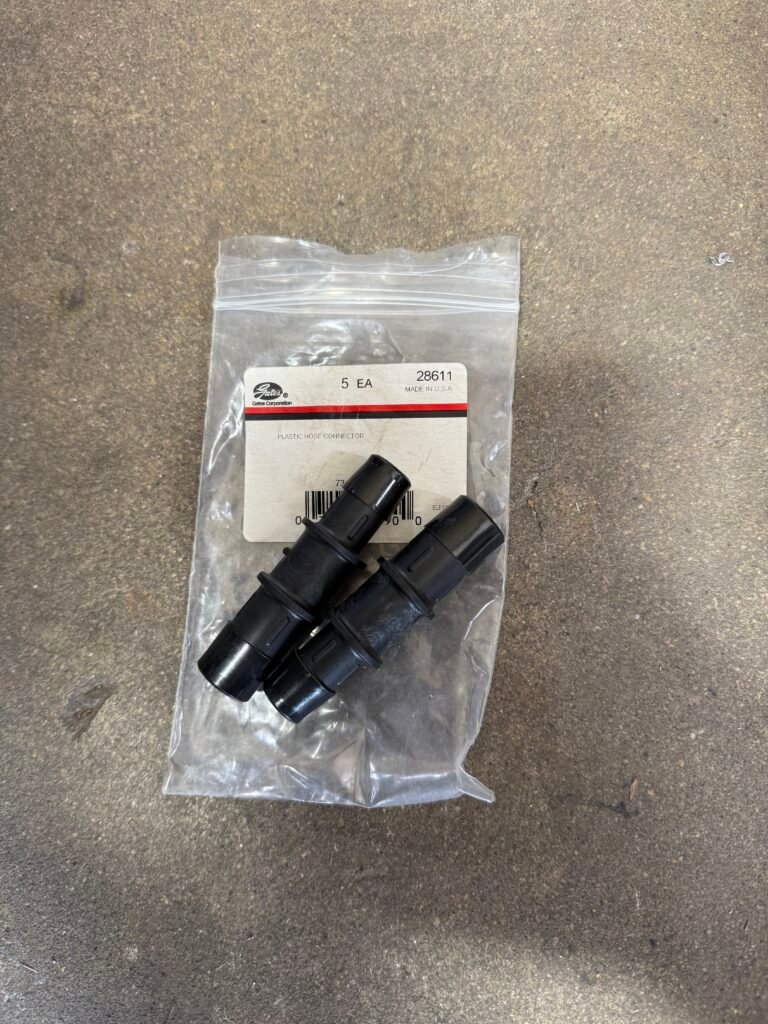
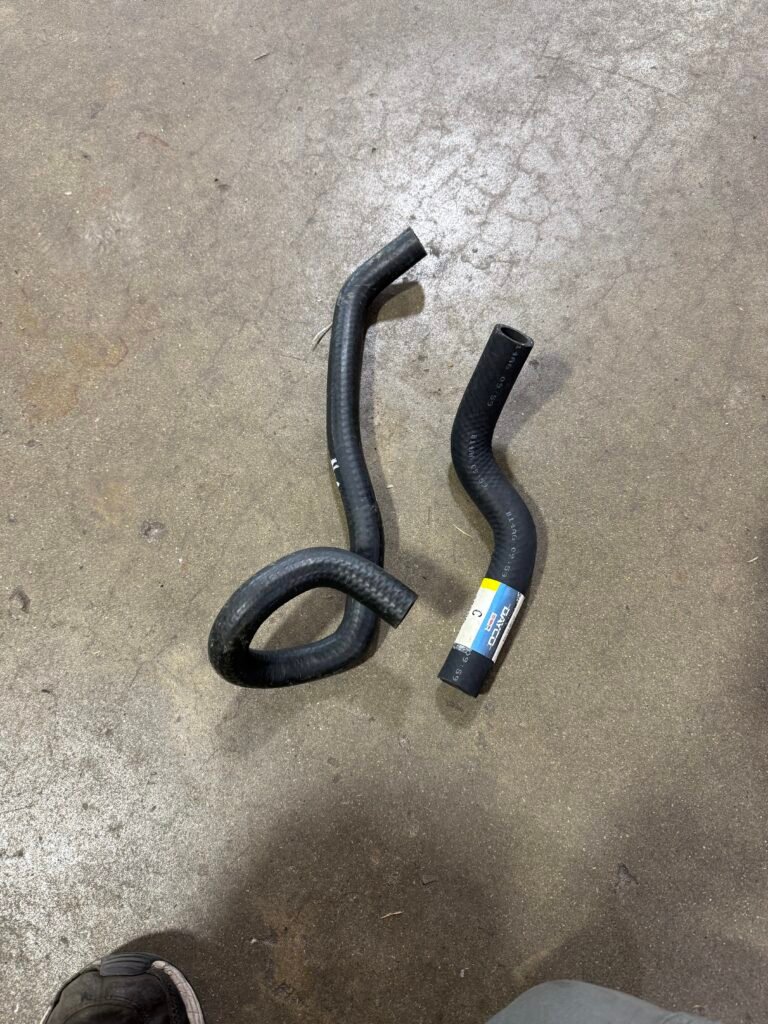
Heater Hose Install
Gates 3/4" to 5/8" hose reduducers and custom heater hoses. Hoses are via Faction Motorsports
Heater hoses installed
The custom heater hoses came out great! Didn’t take much messing around figuring out how to get them to work.
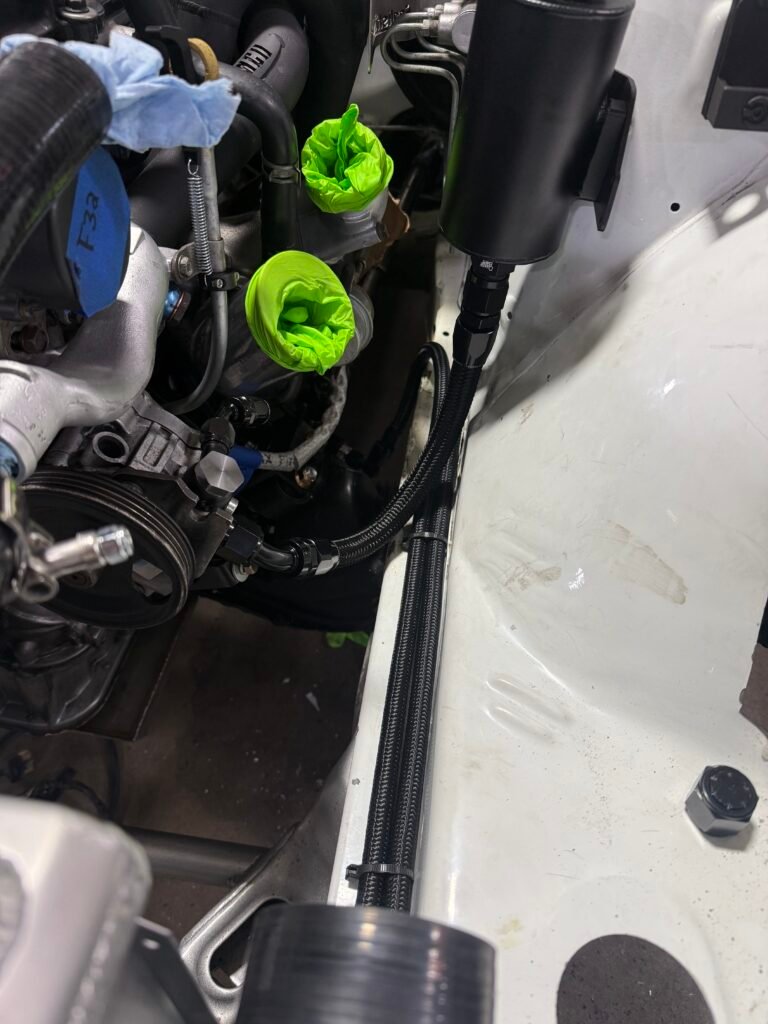
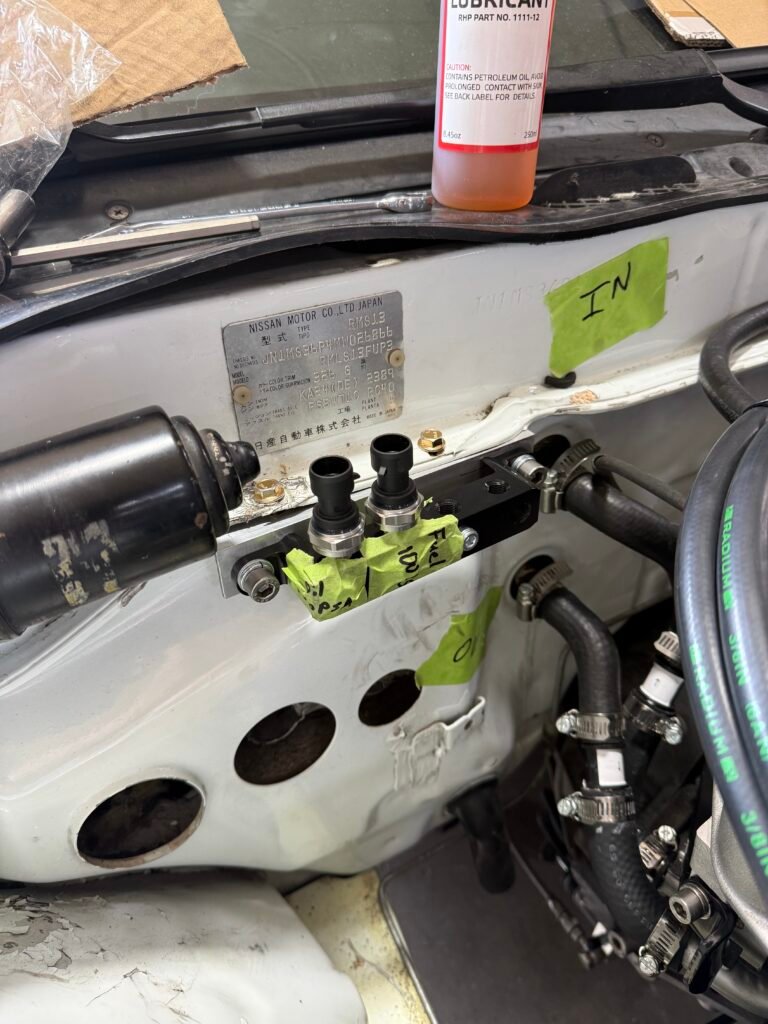
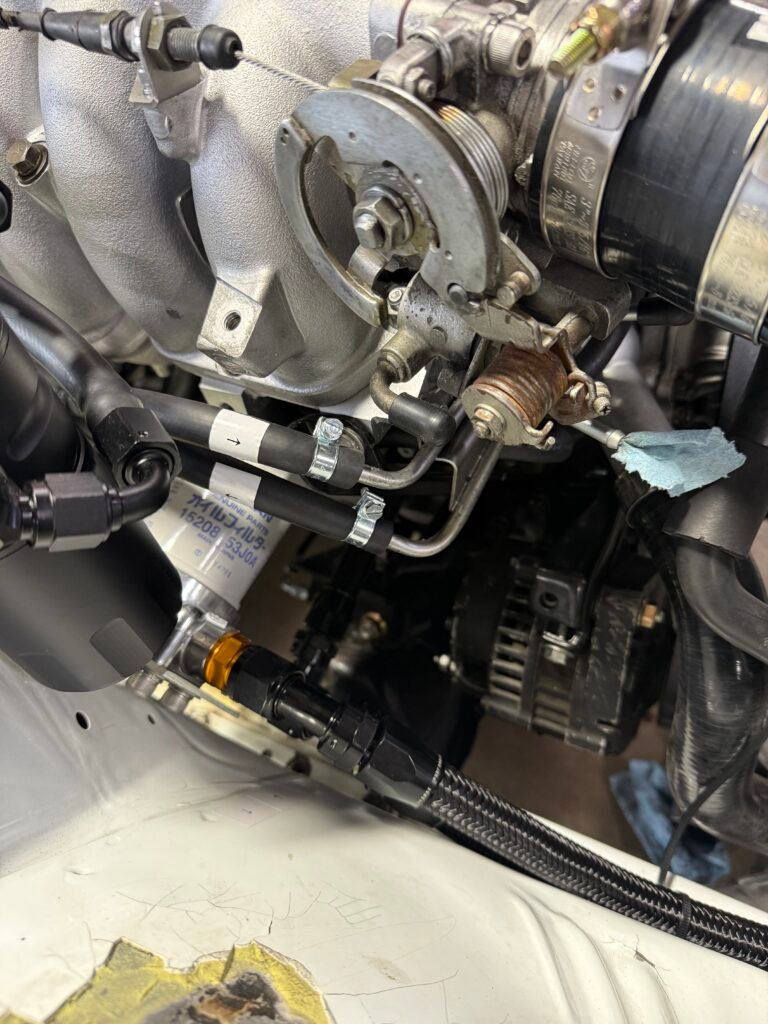
Remote sensor block Install
Remote oil pressure and fuel pressure sensor setup
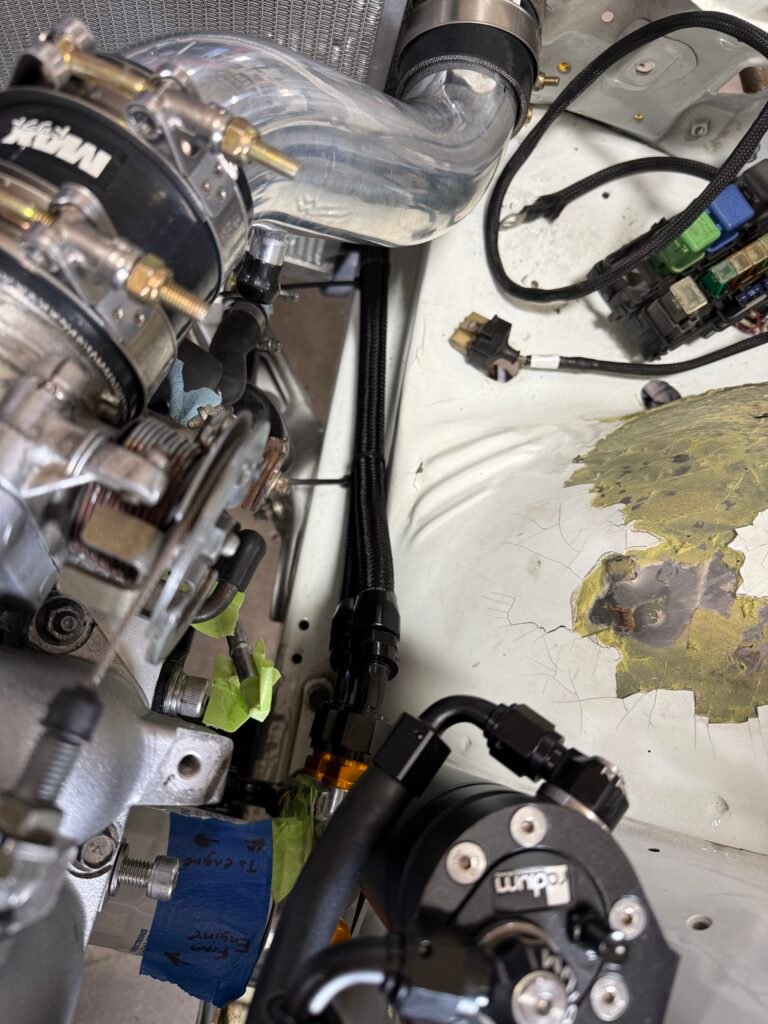
I’m trying a remote sensor setup to promote longevity of the sensors (less susceptible to engine vibrations) and for easy access incase replacements are needed. I used a 1″x 1″ aluminum angle to make a bracket for the remote sensor block. Currently I will have my oil pressure sensor and fuel pressure sensor on the block. The two extra spots are for future expansion. Drift HQ makes smaller blocks with two or 3 ports, I went with the Motion Raceworks block for to max out my options.
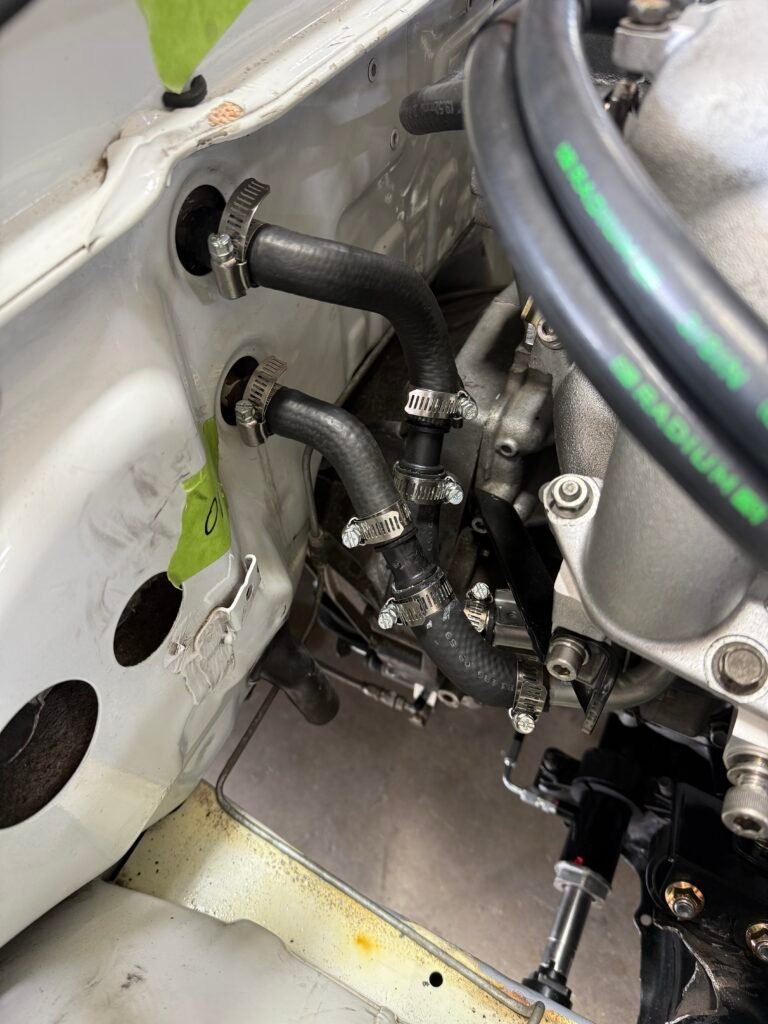
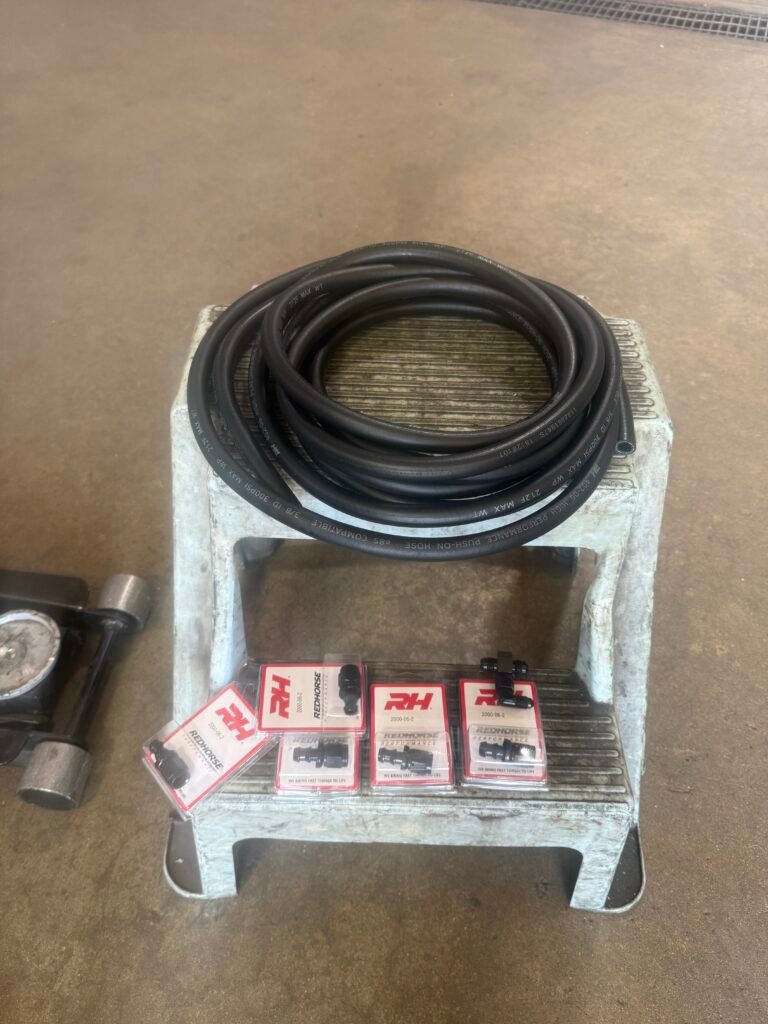
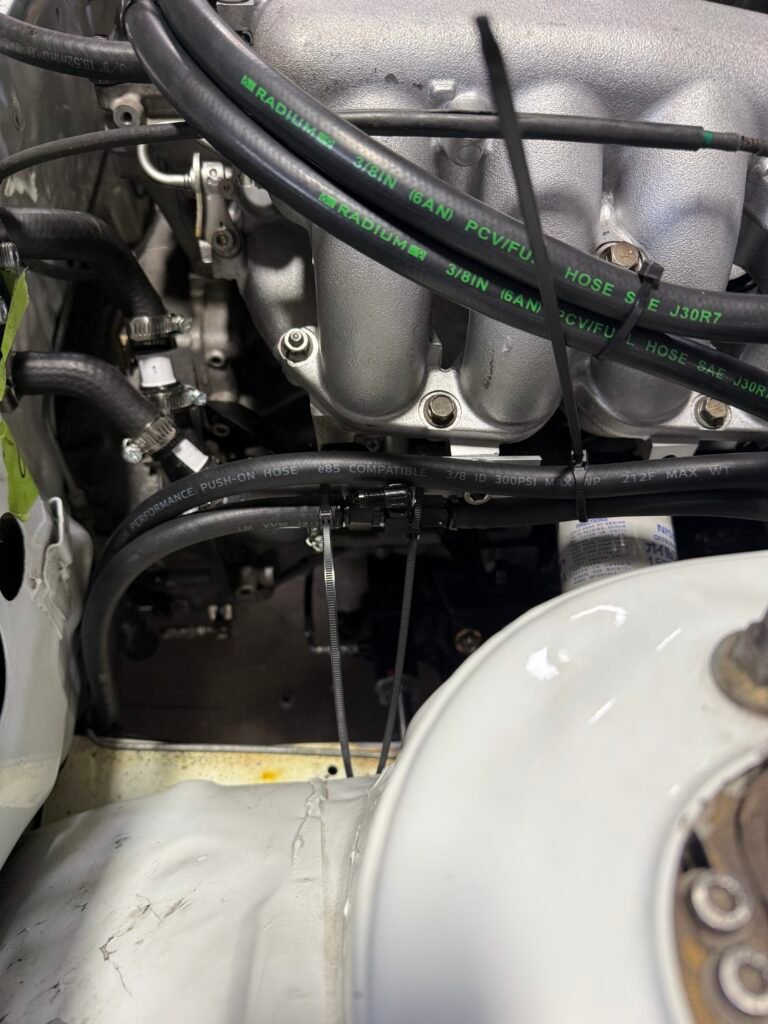
AN Fuel hose installl
-6AN Push lock fuel hose and fittings
Fuel Lines installed
⚠️
6/2/2026 Update
Make sure you put your fuel pressure sensor / gauge on the feed hose. I mixed mine up — don't do that.
Thankfully Ryan from Car Shop D-Style caught it and is switching it up for me.
I had to replace my current AN setup from my VH45 because the lines were too short and the hose was an ugly blue color. Plus side, the new hose is E85 rated for when I want to switch over. I’m using a inline “T” to tap into the feed line to go to my remote fuel pressure sensor.
Catch Can install continued
Press in 90 degree fitting installed
CCV Catch can lines installed
CCV catch can came out pretty good. Installing the 90 AN fitting in the valve cover really cleaned up the routing. I installed DEI sleeves on each hose so they won’t melt being so close to the exhaust manifold. The can itself fits a little more snug than I prefer but the bay is getting crowded to install it elsewhere.
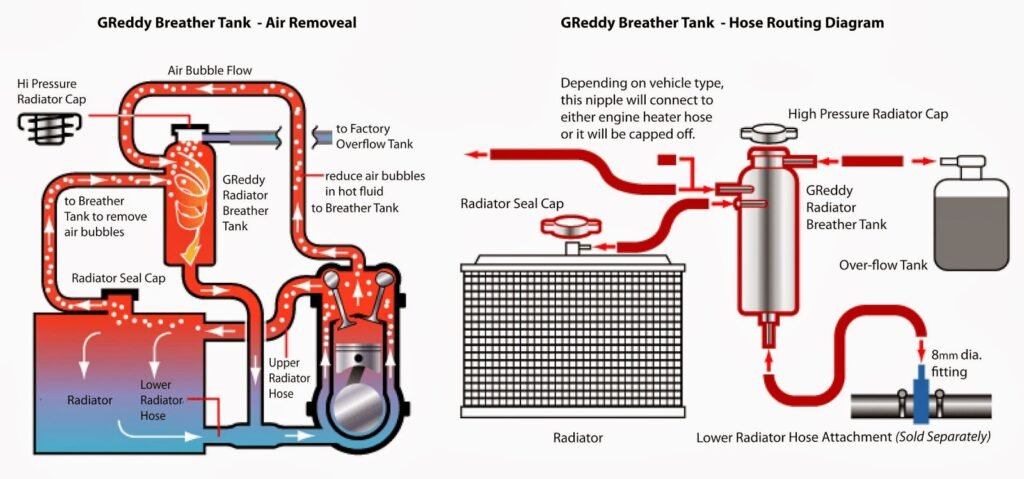
I bought a couple items from the GK tech swirl pot kit to go along with the PBM swirl pot and a coolant hose adapter a homie hooked me up with for free. Not my ideal location for the swirl pot, but due to the nipple locations it’s what worked. I was able to make my own bracket by bending up some aluminum flat stock. Below is the diagram and video I used as my guide for the swirl pot hose routing and install.
Swirl Pot Diagram - Courtesy of GReddy
🎥 Swirl Pot Install
Swirl pot hoses installed
Fuse Box Install
Chassis fuse box re-located
I moved my chassis fuse box back into the engine bay as it was mounted under its current location. It was a cool idea at the time to tuck it away but since it’s not waterproof it wasn’t that smart.
OEM Fan Shround and GK tech Fan Install
OEM fan shroud and GK tech fan installed
I went with the OEM fan shroud and fan clutch as it’s proven to be tried and true to work. As for the fan, the old ones get brittle and break so I upgraded to the GK tech which is provides better cooling.
May 11th
Transmission backing plate install
Had to pull the transmission back out due to my lack of attention to detail (Earlier in the install you can see I forgot the backing plate for the transmission. All is good now. Backing plate is installed. Trans is back in, and the driveshaft is installed.
Transmission pulled and backing plate installed
Driveshaft shop one-piece driveshaft installed
May 15th
Parts collection continued
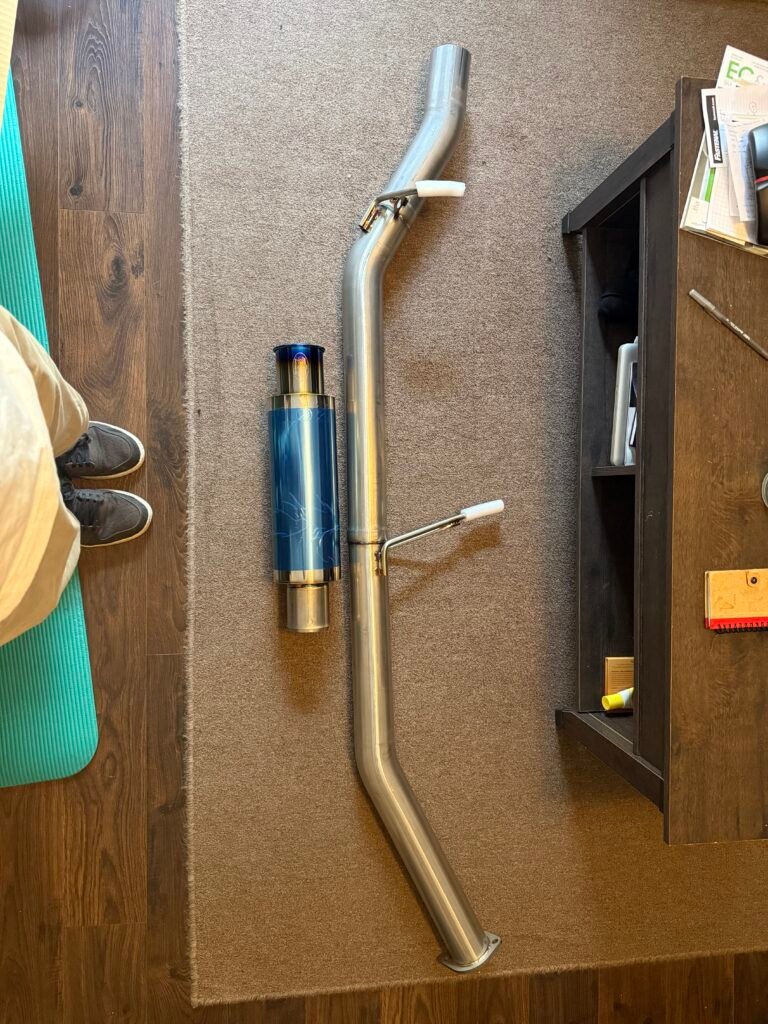
Picked up my exhaust from Touge Factory today. Shoutout Erik for the great customer service providing updates throughout the waiting period.
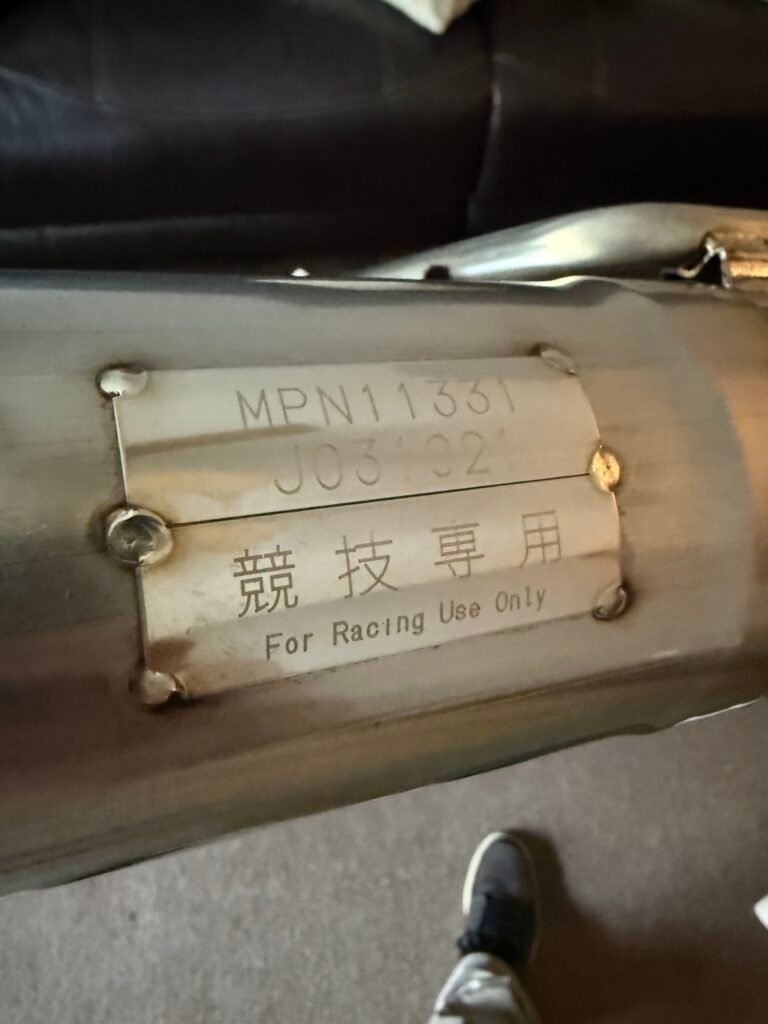
Kakimoto Racing GT1.0Z Exhaust
Kakimoto Racing GT1.0Z Exhaust
Kakimoto Racing GT1.0Z Exhaust
May 21st
Exhaust Install
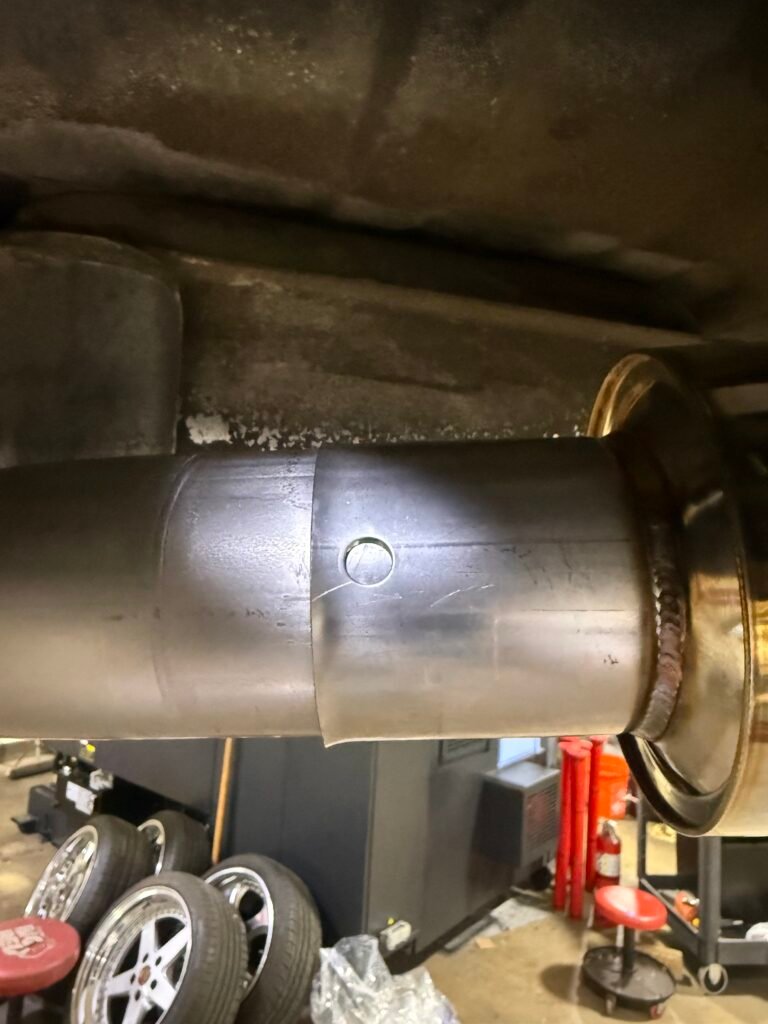
The quality of this exhaust is incredible, really happy with it, everything lines up perfectly. It was interesting to have a slip fit muffler that is essentially separate from the exhaust, I haven’t installed a slip fit style before. It requires a locking tab with some heat tape to prevent it from vibrating loose. It’s essential to make sure you have the hole in the muffler lined up with the circular indent built on the exhaust, if you don’t its gonna be some work getting the muffler rotated or removed. It’s a tight fit.
Muffler install, locking tab slot
Muffler locking tab
I didn’t want to have to buy a test pipe, but due to time constraints I didn’t have a choice (I scheduled my drop off at the Tuner for May 29th). For some reason I thought the PBM cobra downpipe was long enough to “eliminate” the catalytic converter. It’s definitely not. Oh well. I would have normally had one made but I didn’t want to risk paying more or waiting longer. If I had more time I would’ve went with a D-Max test pipe as they are a lot cheaper. I went with what was available and what I could guarantee I would get on time.
Tomei titanium test pipe
Tomei titanium test pipe installed
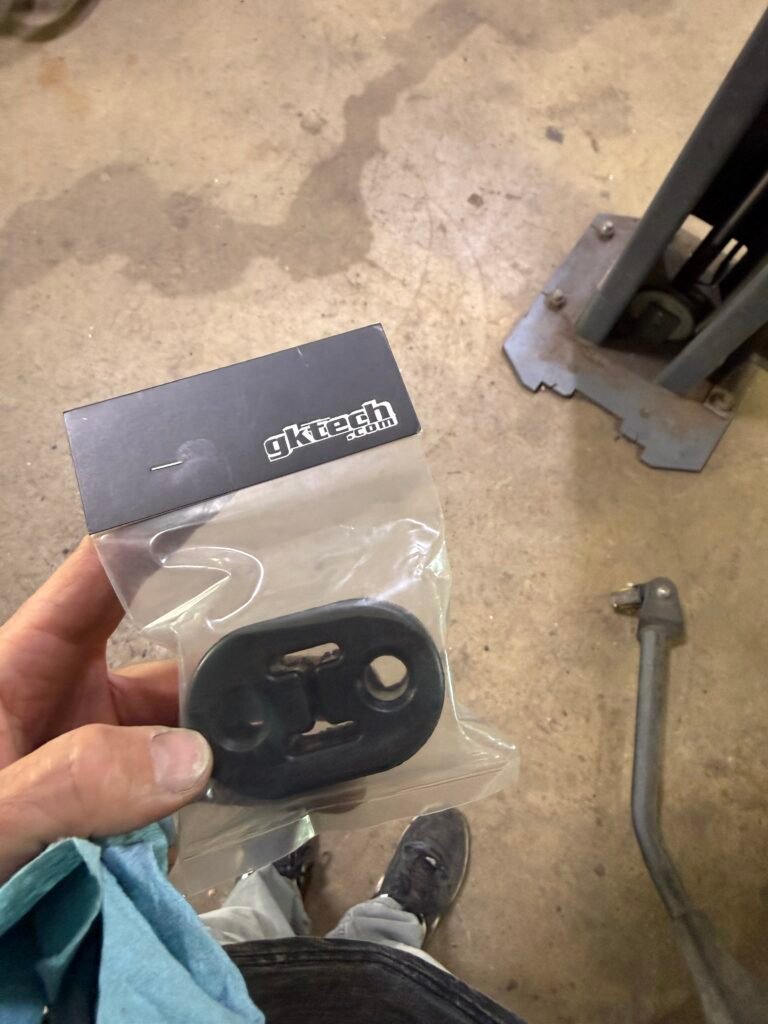
I picked up a couple more poly bushings, I had two already on the car but this exhaust uses all of the stock bushing locations (which I didn’t use on my prior exhaust) so naturally I want the best support for it, so i’m installing them.
GK Tech exhaust bushings
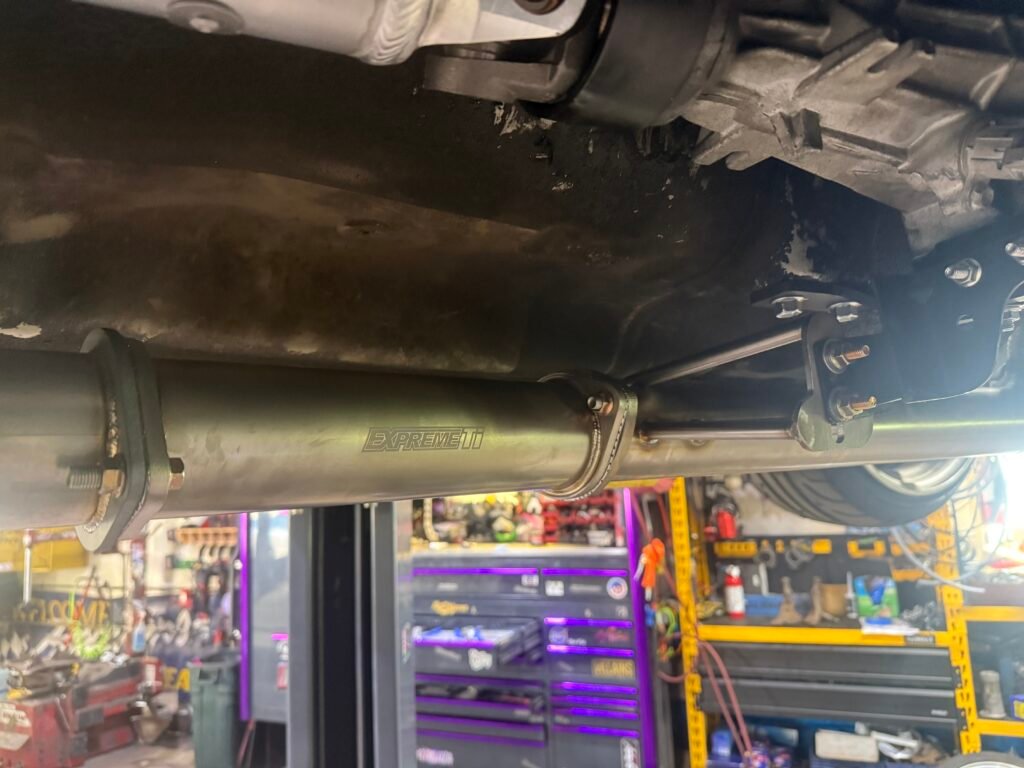
Kakimoto GT1.0Z racing exhaust installed
May 28th
Loading up
Car loaded up
Finished up my punch list items before loading up. I had some odd end things to do. Double checked all my AN fittings making sure they’re tight, add water to the cooling system, ATF for the power steering, put all the parts D-Style is installing in the car, install the hood, tie in power for my fuse box/ starter/ alternator, battery cable, and clean up the car.
May 29th
Drop off day!!!!!
Dropped off for the boys at Car Shop D-Style
Got to finally meet Dale and Ryan at Car shop D-Style, super cool dudes. They gave us a backstory of the shop with a mini walk though which was cool. Big fan of the M-Sports s13 in the shop, it’s definitely the next kit I want to get. After hanging out for bit talking things over, I felt really good that I was leaving the car in good hands. Super excited to drive it and hear how it sounds!
May 30th - June 16th
Inspection, fab work, repairs, and the base tune
After the inspection Ryan and Dale found a couple issues, luckily nothing was too serious.
🔧 First Start Issues & Fixes
Coolant leak — loose hose clamps found after pressure test
✅ Fix: Tightened hose clamps
Fuel pressure sensor plumbed into the return line instead of the feed line
✅ Fix: Switched AN fittings to the feed side, added a union in place on the return
Starter cranking slowly — removed for testing, the magic smoke let out on the bench
✅ Fix: Replaced starter
Poor engine ground — main ground ran from alternator bracket to frame without removing powder coat from bracket or cleaning paint from threads
✅ Fix: Chased threads, cleaned powder coat off bracket, added additional 4AWG ground on driver side to engine block
Alternator not functioning correctly
✅ Fix: Replaced alternator
Fuel pump noise & inconsistent fuel pressure
✅ Fix: Replaced with AEM 340lph fuel pump, installed keyed relay to power pump directly off the battery
Alternator / water pump belt walking off pulley — ATI pulley requires a smaller belt while the Stance water pump pulley runs stock size, creating a size conflict where the stock belt was too large and the ATI recommended size was too small
✅ Fix: Replaced belt with Dayco 5050368 (36.81" long)
I’ll have to find a local shop that rebuilds alternators and starters so I have some spares.
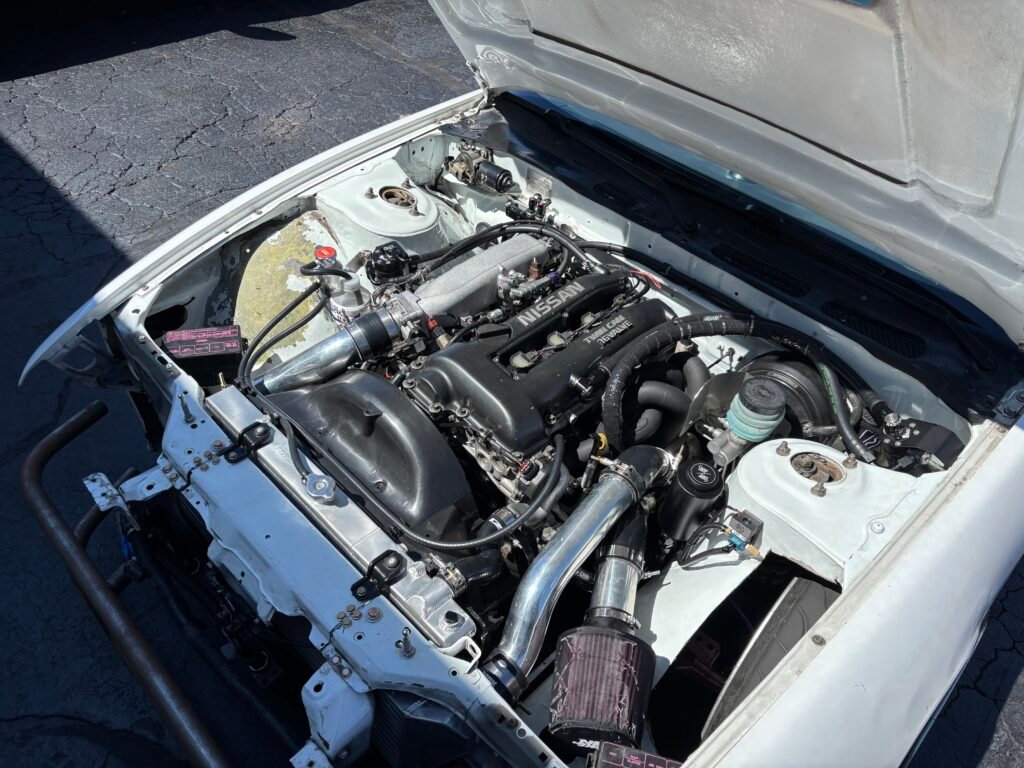
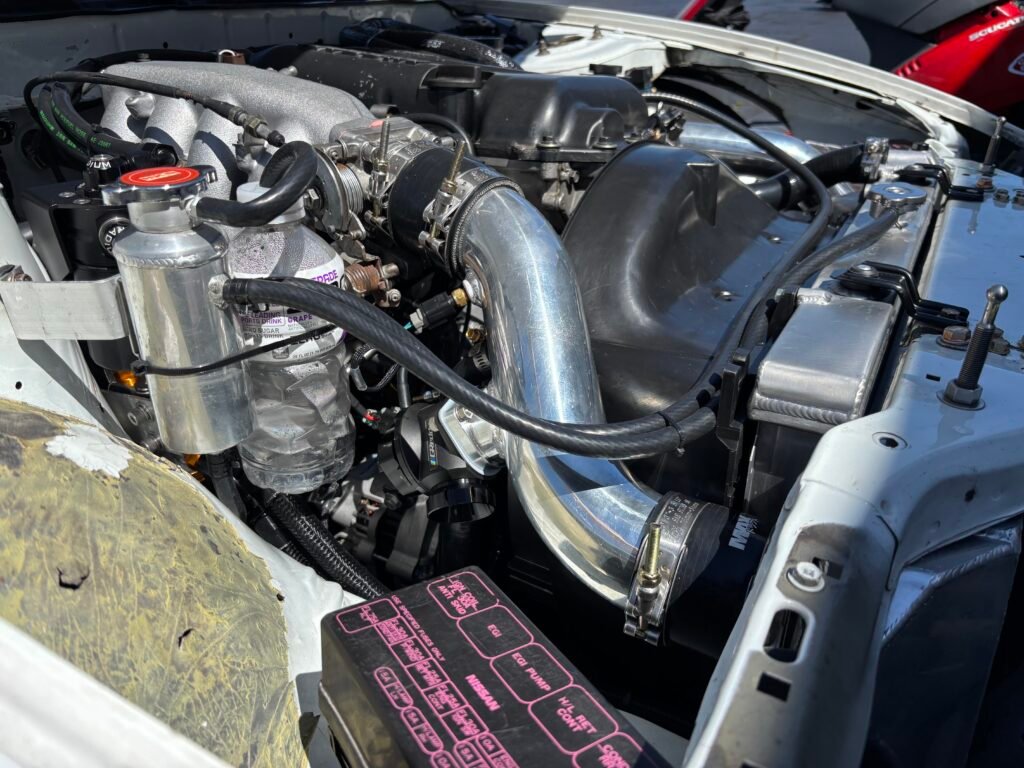
Boost solenoid and new intake installed
Boost solenoid looks great, they did have to switch to an AEM solenoid as the Link solenoid didn’t fit in the mount. How they did the waste gate boost reference tap on the compressor hard pipe and the boost solenoid wiring looks super clean and tucked away. I ditched the HKS intake to so I could eliminate the MAF sensor as i’m not using it. Also, a water sock was added which was much needed because of my chopped up up tub.
IAT sensor/ bung and BOV/ BOV flange installed
Fab work tuned out great, weld are super clean. I love the placement of everything! I’m blanking on the fabricator’s name right now, i’ll have to add it later.
June 17th
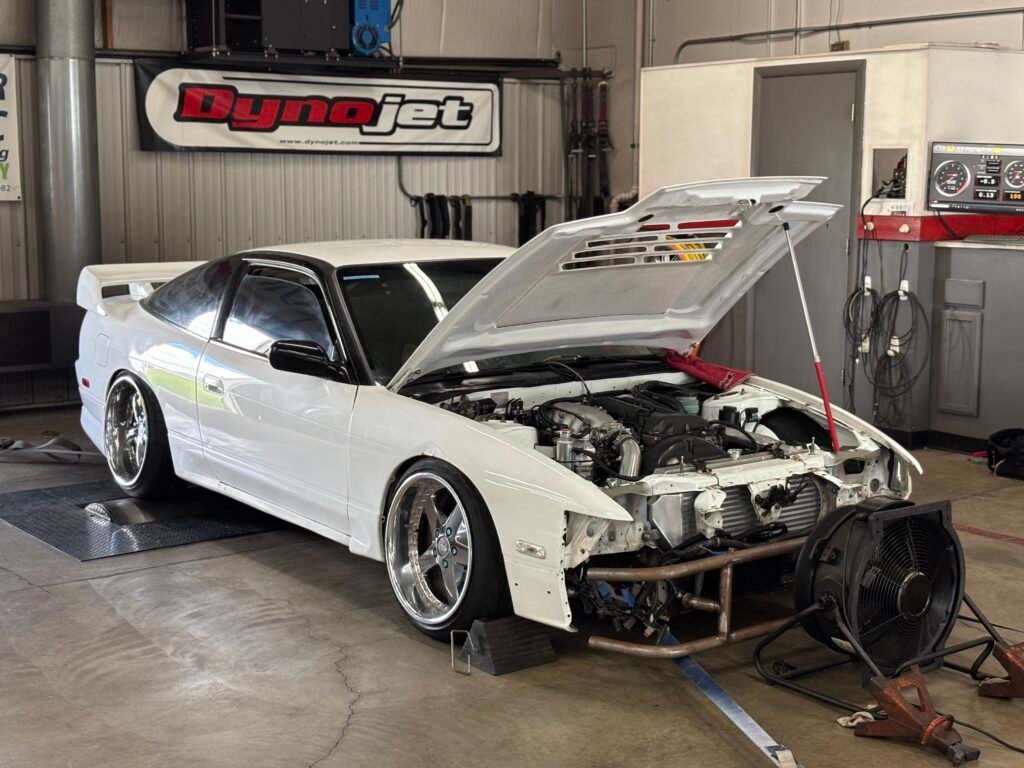
Dyno Day
On the dyno
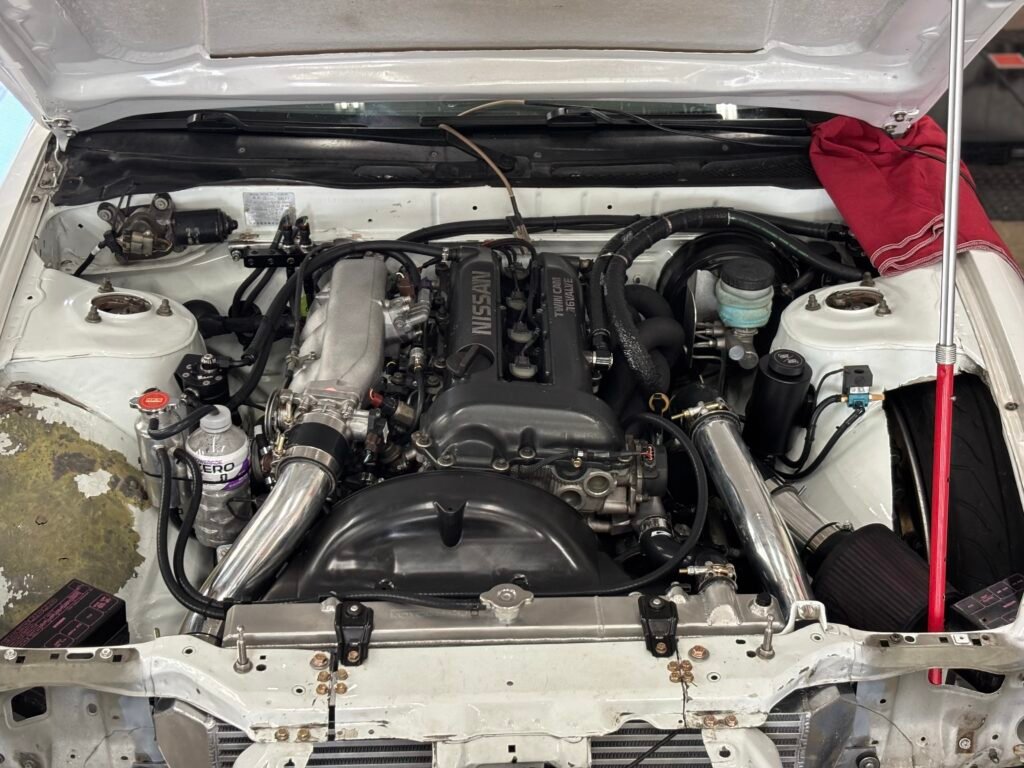
Engine completed!!!
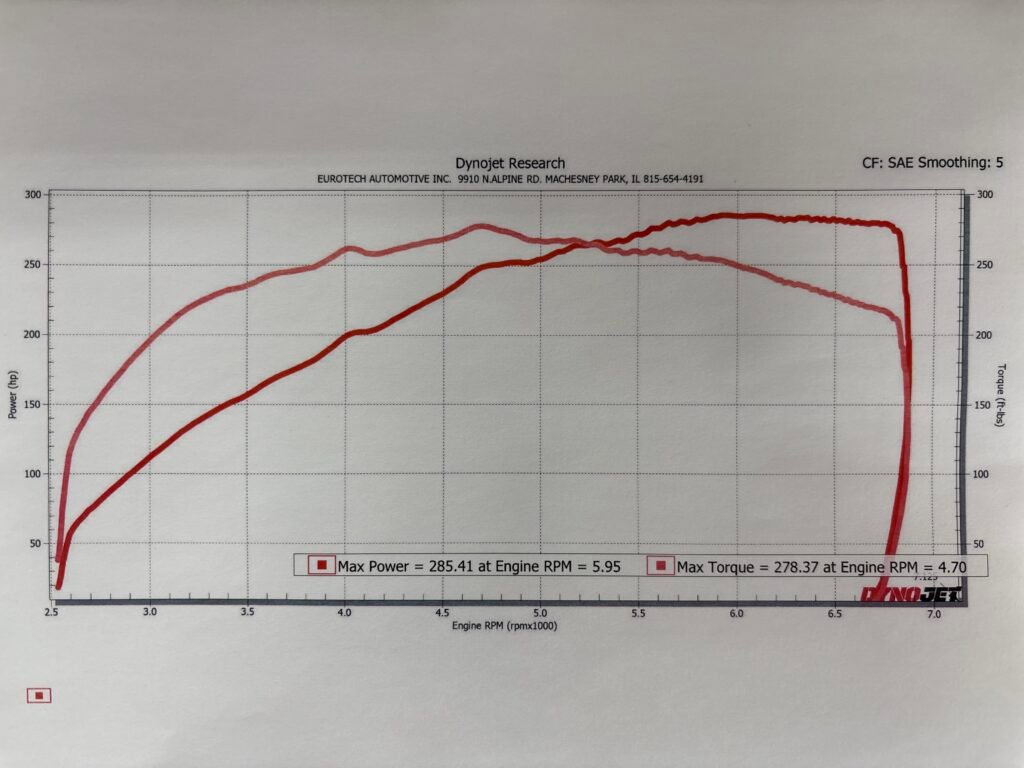
Dyno Pull
Dyno Numbers: 285hp/ 278 torque @ 16PSI 6,800RPM
I was blown away to see these numbers Ryan killed it with the tune, couldn’t have asked for anything better!
June 19th
Pickup day!
My dad and I headed down at 6:30am to be at Carshop D-style to catch them before they headed up to USAIR. When we got there we met up with Ryan and took the car out for a spin to check everything out…and dude….. this car is soooo sick. Absolutely rips! The feeling when boost hits and you slam into the back of your seat, so damn cool!
After the test drive, Ryan gave me the rundown on what was done, mentioned my oil cooler hose to fitting connections should be tightened (which another homie mentioned to me before too, shame on me for not taking car of it right away), and how use the Link software so I can record logs if anything happens. We hung around for a little bit talking shop, Dale hooked it up with a couple stickers and T-shirts for my Dad and I which was super cool.
I couldn’t be happier with working with Car Shop D-Style, Dale and Ryan went above and beyond with everything they did for my build. They knew exactly how to translate the vision into a reality, which is not an easy task to do. Both were incredibly knowledgeable, professional, and just overall cool dudes. Customer service and communication is one of the biggest things to me, and they killed it. I’ll end with this, when you’re trusting someone with a build you’ve been working really hard toward, It’s a relief to know they actually give a shit about the outcome as much as you do. Couldn’t be happier dudes, thanks again!
Loaded up (I was too excited and forgot to take better pics)
Back at the shop
Engine purring
June 20th
Prep and maiden voyage to Final bout SSC
After getting the car home I needed to install the headlights and fix all of the oil cooler/ remote oil filter AN lines before I drove anywhere. They were seeping from the gap between the collar and the fittings.
Remote cooler line before
Remote cooler line After
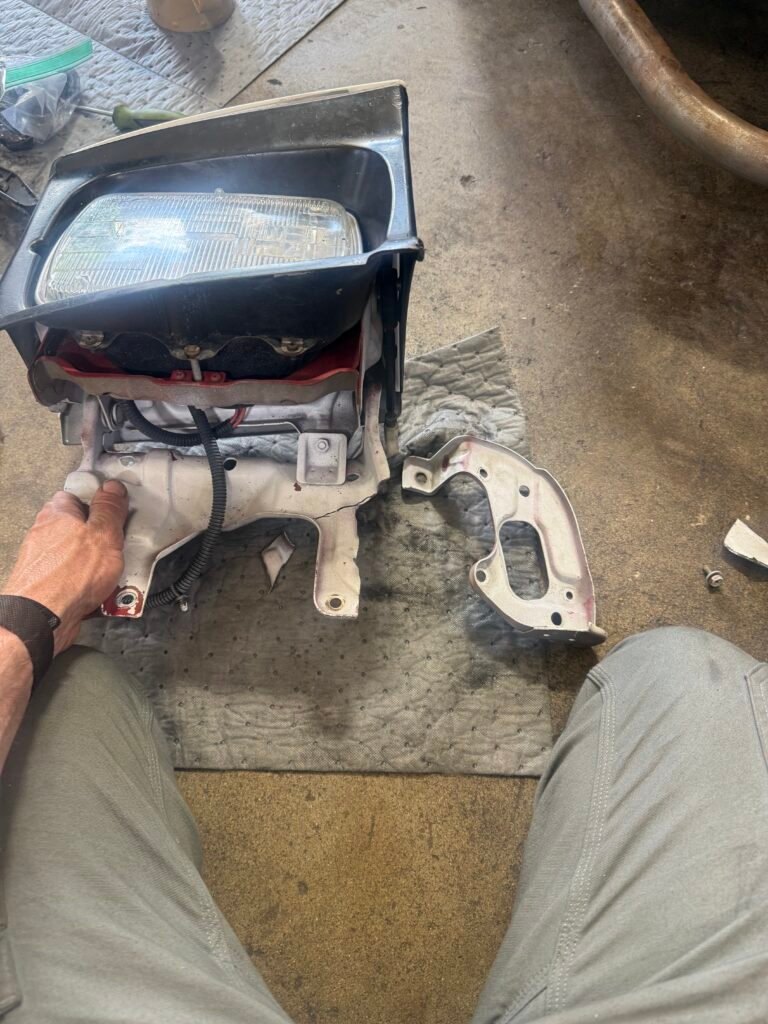
Headlight modifications
Made it to USAIR for Special Stage Central
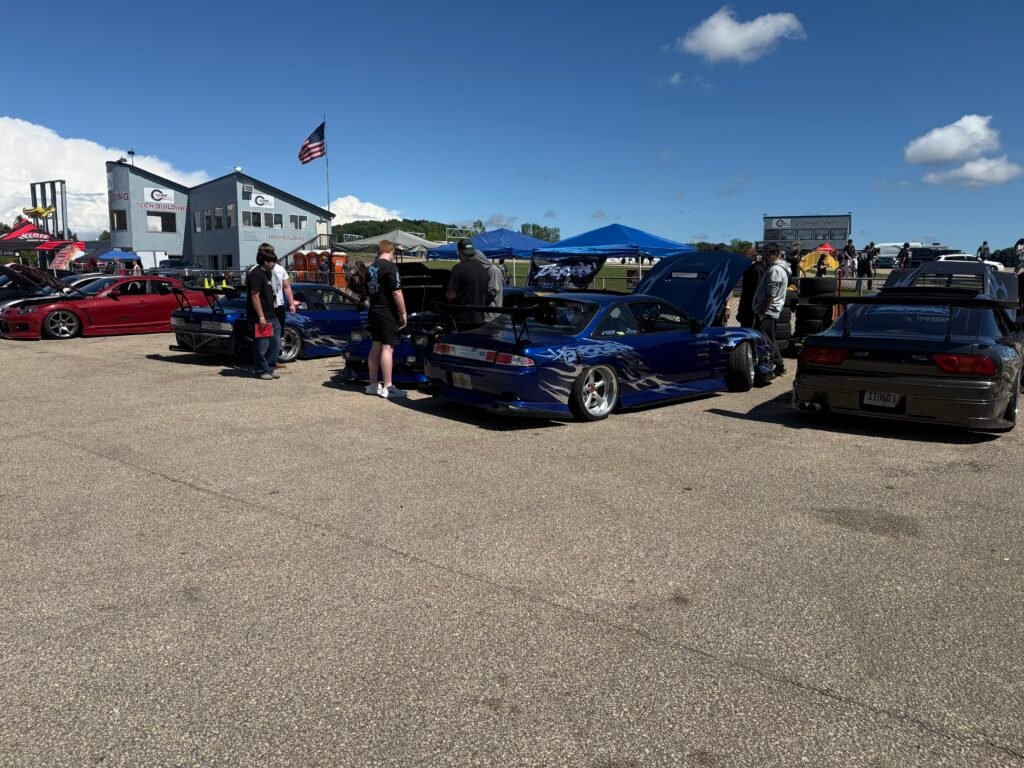
The car ran great to and from USAIR, temps stayed cool, zero issues. This car is so much fun to drive, I can’t help but smile every time I hear the BOV or waste gate flutter. Next month is going to be great,! I’m signed up for the Test N Tune and DD110 (July 10th-12, so this will be plenty of time to figure out the car. Got a few things cosmetically to take care of before then but other than that the car is set!
Team Breaking - 1st Place
Team Beserk - 2nd Place
Team Carshop Kagami - 3rd place
Team Halfway Crooks - 4th place
Team Sauce - 5th place
Congrats to all the teams that made it to the summit at FB9 this year!