Z32 Rear Brake Upgrade w/ Functioning Ebrake

I’ve been wanting to do this swap for a long time, so after destroying countless PMU rear brake pads from failing rear calipers it’s finally time to upgrade. 
My goal for this swap is to keep my ichiba 5 lug hubs and retain a functioning e-brake. I currently have a hydro e-brake setup but it’s an in-line setup. So when the hydro is pulled the brake pedal moves as well. Not quite ideal. 

📝

Notes

Fort my install i'm using a PBM rear drop knuckle

Some pictures may show the opposite side from what was previously shown — the process is the same either way

🔩 Z32 Rear Knuckle Assembly — My Setup

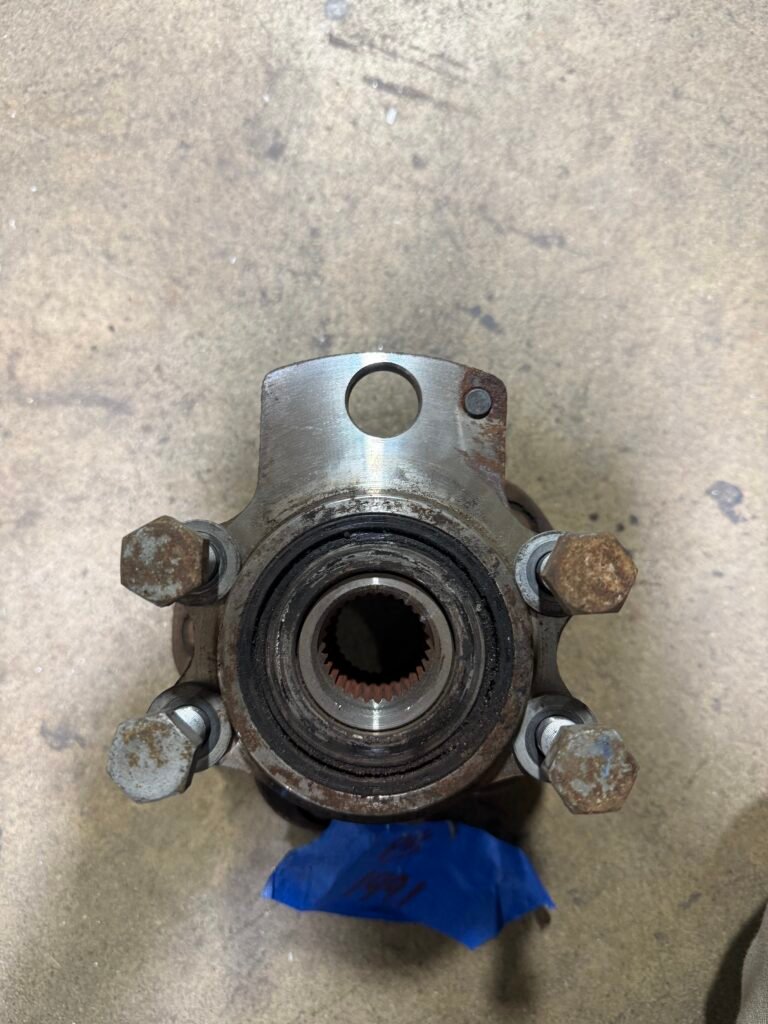
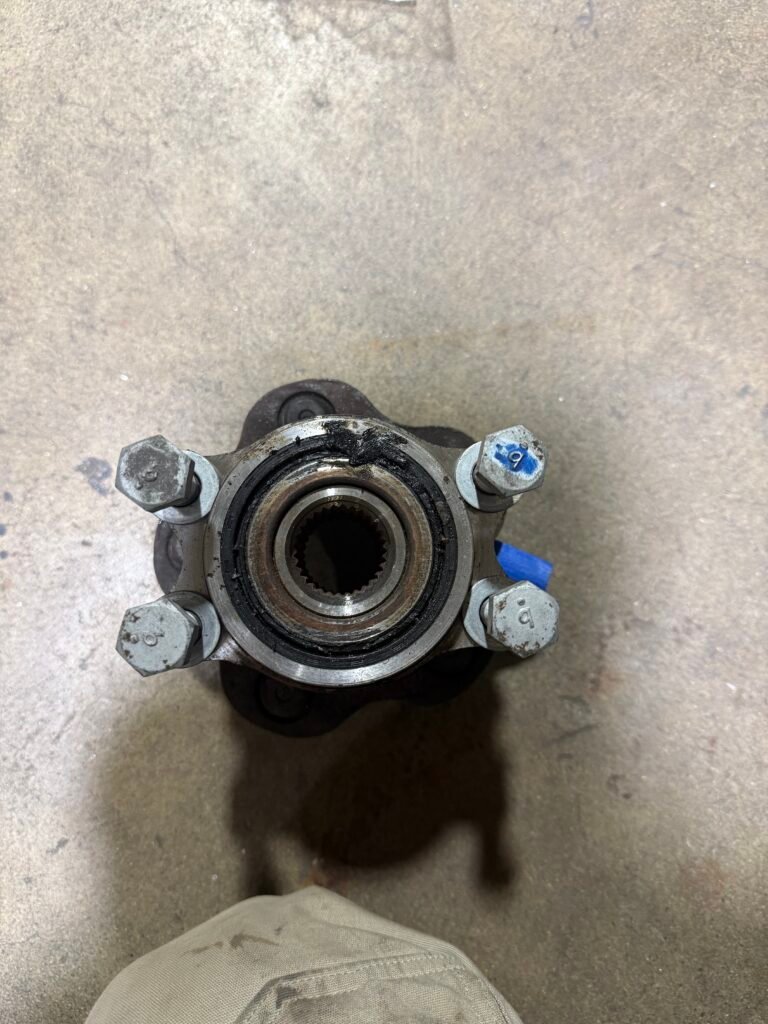
Two full rear Z32 knuckle assemblies — one 1991 N/A and one 1990 N/A. I purchased these separetely as I couldn't find a good pair that wasn't rusted out. As I started disassembling them I noticed some major differences between the hubs and the anchor bolts.

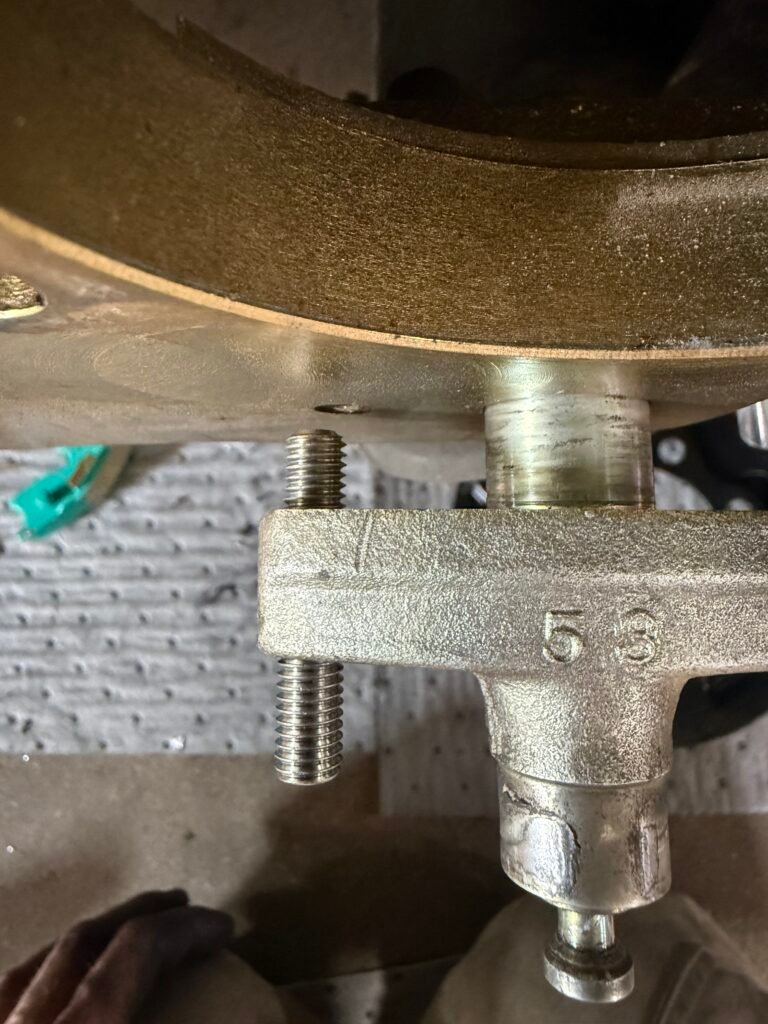
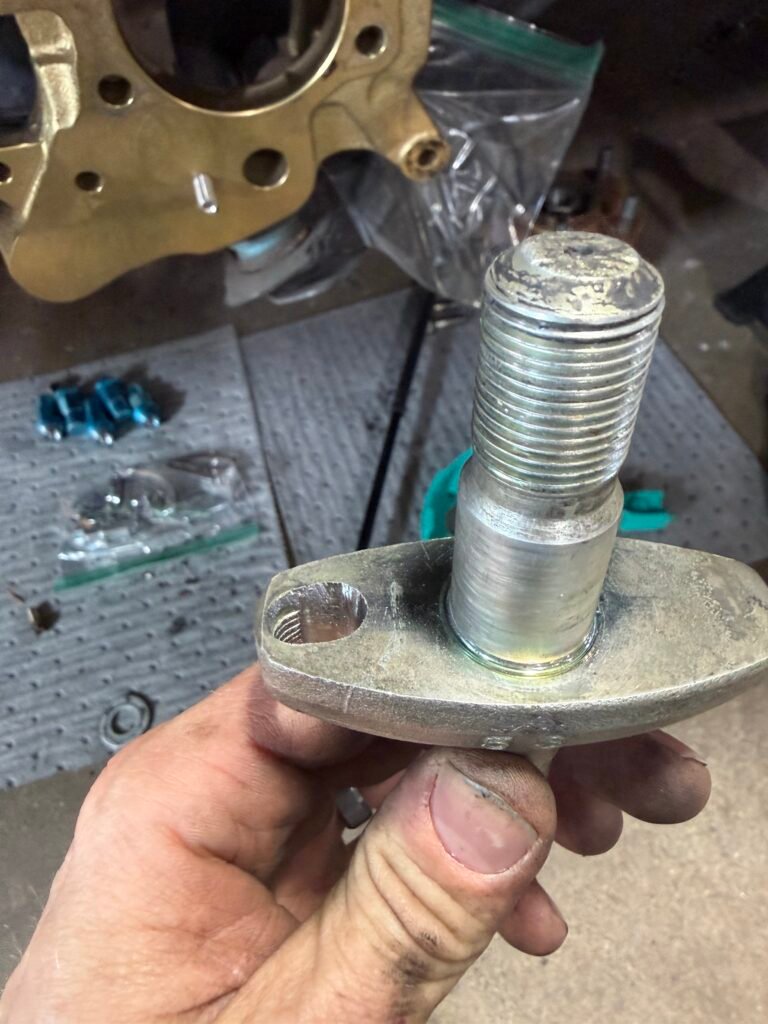
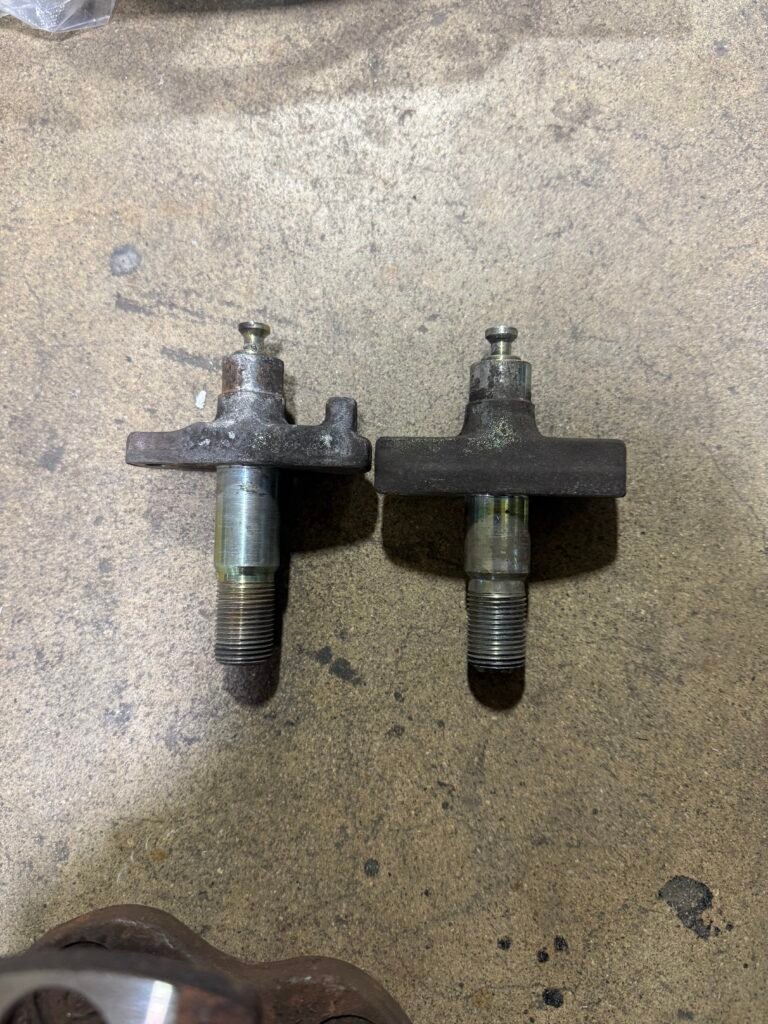
Anchor Bolt Differences

1990 · Right

Anchor bolt has extra material to space it outwards for the shoes to anchor to

1991 · Left

Anchor bolt has less material, due to the fact the z32 hub has that extra material built in to it

📸 See photos for reference — 1990 pictured right, 1991 pictured left

1991 (left) · 1990 (right)

🔩 Z32 Hub Differences

1990 · Right

Does NOT include a flange

You'll know immediately upon disassembly — if you have a 1990 hub you can remove it without taking off the brake shoes

1991 · Left

Includes a flange

The flange is what the anchor bolt sits on and acts as a spacer

📸 See photos for reference — 1990 pictured right, 1991 pictured left

1991 (left) · 1990 (right)

💡 Running S13 Hubs on a 1991+ Z32 Assembly?

If you buy a 1991+ assembly and don't plan on running the Z32 hubs, you'll need to address the anchor bolt spacing. You have two options:

Option 1

Part Shop Max Spacers$37

Buy
Option 2

Z1 Motorsports Anchor Bolts$150

Buy
📝

If using a PBM drop knuckle, you will need to buy the PBM spacers in order to get the studs to use with the anchor bolts — or source your own studs.

Parts Collection

🔧 Z32 Rear Brake Swap — Parts List

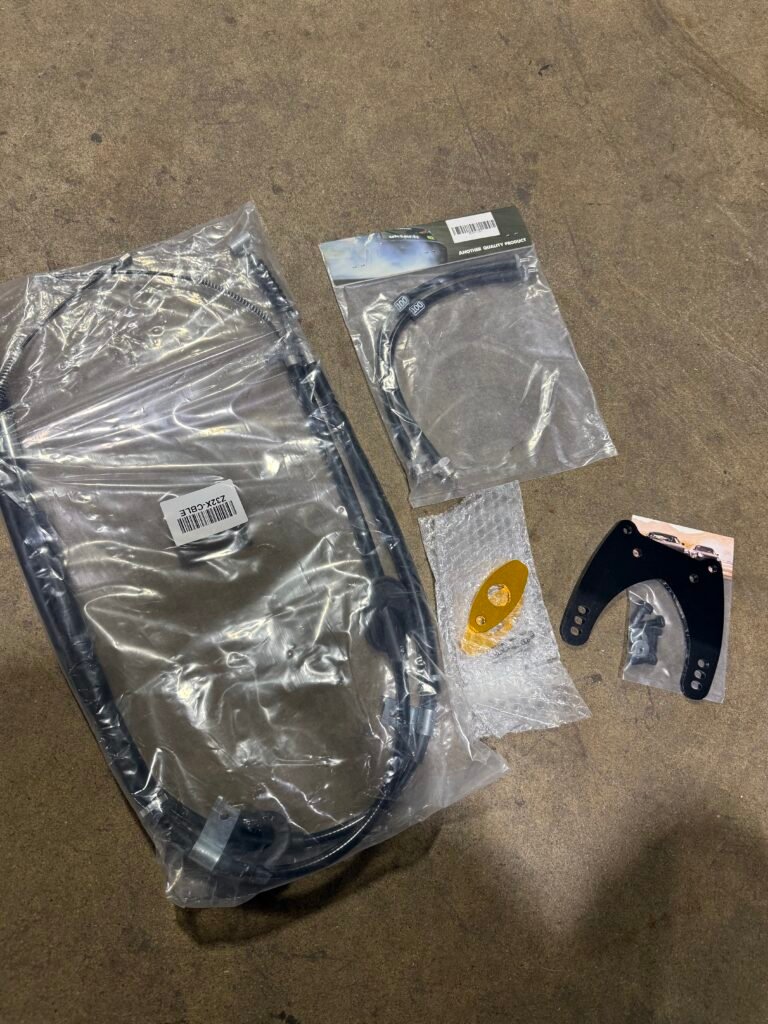
GK Tech Ebrake Cables — Z32 2+2

Buy

GK Tech Ebrake Cable Conversion Plate — must be used with the 2+2 cables

Buy

PBM Anchor Bolt Spacer

Buy

GK Tech S13 to Z32 Brake Line Conversion

Buy

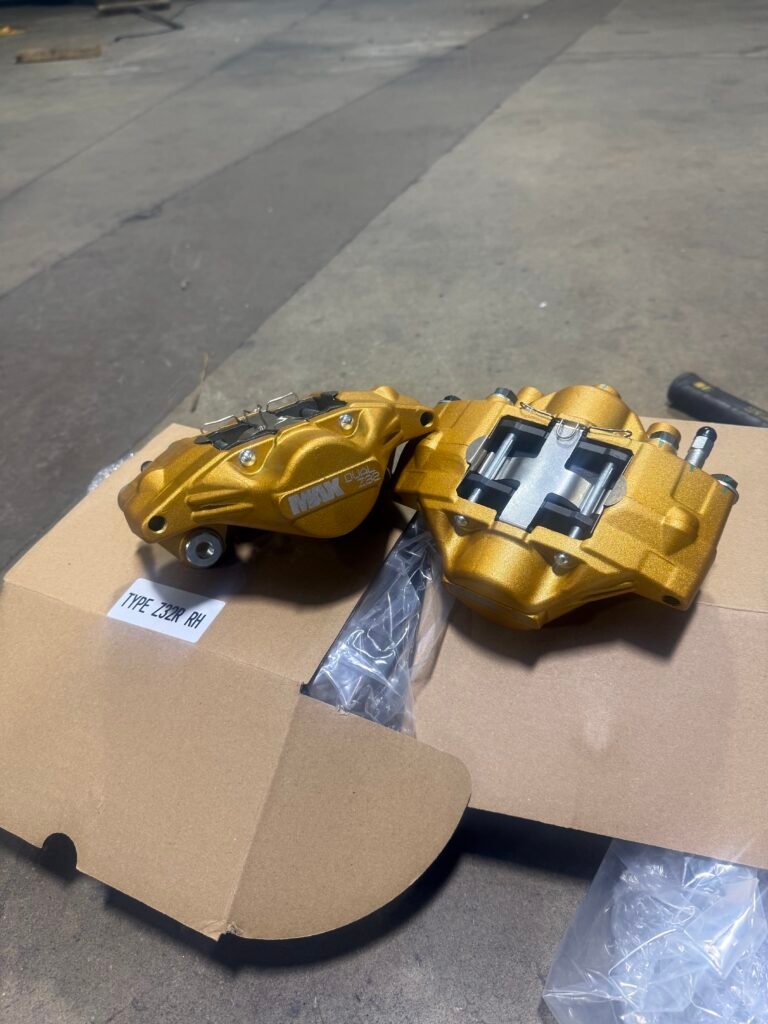
PBM Rear Calipers with Pads

Buy

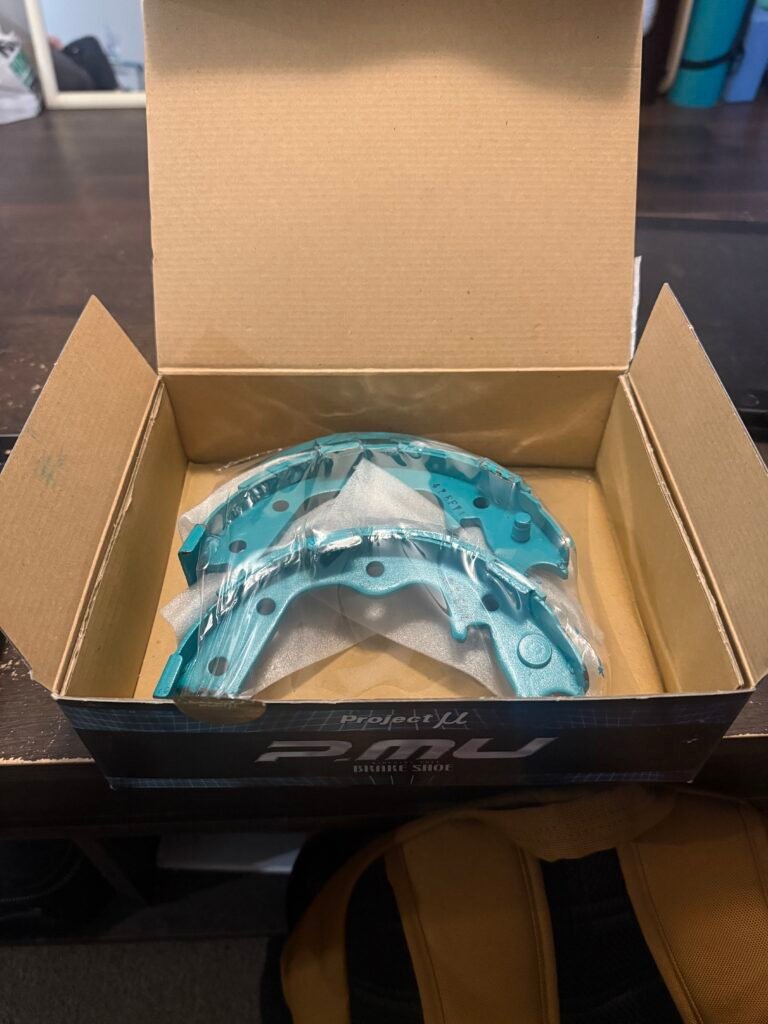
Project Mu D1 Spec Brake Shoes

Buy

OEM Rear Rotor Plugs

Buy

Drum Brake Hardware Kit

Buy

1995 Z32 TT Rotors — Brembo Blanks 18mm

Buy
💡

Fun Fact: Z32 and R32 brake shoes are interchangeable.

GK tech 2+2 Cables, extension bracket, and s13 to z32 brake hoses/ PBM spacer/

PBM rear Z32 calipers w/pads

Project U D1 Spec Z32/ R32 rear shoes

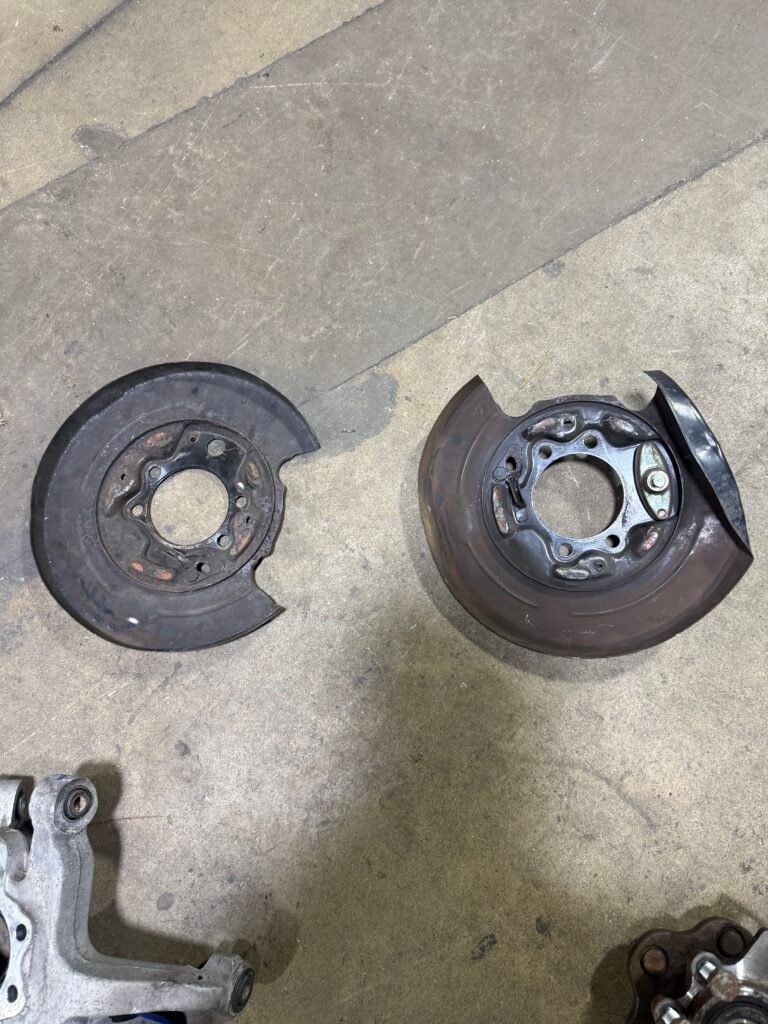
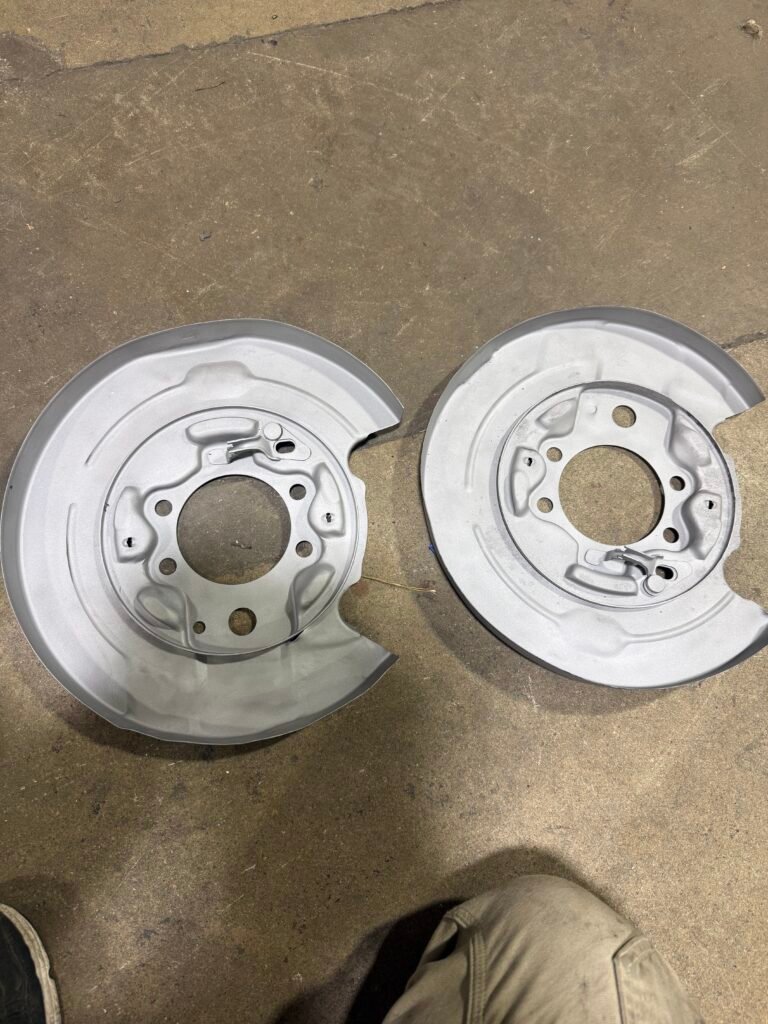
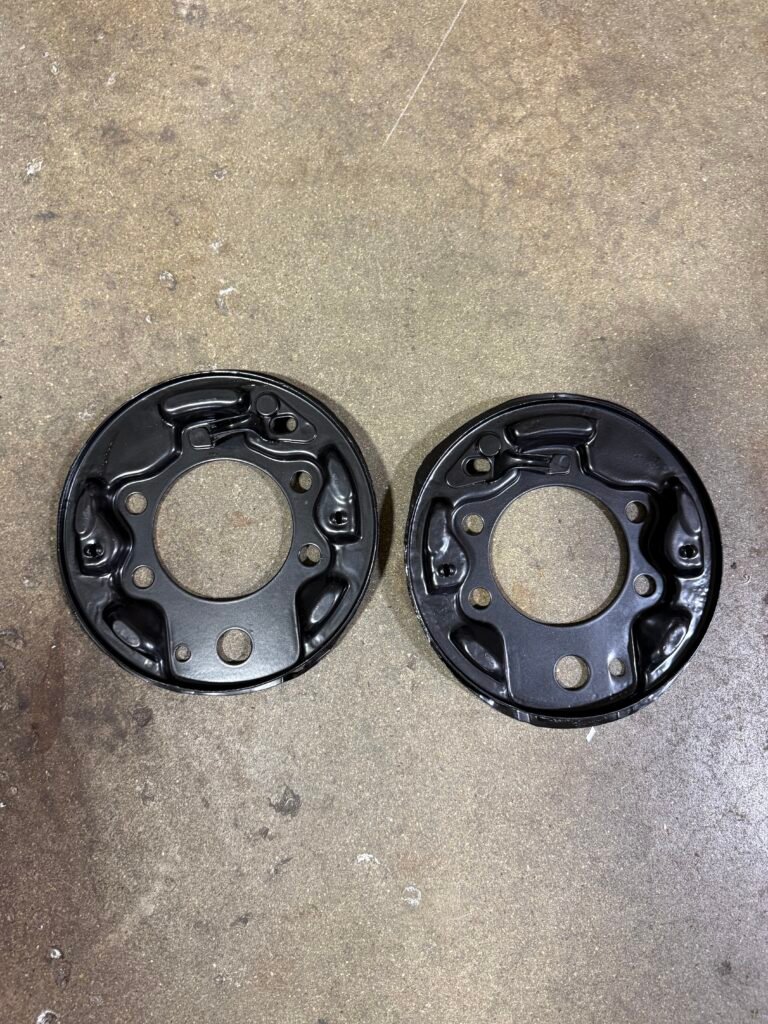
Powder coating and trimming Brake shields

Before and after sandblasting

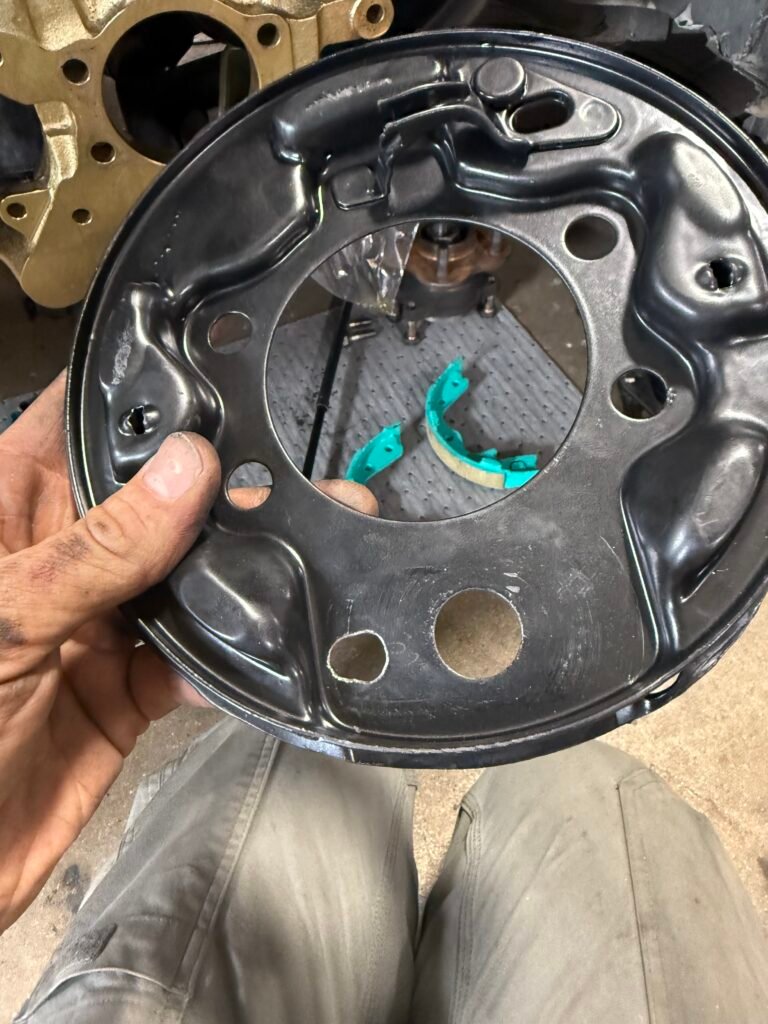
Sandblasted and fixed the bent dust shields. Now it’s time to trim them to fit before powder coating them. 

Trimmed and powdercoated backplates

You will need to trim directly around the inner lip to gain adiquate clearance to expose the caliper mounting holes.

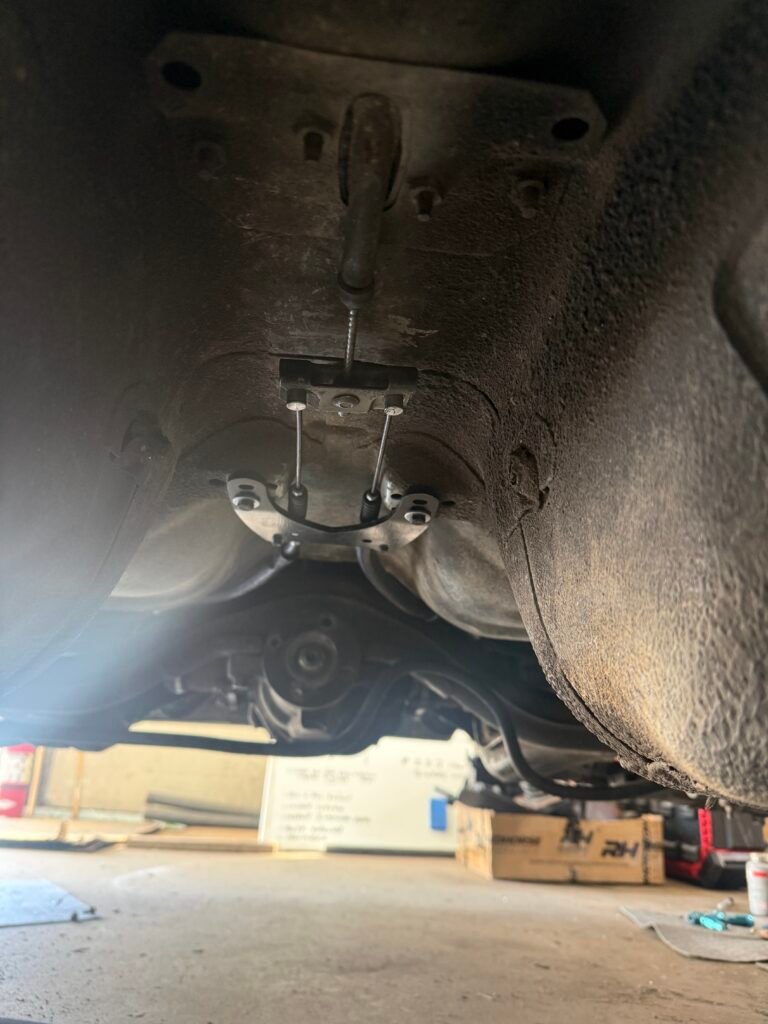
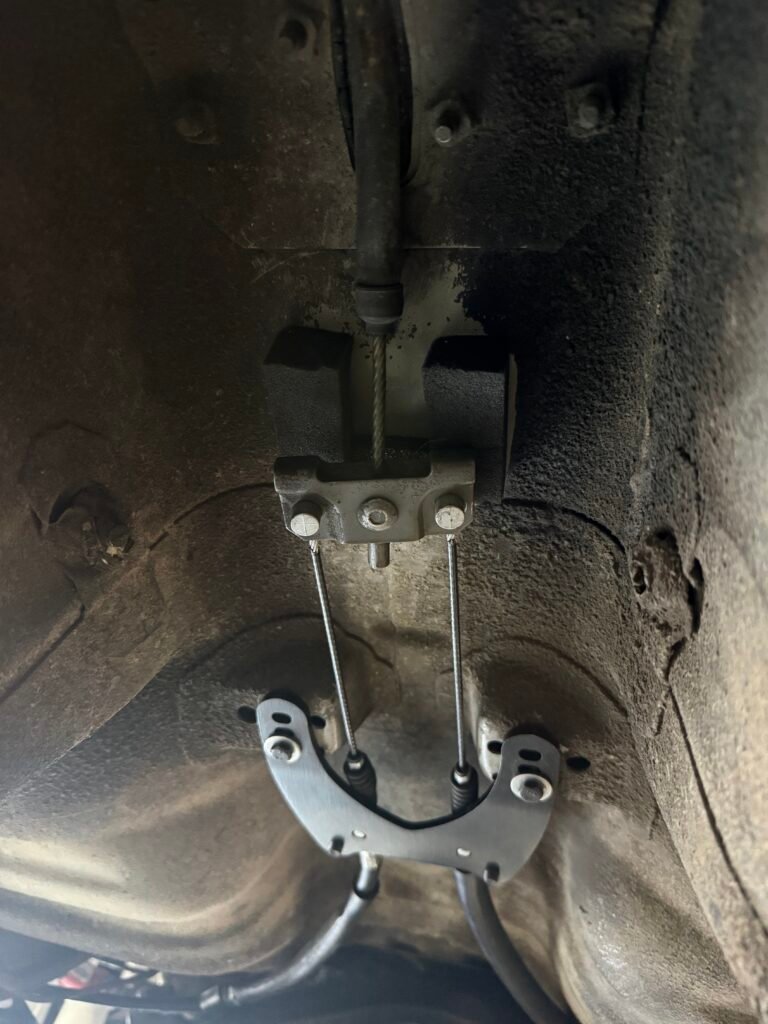
Ebrake cables and coversion plate install

⚠️

PBM Rear Drop Knuckle — Cable Warning

If you are using PBM rear drop knuckles you must install the cables crossed:

Left cable → Right side

Right cable → Left side

This is because the backing plates are mounted upside down on the drop knuckles.

The cables will need to be installed on top of the conversion plate in order to work, this is due to the cables being flipped.

Cable install and conversion bracket is pretty easy, simply bolt the bracket on the chassis then install the cables on top. 

Cables and conversion bracket installed

Foam pads installed

Assembly Precheck

💡

Pro Tip

Verify the anchor bolts line up to all the holes on the knuckle and the backing plate before installing.

Guide pin doesn't line up with hole in knuckle

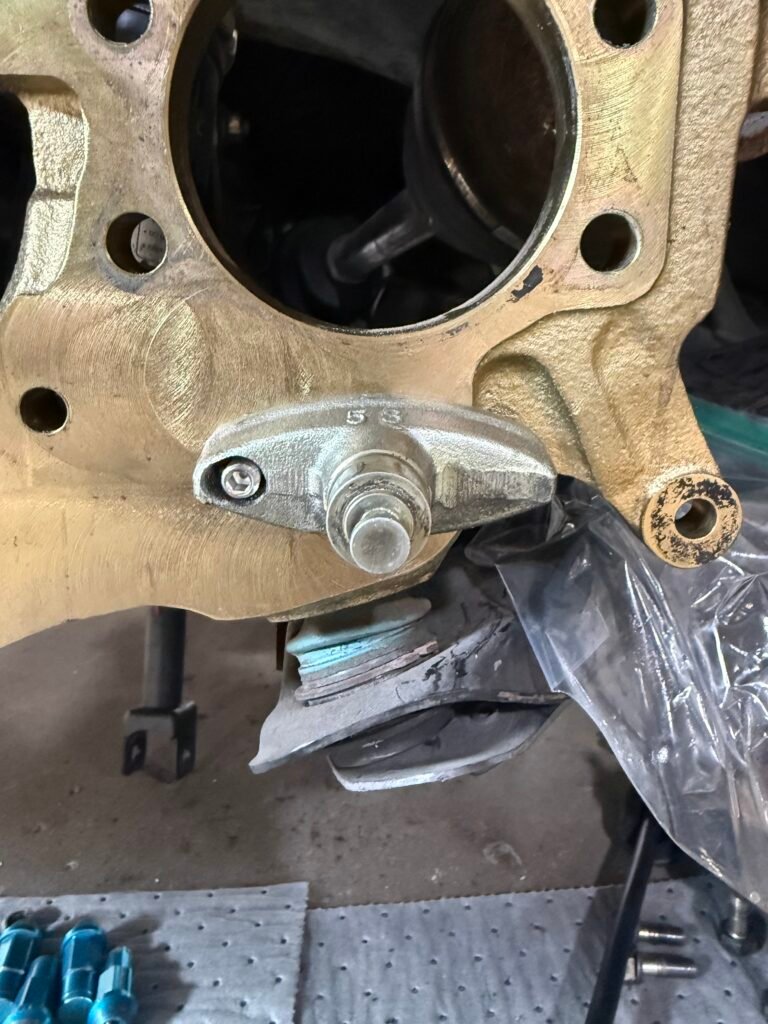
This was annoying to see, the holes in the knuckles don’t line up with the anchor bolt holes. It happened on both sides, one side worse than the other. I had to open up the holes with a cone bit on the anchor bolts, PBM spacer, and the backing plate. 

Widened hole to fit on guide pin bolt

Modified backing plate

Modified anchor bolt test fit

Just when you think you’re done with modifications

🔴

Essential Step

This next part is essential to make this work.

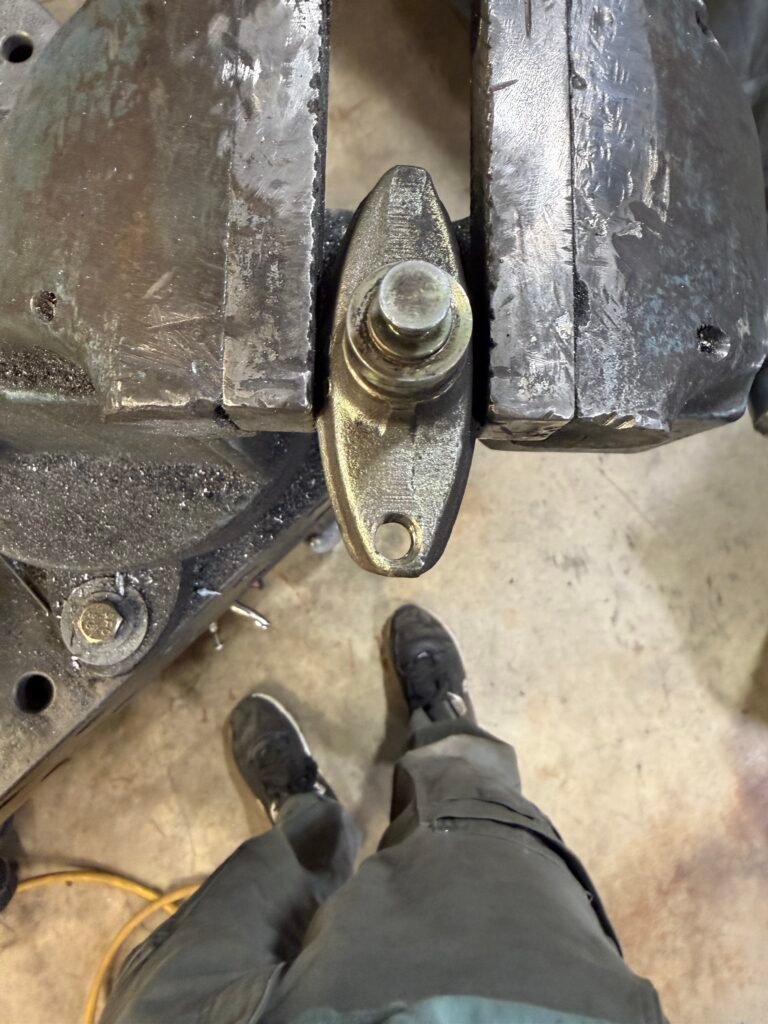
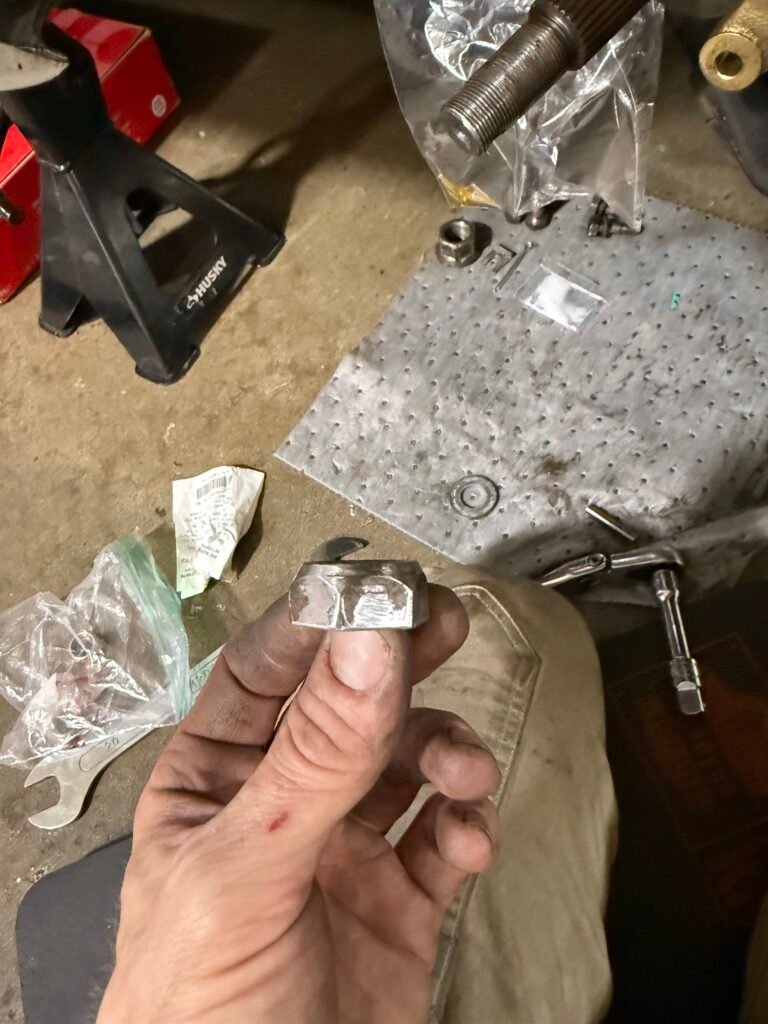
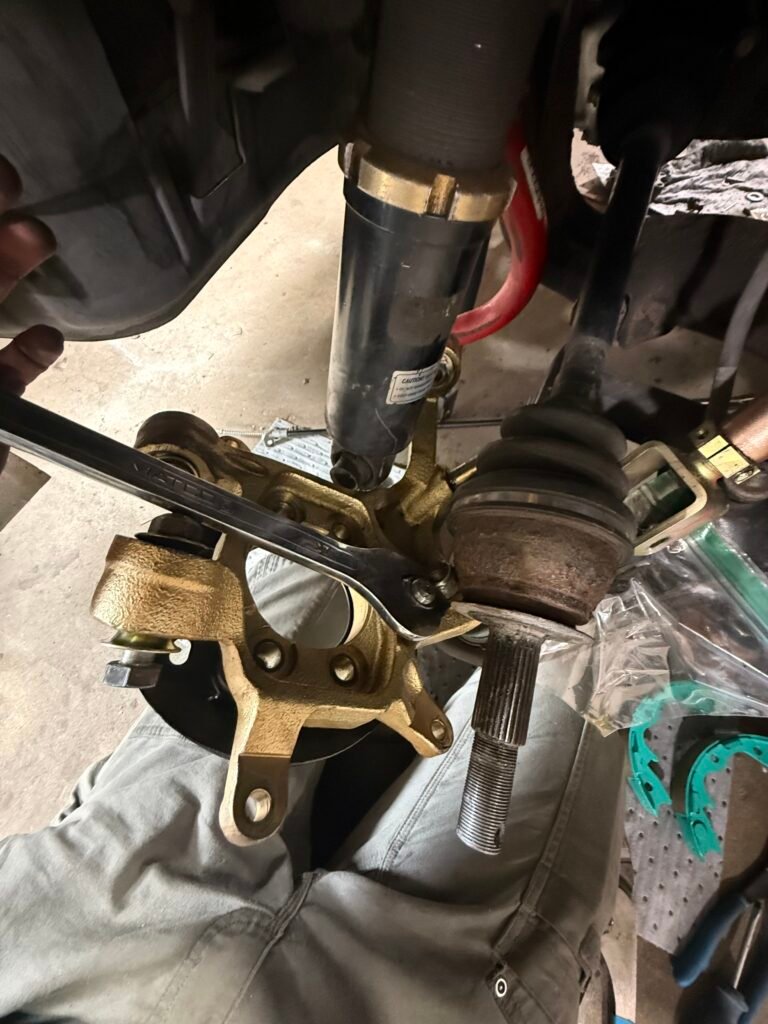
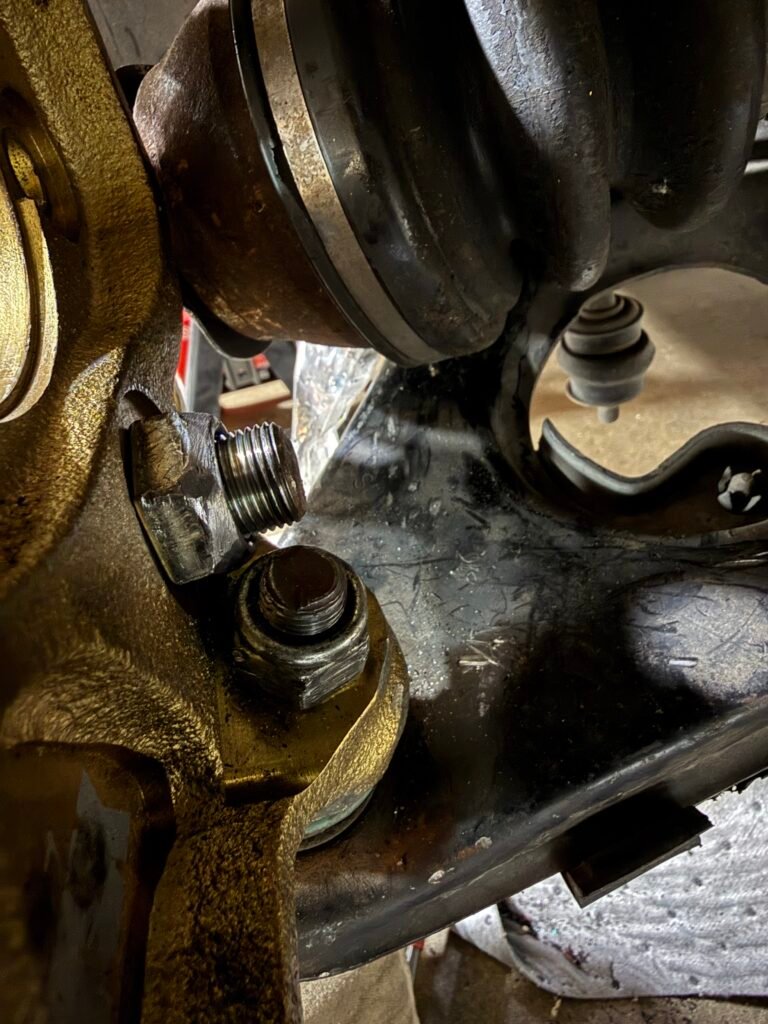
The anchor bolt nut will need to be ground down on the back side to make it thinner

Ground to form a slight taper at the top of the nut

To do all of this. I put the nut in a vice, exposing about 1/8″ of the back of the nut then took a angle grinder to it to shave the exposed section down flat to the vice jaws. After that maybe let it cool, its going to be hot.
Once done, cleaned it up with a polish wheel to get rid of all the burrs. 
Now take the nut and for a slight taper at the top similar to what you would see on all the nuts from the rear suspension arms you took off. I used a bench grinder for this. 

Shoutout to my friend Brendon for giving me the idea to grind the nut down over trying to find a replacement.

Modified anchor bolt nut

Assembly

Now that the anchor bolts, anchor bolt nuts, and backing plates are modified to fit we can finally move on to the install. 

🔧 Anchor Bolt Install — Order of Operations

1

Remove all rear suspension arms, coilover, and the axle — leaving the ball joint attached

2

Insert nut on the back of the knuckle

3

Install anchor bolt guide pin (included with PBM spacers)

4

Install the backing plate

5

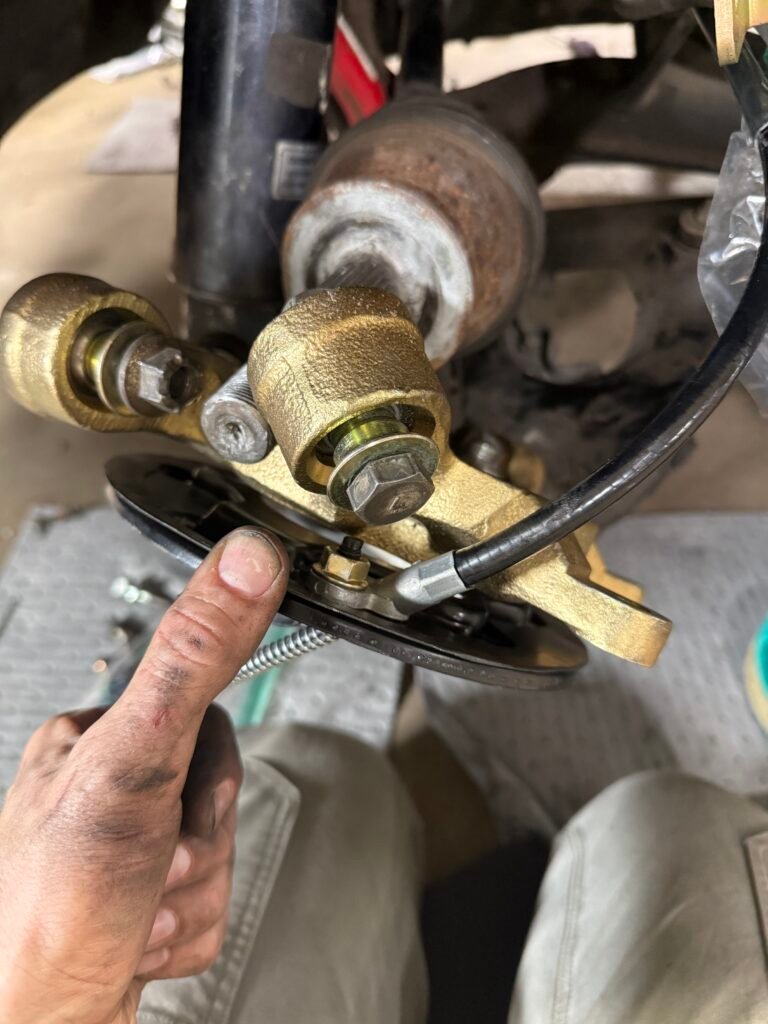
Install the anchor bolt and tighten to essentially "pull" the bolt in — the control arm nut will prevent you from pushing it in fully as it will hit the anchor bolt nut. A 27mm wrench is needed to tighten the nut

6

Once close to fully tightened, install your ebrake cable

7

Finish tightening the anchor bolt nut

🙌 After that, pat yourself on the back — you just got the hard part out of the way.
27mm thin wrench used to tighten nut

Ebrake cable installed

Anchor bolt nut clearance

Once the anchor bolt is in, we can install the brake shoes and hardware. 

🎥 Reference Video

Rear Brake Shoes, Ebrake, Hardware Install, and adjustment

This is a great video if you don’t have any reference pictures for putting everything back together. 

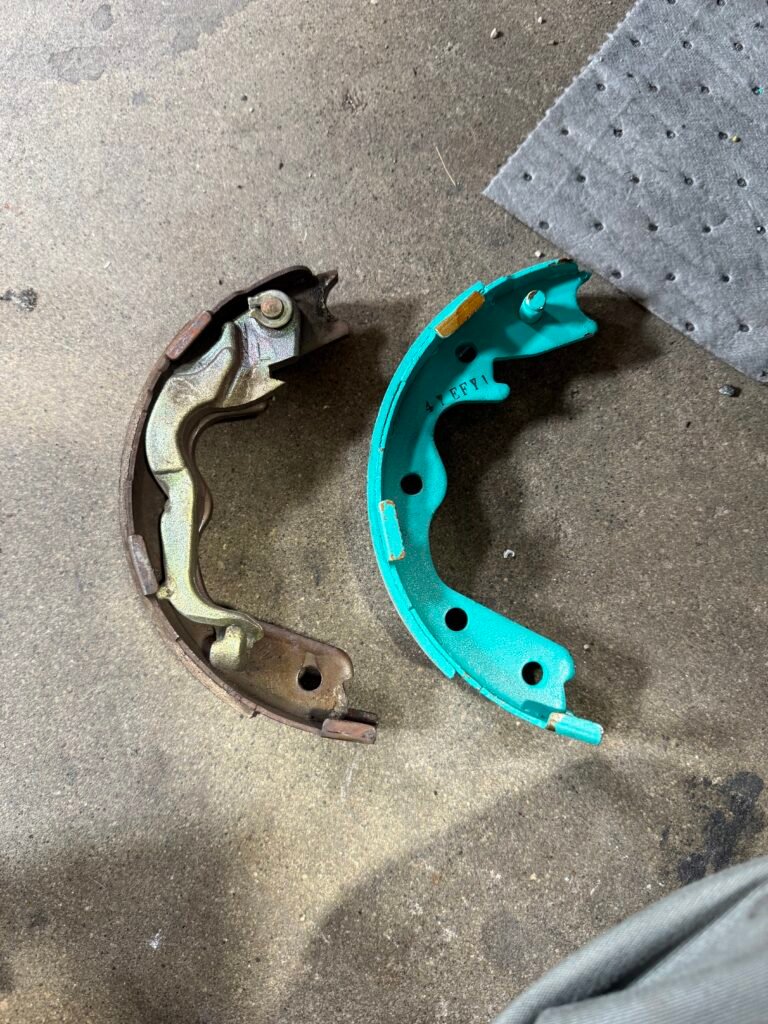
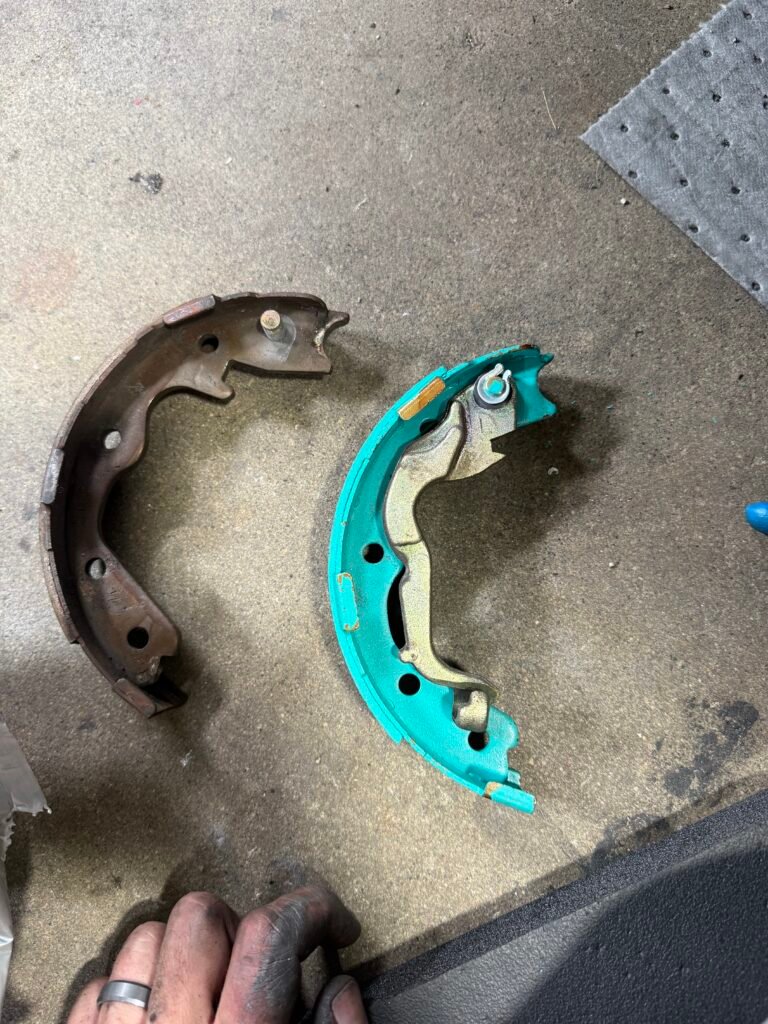
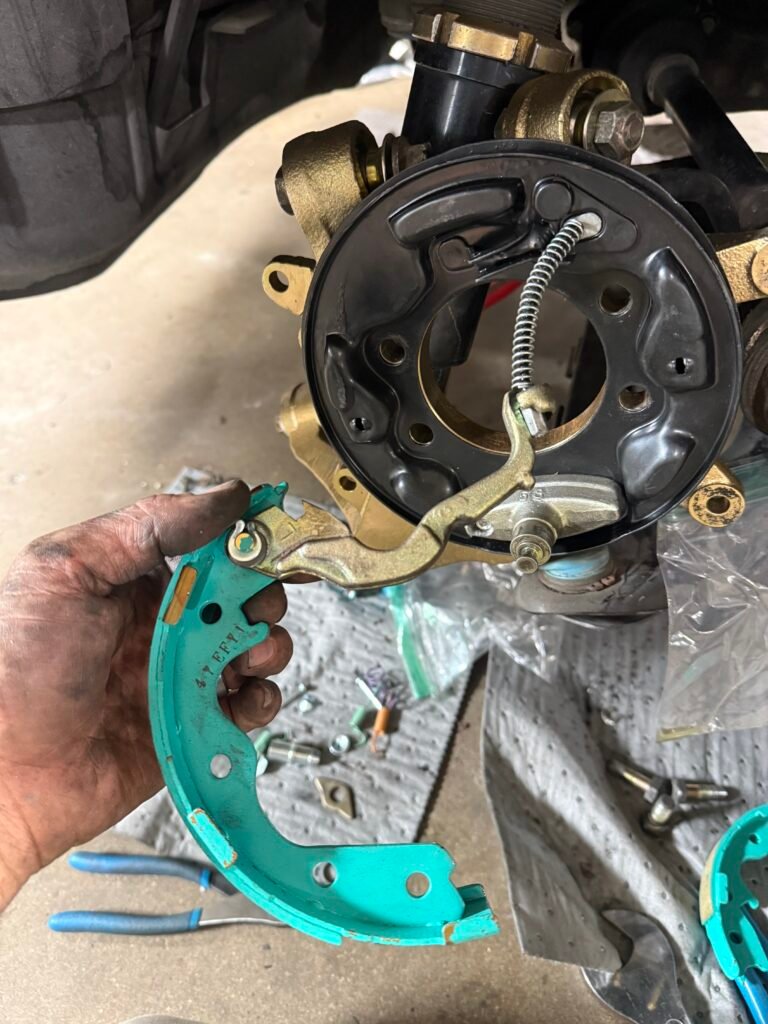
Your going to need to swap the ebrake levers from the old shoes to the new shoes. It’s done by simply removing the “U” clip and washer. Taking the lever off and installing it on the new brake shoe using the new hardware provided in the drum hardware kit. You’ll know which drum shoe to use for this as only two of them will have the mounting pins installed on them. 

Brake shoe e-brake levers swapped over

E-brake cable attached (This picture is from the right (passenger) side)

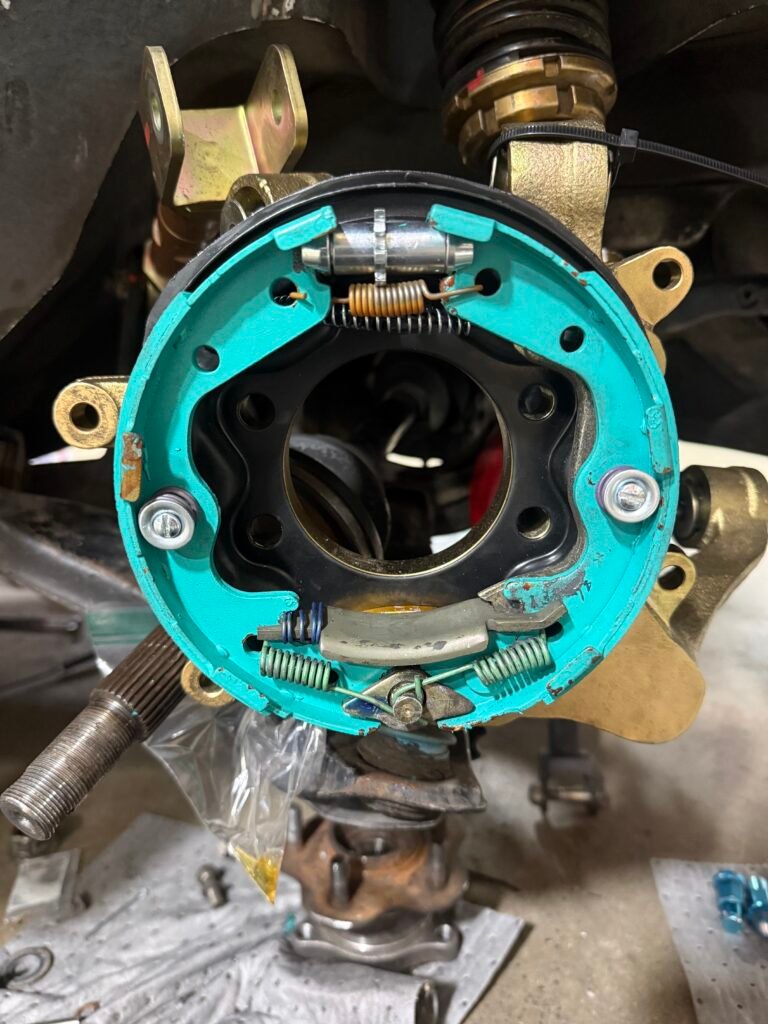
Brake shoes and hardware installed

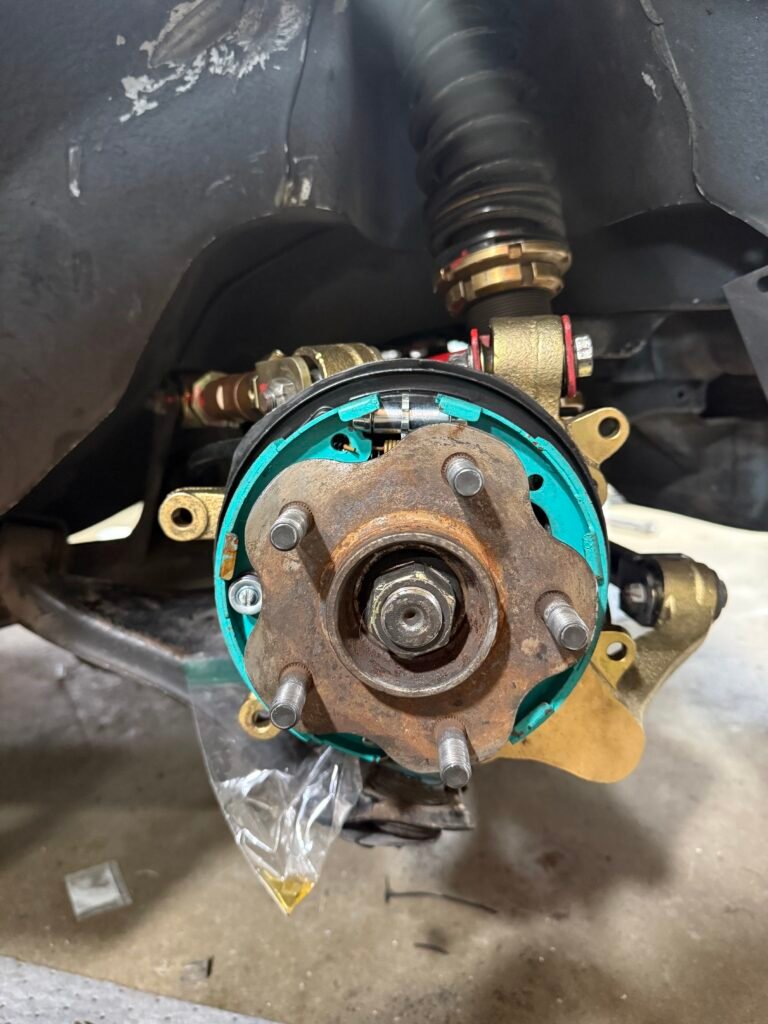
Hub installed

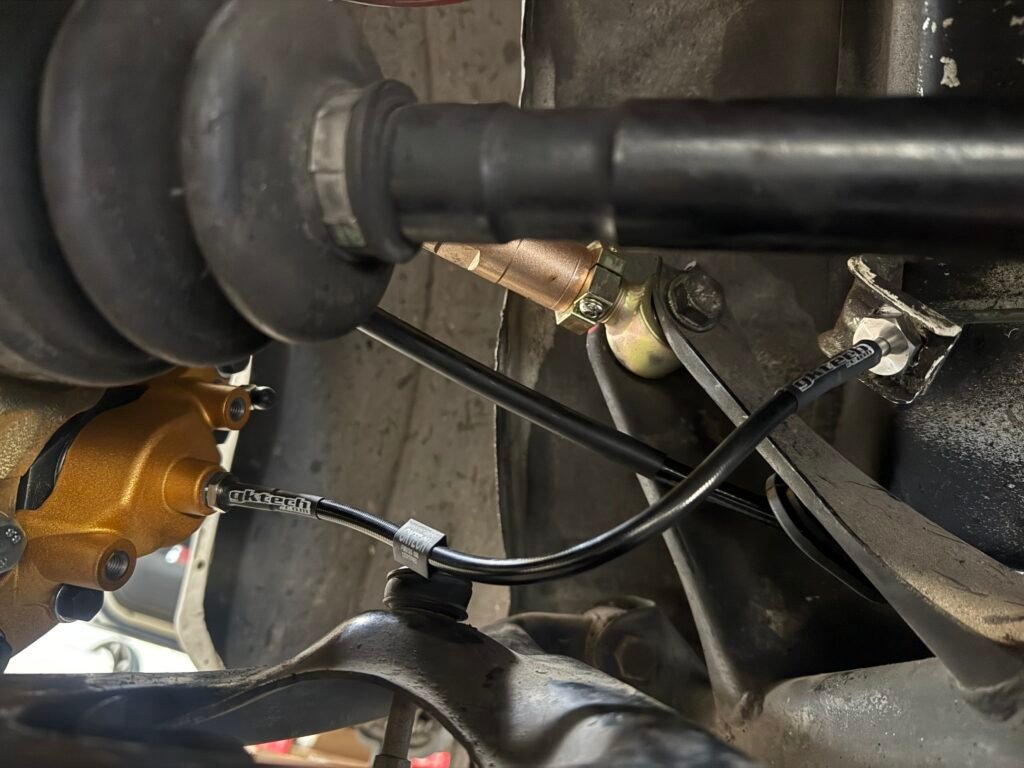
GK Tech conversion brake Line installed

 Install the brake hose on the caliper before you install it. Then route the hose to the hard lne. 

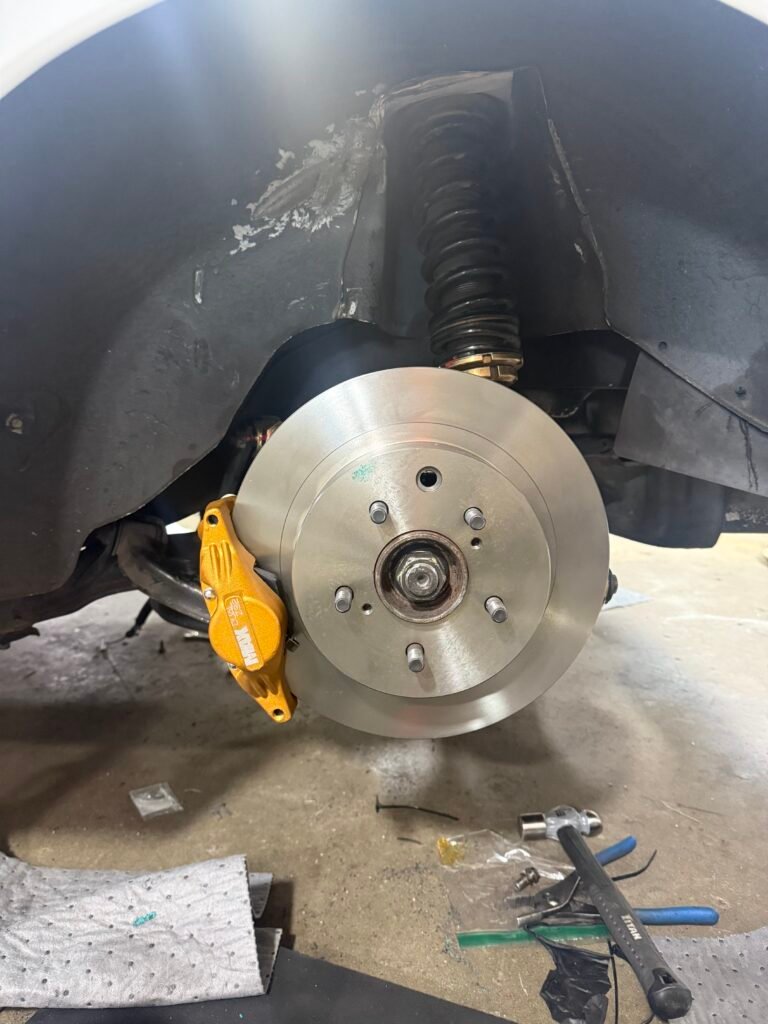
Rotor and caliper installed

Now adjust the handbrake via the hole in the rotor and your done!

📋 Bedding Procedure

via Project Mu

1

While driving, pull the handbrake several times with approximately 60–70% of your force

Do not suddenly pull it all the way — it is important to avoid applying rapid heat

2

Gradually increase the heat then allow it to fully cool down

Leave a Comment

Your email address will not be published. Required fields are marked *

Scroll to Top